Starving Student II HPA Complete Kit
1 x Complete Starving Student Kit, including all parts and chassis
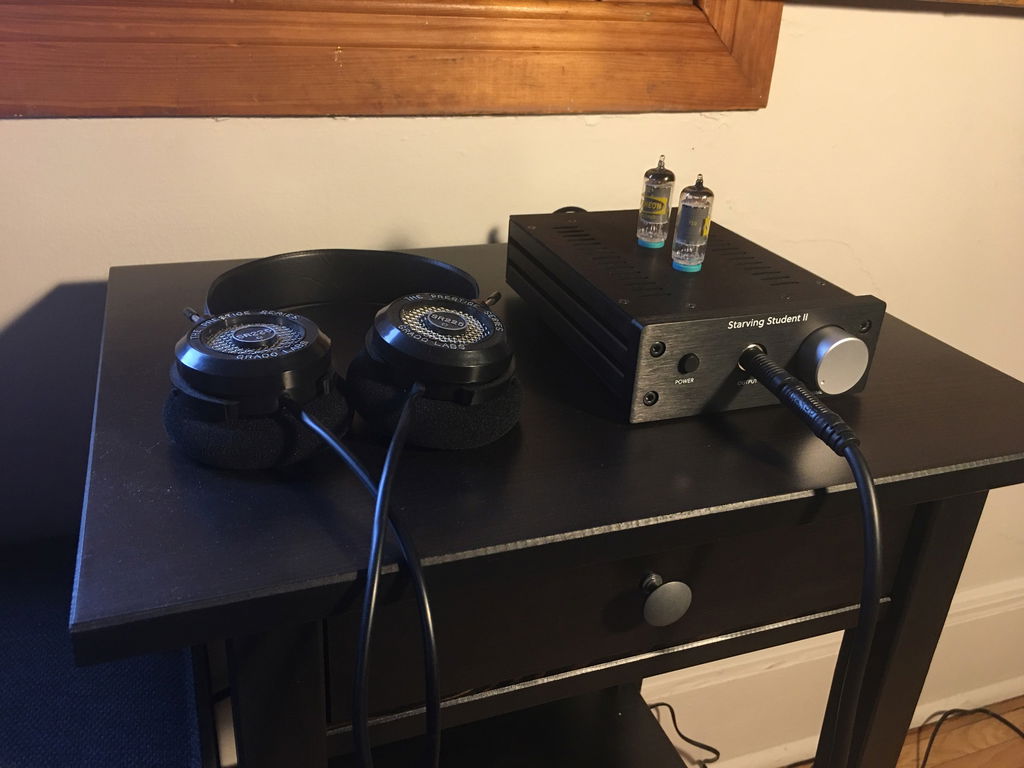
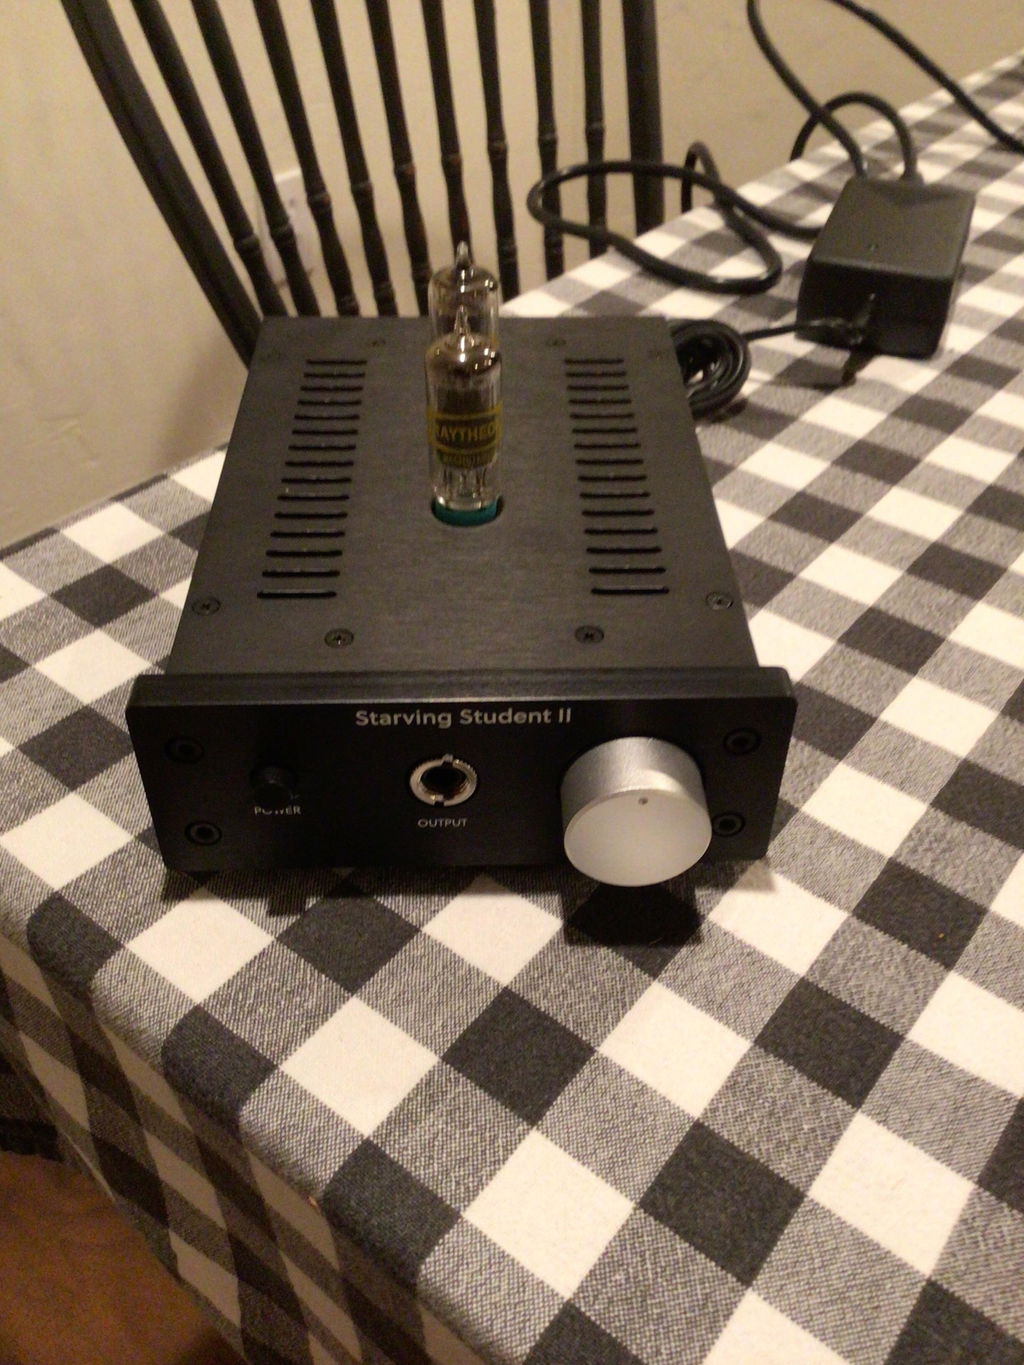
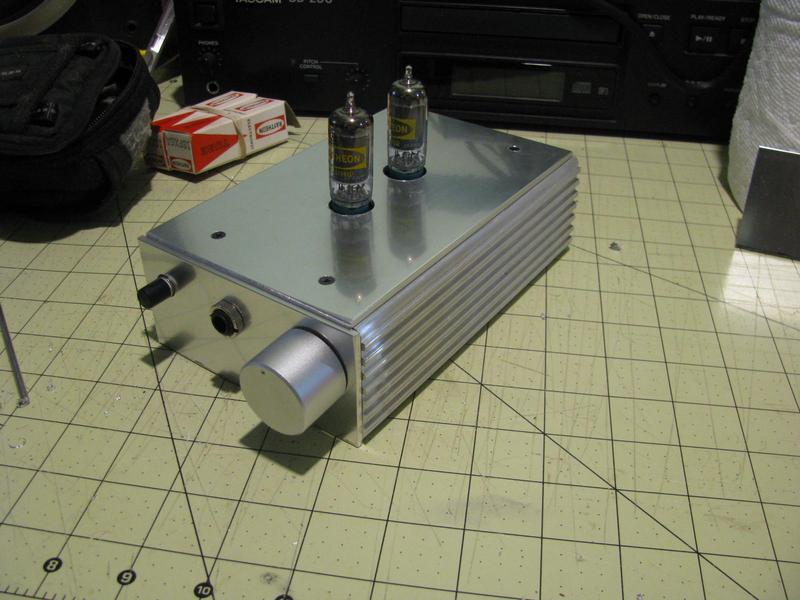
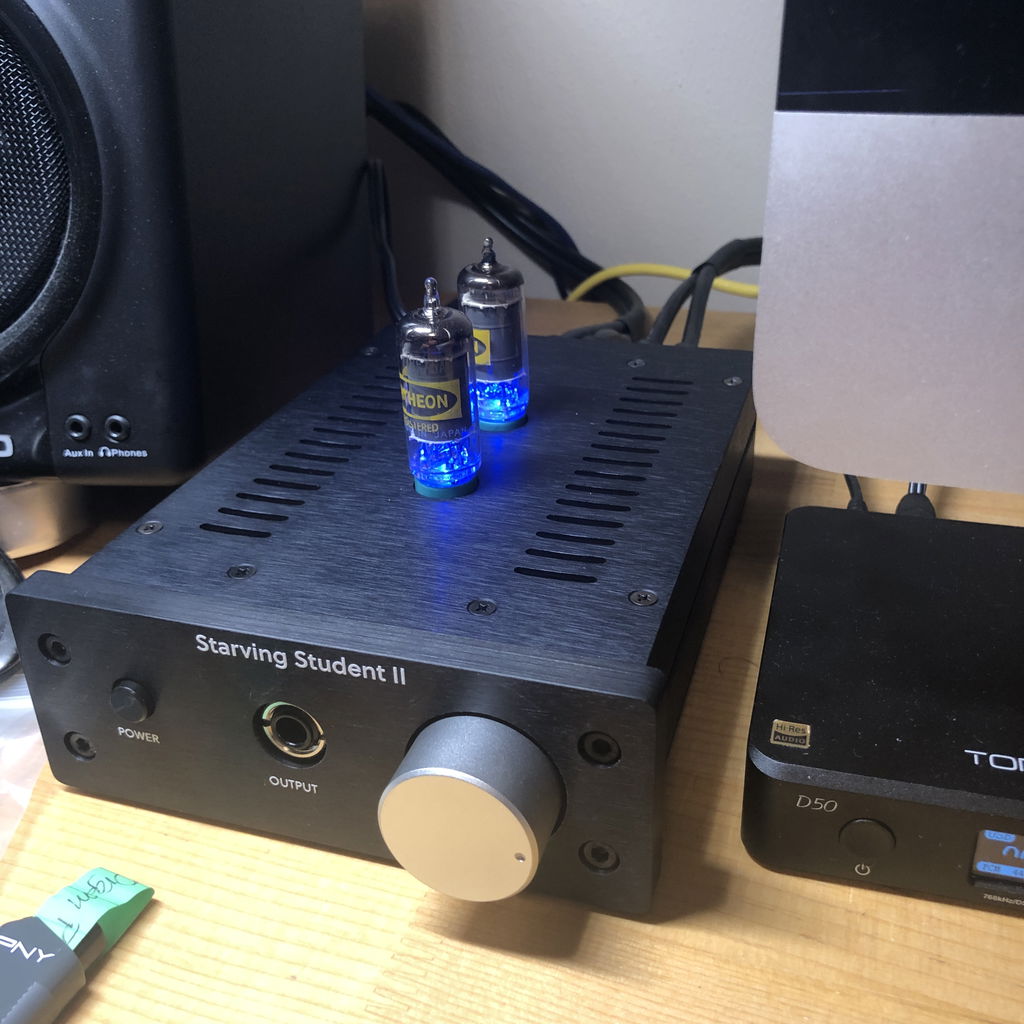
The Starving Student II is a hybrid tube/solid state headphone amplifier and pre-amplifier collaboration with tube guru, Pete Millet.
48VDC is fed via in from a high quality universal-voltage Meanwell power adapter. It has dual RCA inputs, with a 1/4” jack for headphones and another pair of RCA outputs for use as a pre-amplifier.
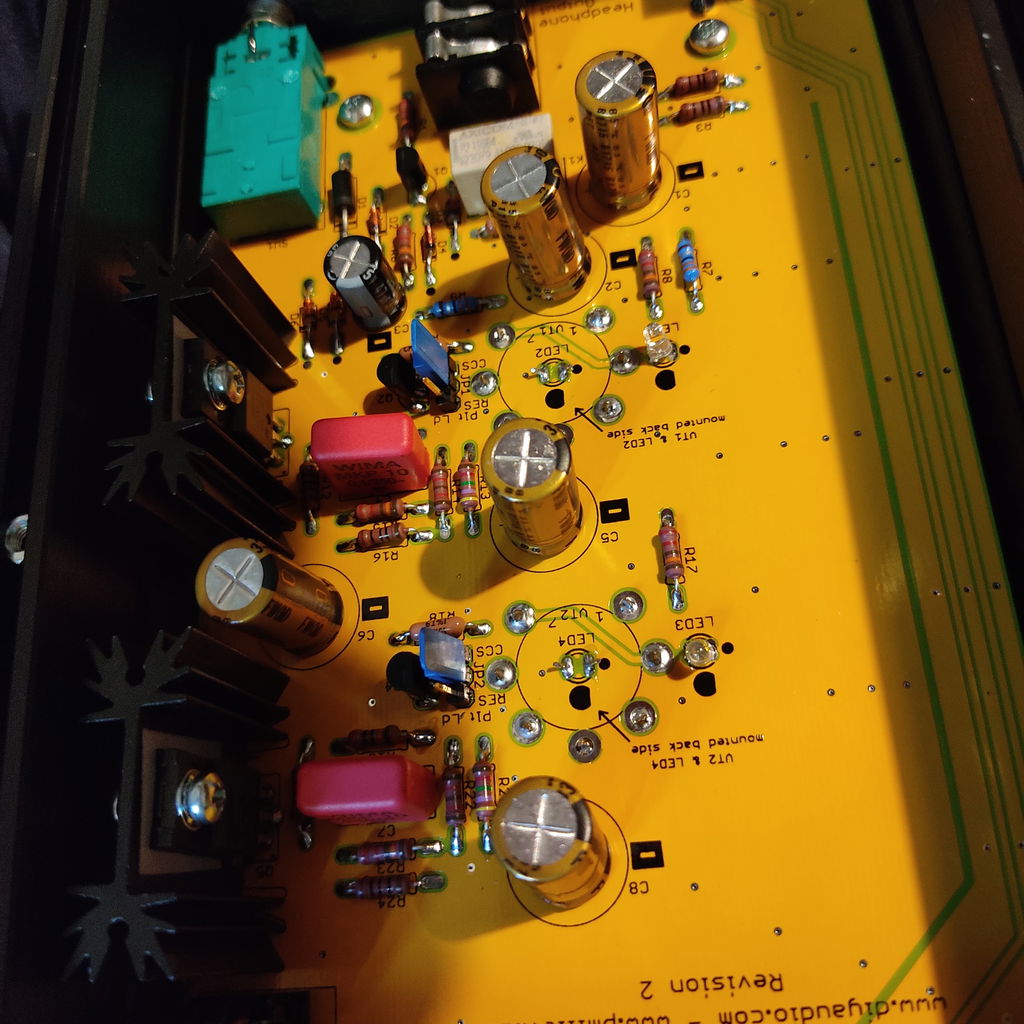
BOM and schematics are inside Pete's excellent SSII assembly instructions. 6L6 has prepared a beautiful SSII step-by-step build guide. The SSII information directory contains links to every SSII resource.
Both the parts kit and chassis will ship immediately from our US warehouse at the same time. You can ask questions and discuss your build in the SSII discussion thread on diyAudio.
Features
- Can be used as a headphone amplifier or pre-amplifier
- Includes two 18FX6 vacuum tubes, functioning as triodes
- Choice of resistor or CCS plate loading for preferentially lower distortion or softer clipping, using a blue LED to bias CCS and light the tubes
- Time delay muting circuit to allow the tubes to warm up
Key Information
- Pre and Headphone Amplifier Project
- Designed by Pete Millet
- Beginner to Intermediate Difficulty
- Complete Kit Available
- Comprehensive Build Guide
Highlights
- Can be used as a headphone amplifier or pre-amplifier
- Includes two 18FX6 vacuum tubes, functioning as triodes
- Choice of resistor or CCS plate loading for preferentially lower distortion or softer clipping, using a blue LED to bias CCS and light the tubes
- Time delay muting circuit to allow the tubes to warm up
- Sold as a complete kit with everything included
Links, Discussion & Files
Specifications
| Spec | Plate load | 150 ohm load | 30 ohm load |
| Gain (at max volme setting) | CCS | 20 dB | 18 dB |
| Resistor | 17 dB | 16 dB | |
| Frequency response +/-3dB | CCS | 11Hz - 40kHz | 18Hz - 40kHz |
| Resistor | 12Hz - 50kHz | 20Hz - 50kHz | |
| Frequency response 20Hz-20kHz | CCS | +/- 0.8dB | +/- 1dB |
| Resistor | +/- 0.8dB | +/- 1dB | |
| THD+N 1V 1kHz | CCS | 0.47 % | 0.15 % |
| Resistor | 1.8 % | 1.3 % | |
| Maximum output @ 5% THD | CCS | 9.9 V RMS | 2.5 V RMS |
| Resistor | 3.1 V RMS | 2.4 V RMS |
We also have available a zip archive containing 12 different SSII graphs.
One of the really nice things about Pete Millett's Starving Student II amplifier is that you literally get everything you need to build it except the solder. It's an easy build, and when you are done, you have a headphone amp/preamp that sounds great and looks like a commercially made product. It has no issue whatsoever driving the Sennheiser HD650. Highly recommended!
Easy to build and easy to your ears. A smooth Operator with an organic sound that please ears and will keep you seet to listen more time you planned too. Great! Thanxs again to the store to bring us Little jewels easy to build.

Since I rarely listen to headphones, this one is being used primarily as a preamp. I Have really enjoyed the project, and the results. Haven't welded it yet but this is where I am going with the chassis.
Excellent kit. Instructions very clear and kit very simple to build. This is my second DIY audio project (the first one was an AudioNoteKits DAC for my room sound system five years ago -I love valves sound, as you can see-). I needed an alternative for my little moments working in my desk with my computer, so I found out your SS-II and said myself "this is it, this is what I need".
No doubt for me to choose the resistor option for the plate load, not the CCS. I use a pair of Final Sonorous III headphones and they work excellent with the SS-II. They move well and the sound is sweet and clear; the bass is enough and well controlled. Maybe I would like a little bit more power and punch in this part, but I insist: enough for price and for what I expected.
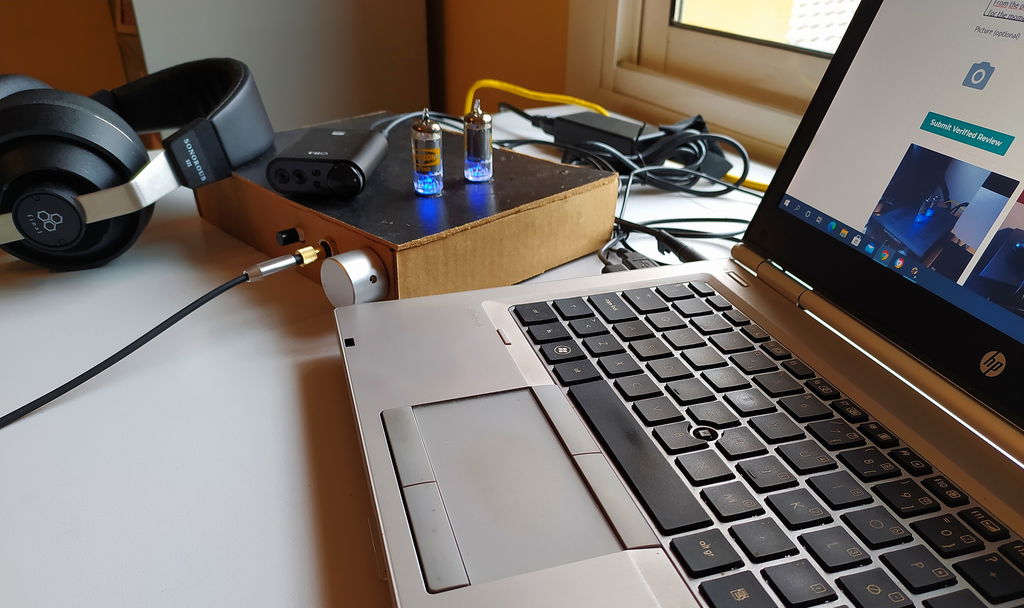
From the picture you'll be abble to see my provisional idea for the chasis. I expect to get your finer chasis next year. But for the moment, this is what I have.
Negative experiences:
I had real problems soldering the mass parts of all the components. Because all the PCB mass is a big surface of copper, my 25 W solder was not abble to compensate de heat dissipation, so after desperating tryings I had to use a pair of solders for each and every single mass pad! After 35 years soldering, this is the first time I've had to do something like this. But never mind: I could do it and... the result was good. Another experience for my soldering skills.
The only thing that really concerns me is that there are unnatural sounds in my left channel. They dissapear after some minutes of listening, but I have the impression that with the pass of the weeks, they need more time to dissapear, they remain longer. I know valves can do this things, but I wonder if this can affect some parts of the circuitry and if I will have to fix it.
To finish: I'm very very sorry for being the first to give the SS-II a four stars review. In fact, I'd prefer "four and al half", but there is no option for this.
This was my first DIY Audio kit and I am really glad I started with this one. The excellent build guide from 6L6 makes assembly easy. Having all needed parts and the chassis in one kit guarantees success in completing the project. The case was a little bit finicky to assemble, but all parts came together nicely and the amp looks and sounds great.
As many folks during COVID-19 lockdown, I was looking for projects and this one fitted the bill nicely--even though I wasn't in need of another headphone amp. The kit is very relaxing to build, even without the well-written and well-ilustrated instructions. Basically, the markings on the PCB provide sufficient information for putting it all together. Even though I have considerable experience with electronics, I would say that with patience and care, this kit could be assembled successfully by a complete beginner. I took my time to do it over two evenings, going from lowest height (diodes), to resistors, to highest parts (heatsinks). For those, my vintage 1985 Weller gun came in handy. The only little gripe is that in my opinion the headphone jack should be soldered AFTER the whole thing is assembled, as soldering it with the plastic in contact with the PCB resulted in my case in a slight vertical misalignment with respect to the front panel hole. The switch and volume knob were perfectly aligned however, so it's definitely a phone jack issue. I decided to solder the current source LED on the component side of the PCB. I might be old-fashioned, but tubes usually don't glow blue... At such low heater current, these don't glow much anyway.
I feed it from the Tape Out of a Rotel RC-995 preamp via 25' of RCA interconnect (yes!) and the sound is sweet. So far I have only used the constant current source mode. The tubes are very microphonic, but since the heater current is very low and the tubes remain cool, any tube damper would likely fix this. I haven't bothered with that yet, since the amp is on a small IKEA bed table and I don't touch it. I have used it with Grado SR225e, B&O H6, Audio Technica ATH-M50x and... a pair of Koss Porta Pro. Great kit that is easy to assemble, sounds very good and looks completely professional. Makes a perfect gift--assembled or not!