Collections
All Chassis
View collection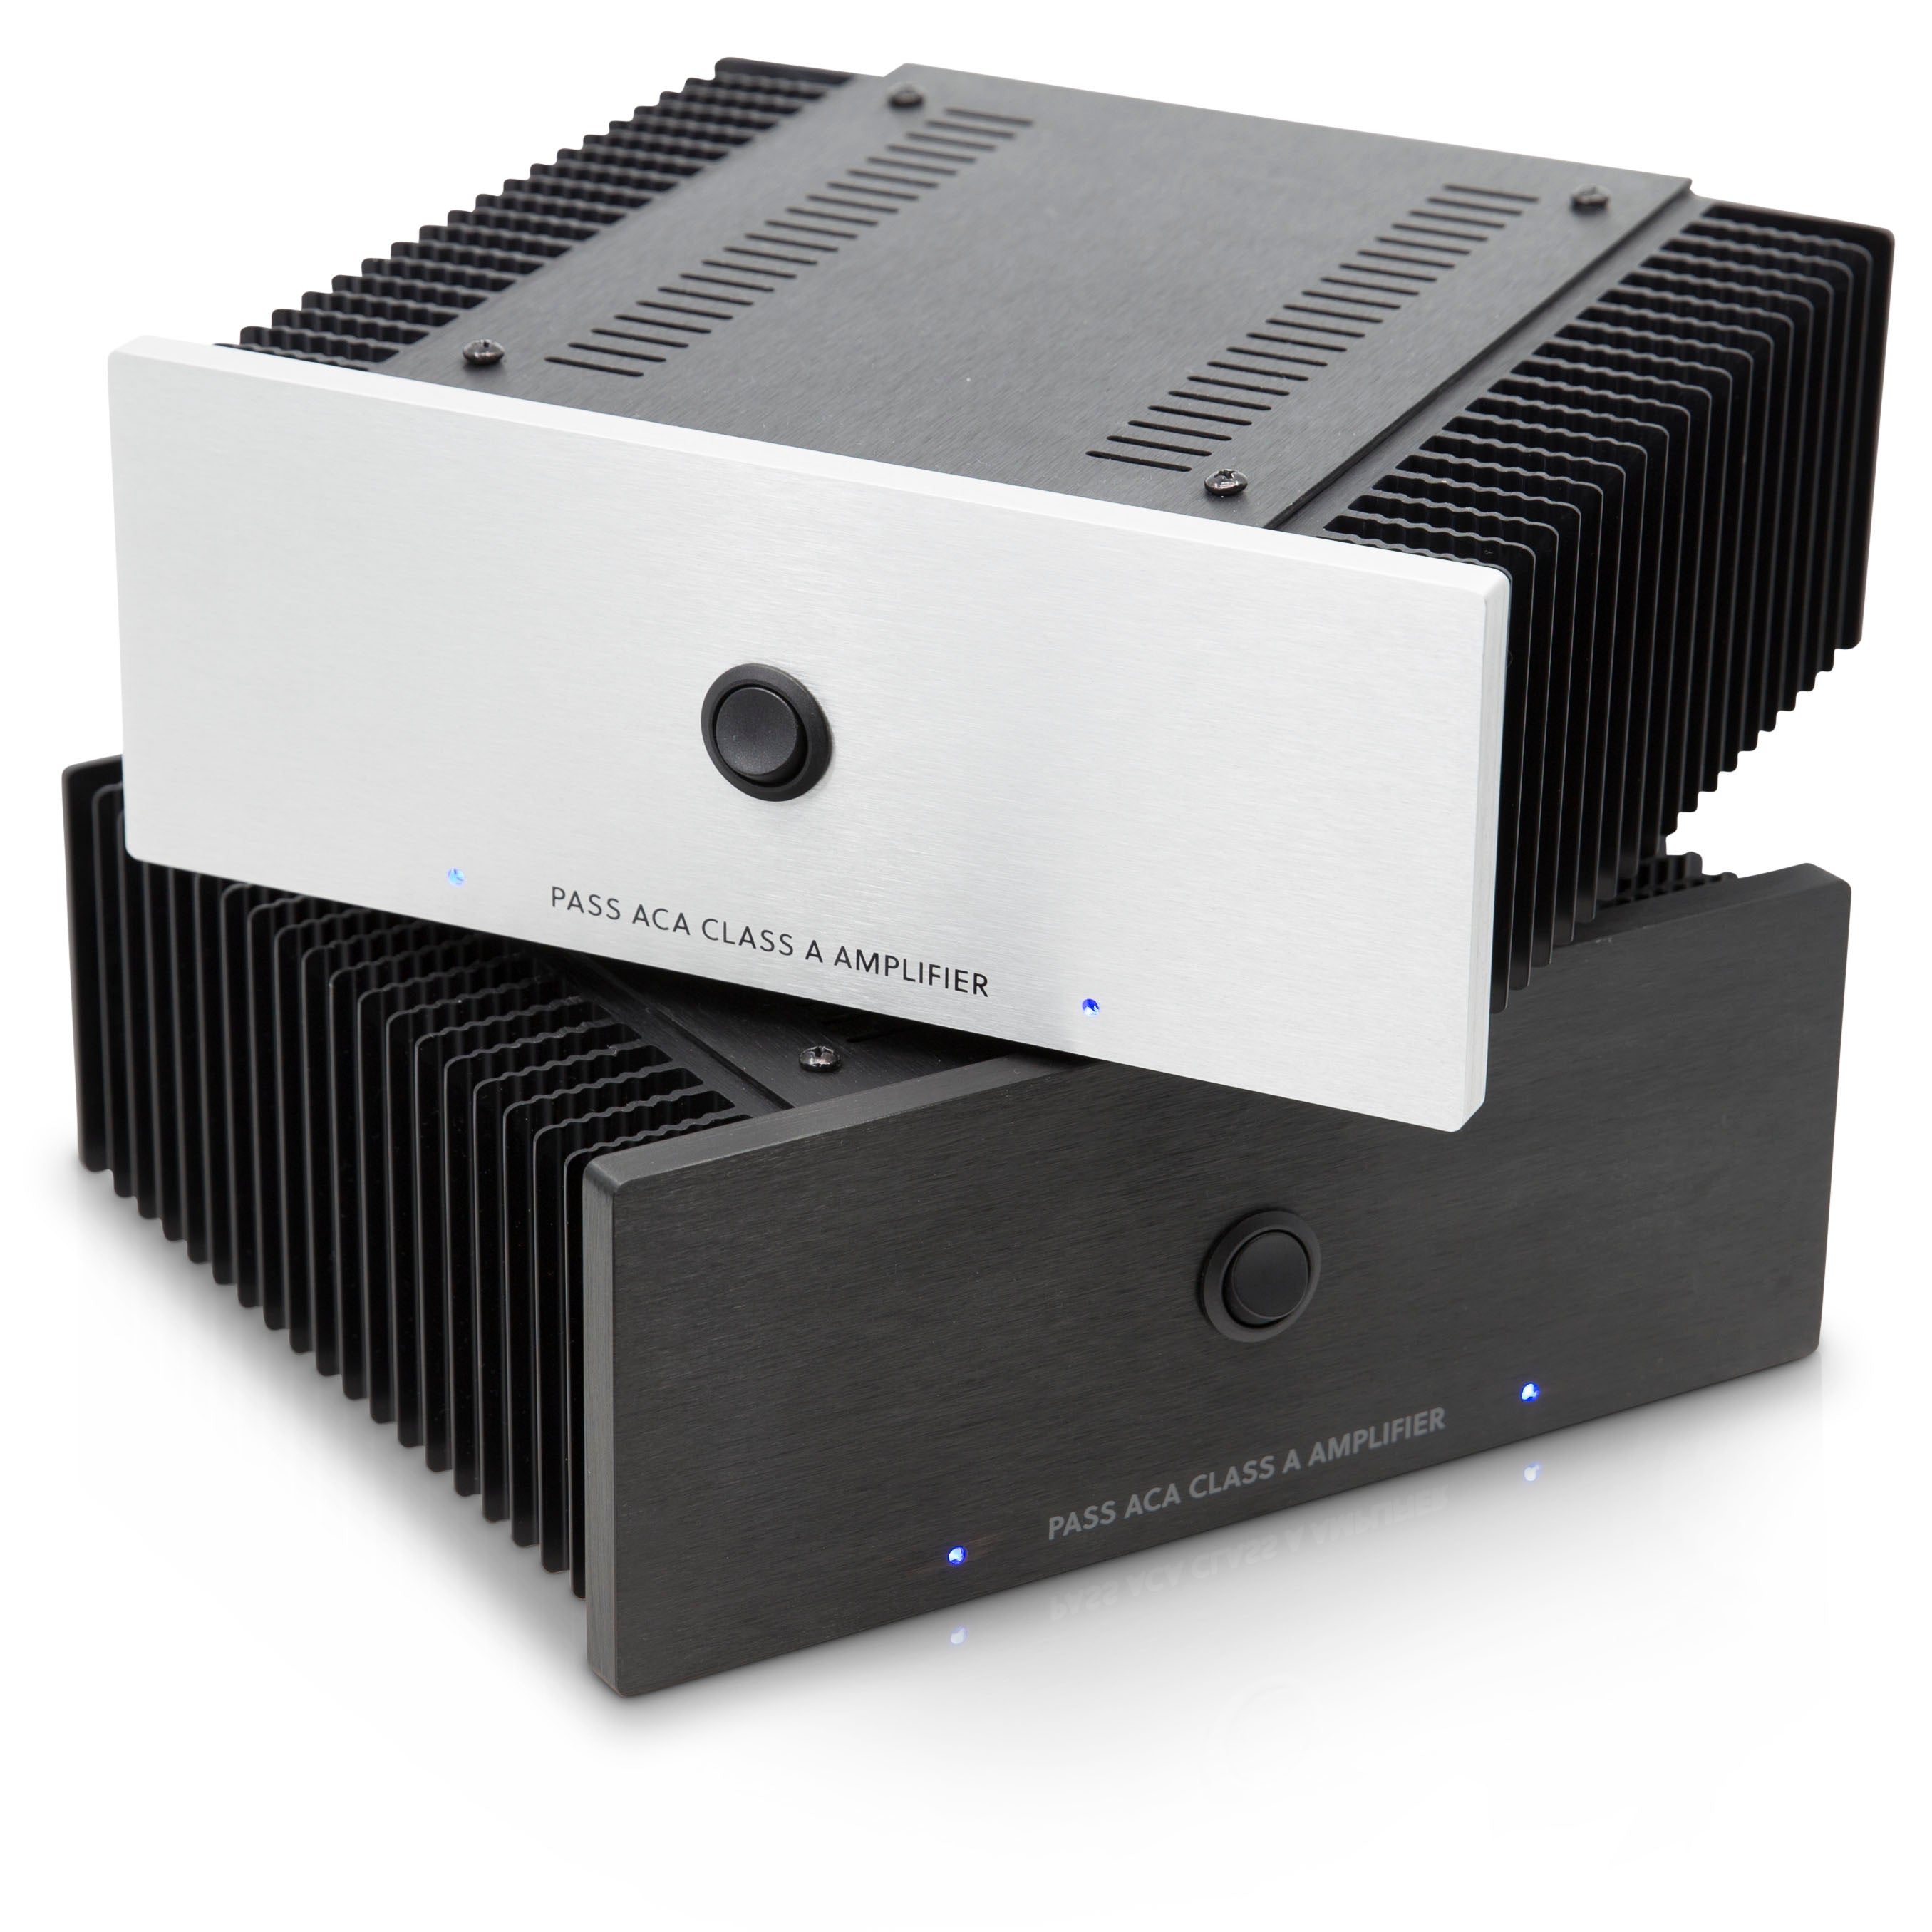


All Parts
View collection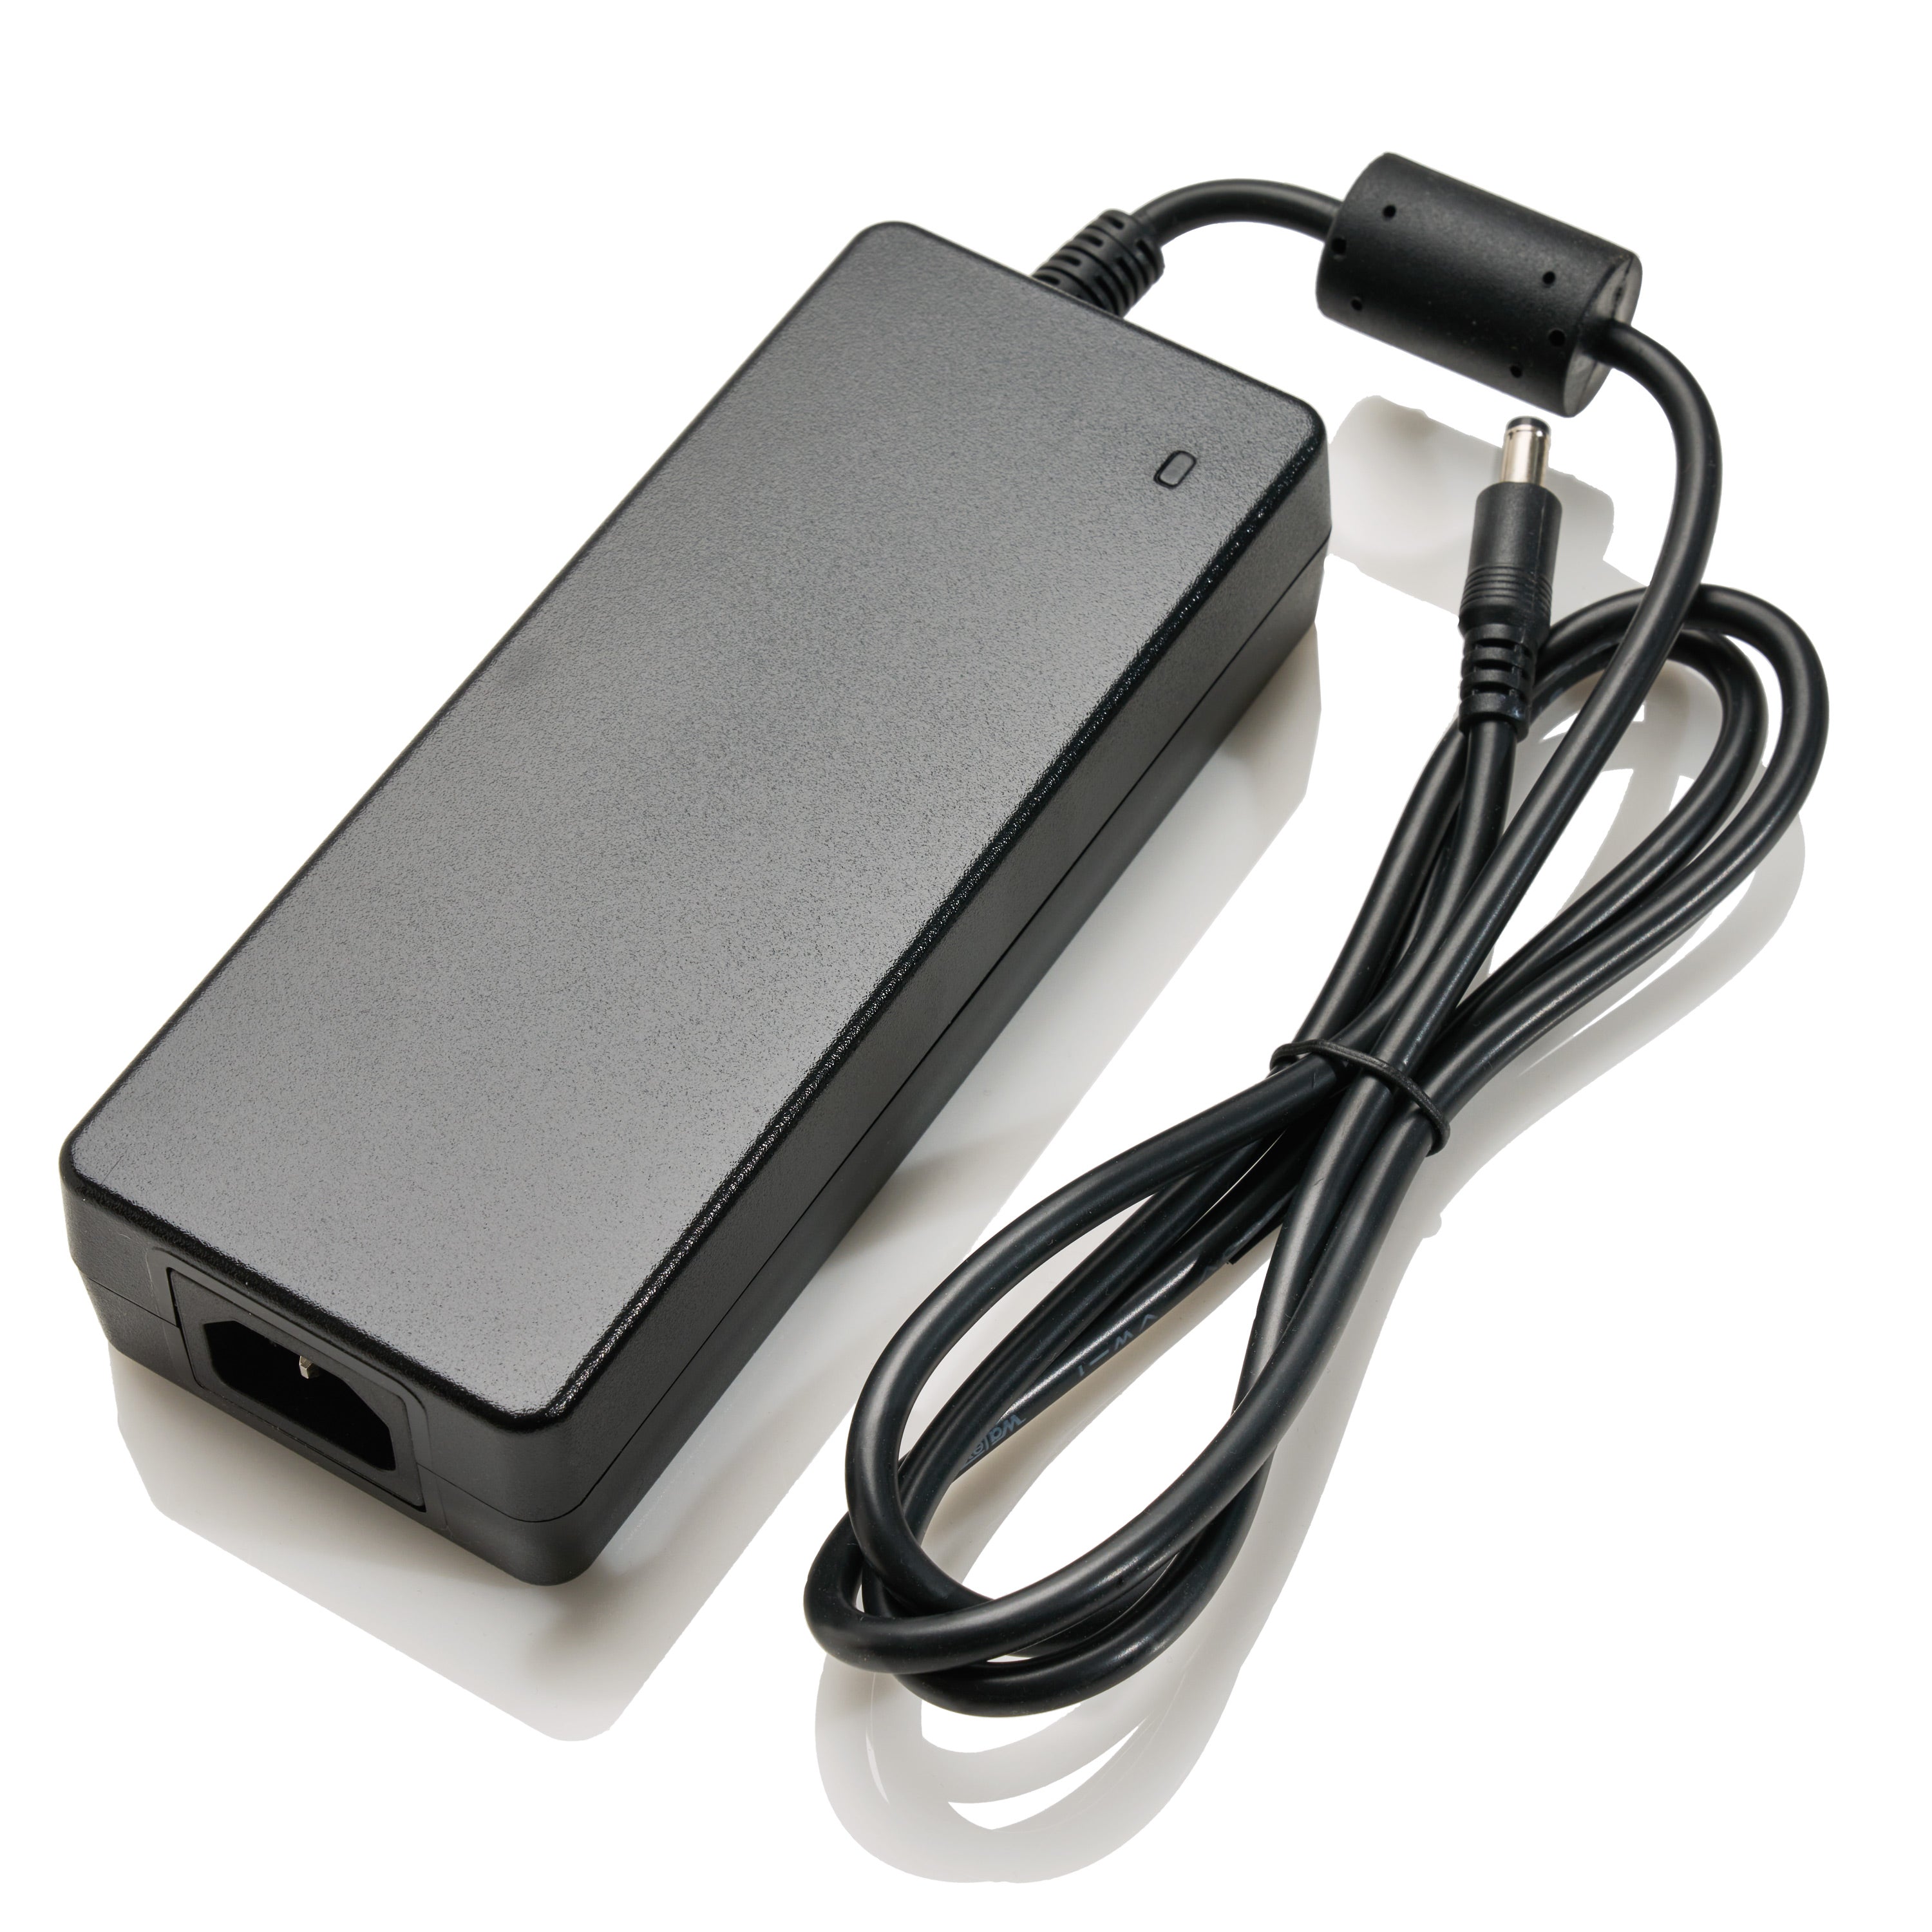

All Projects
View collection


Auxiliary Circuits / Experimental Platforms
View collection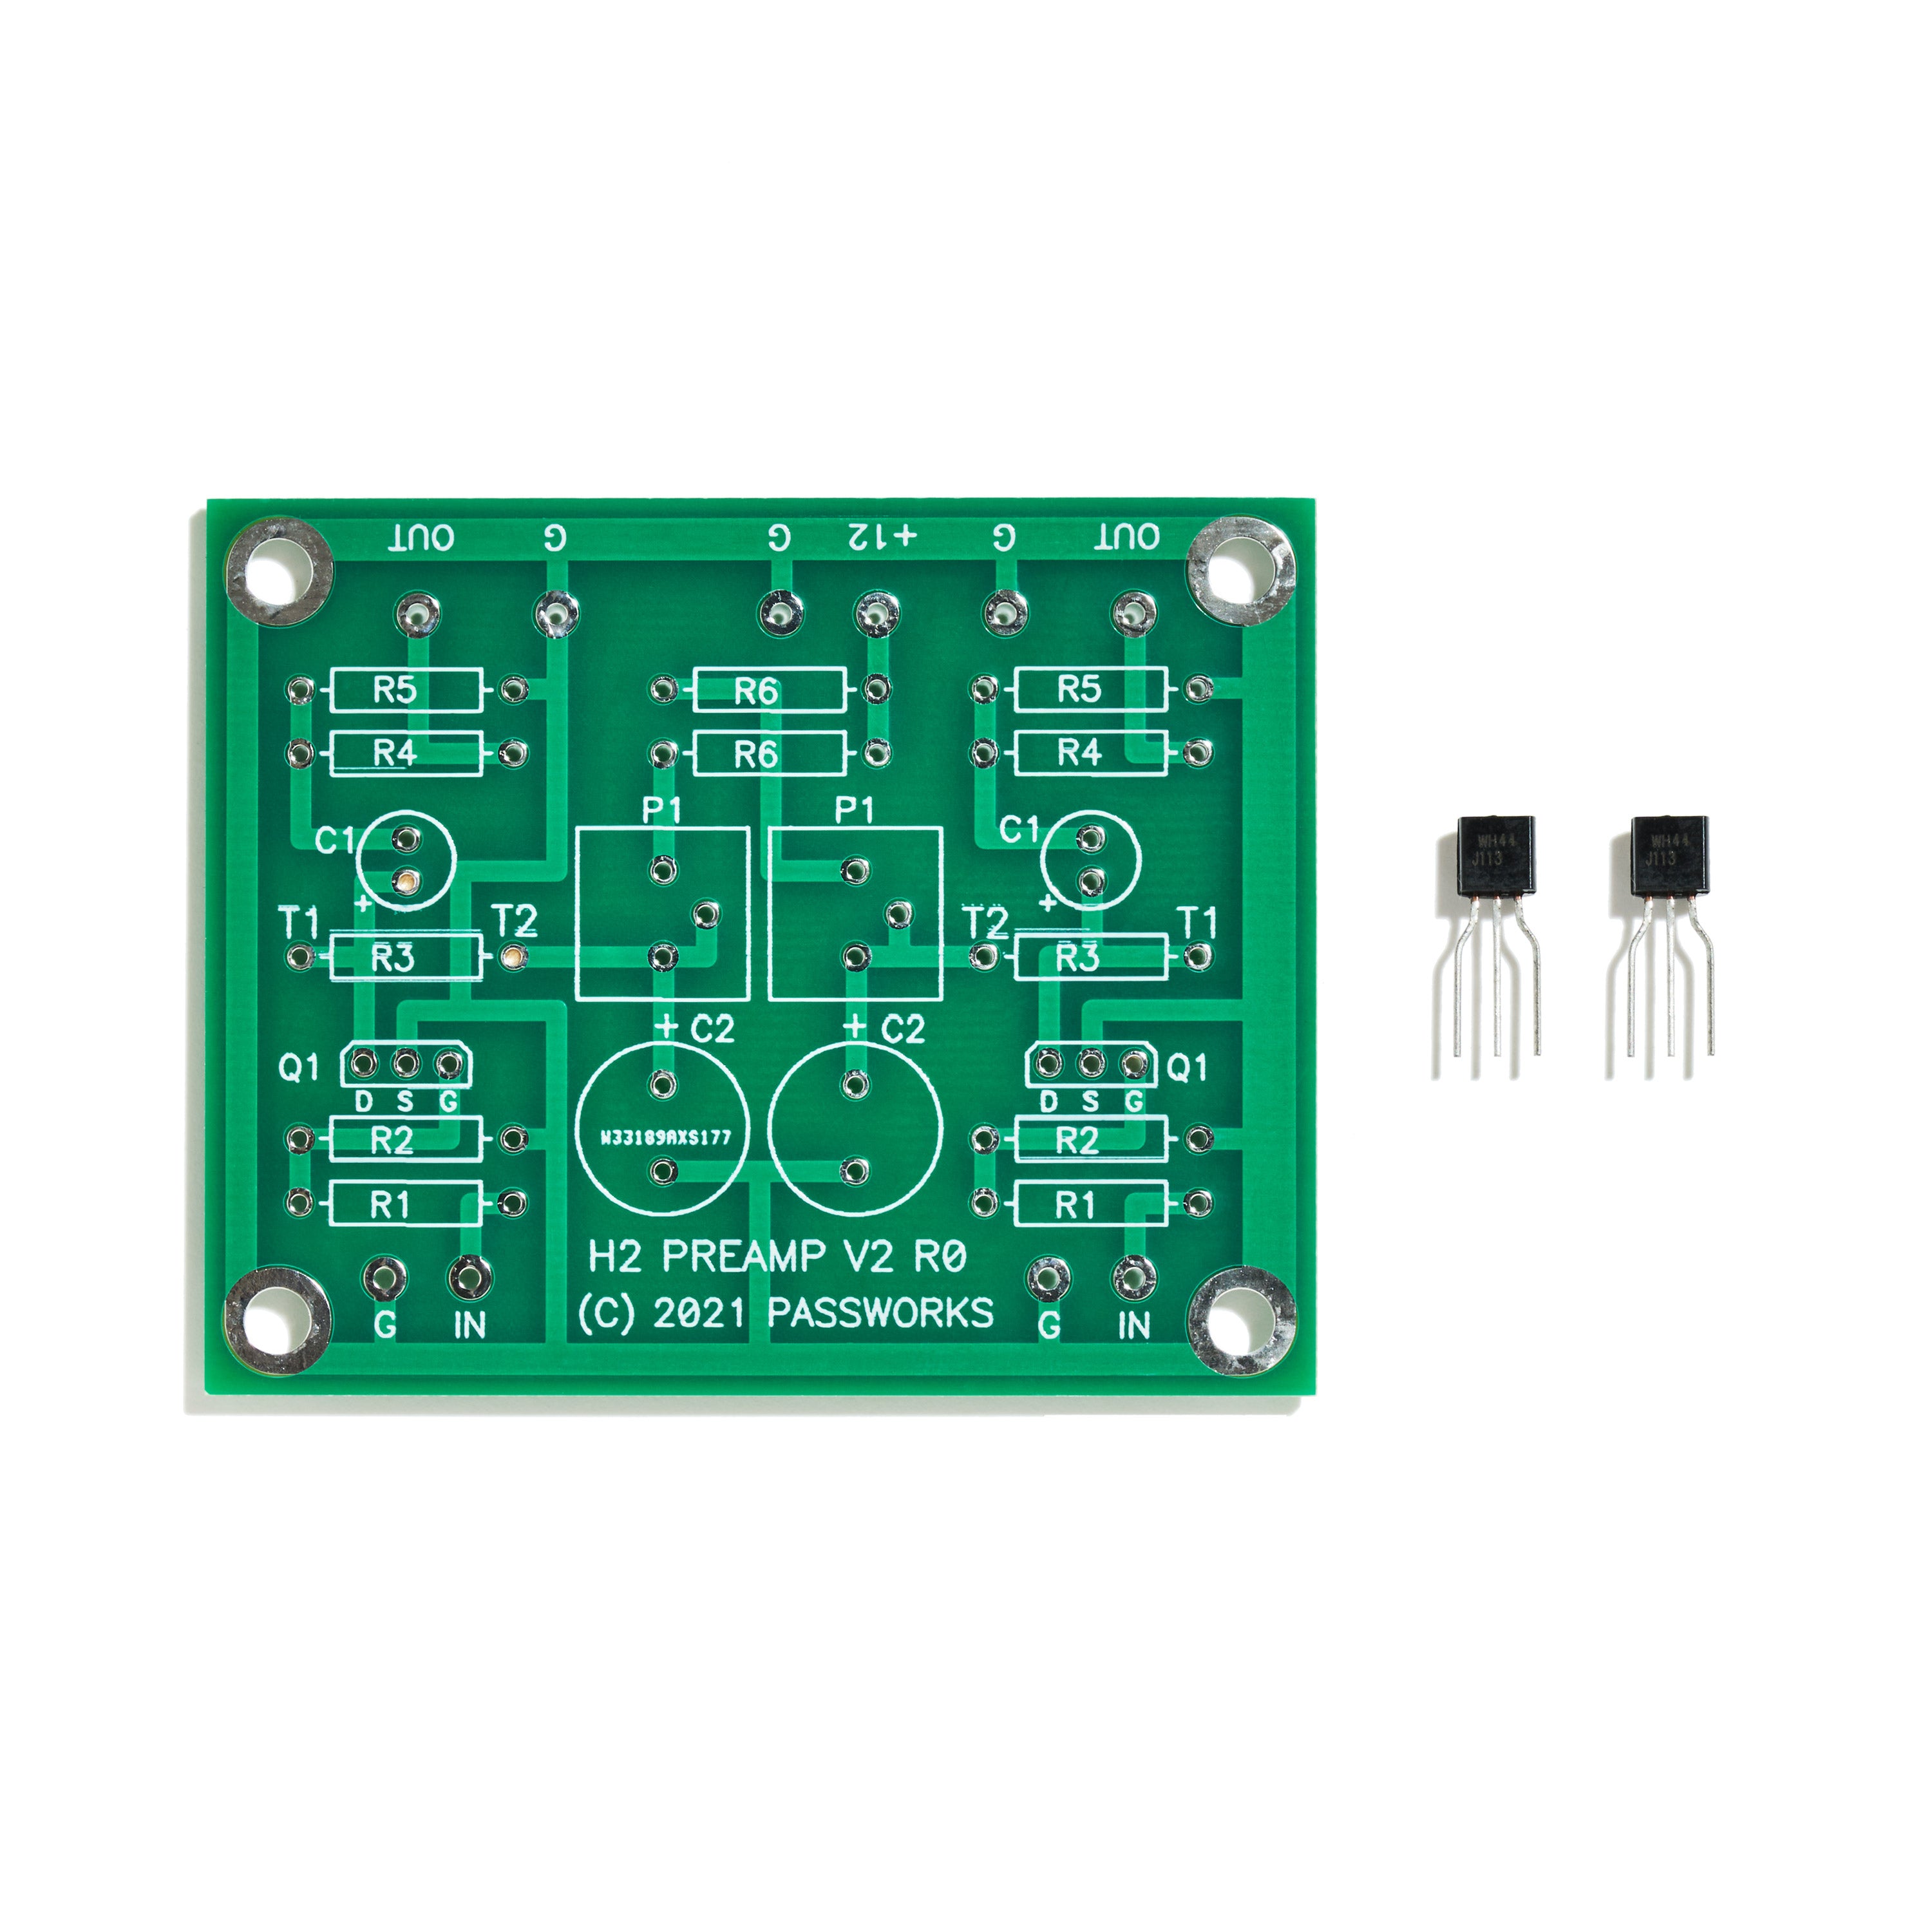
Burning Amplifier Series
Please visit the Burning Amplifier Helpdesk Thread for any questions you might have and for a definitive list of links to all articles and discussions about the Burning Amps.

 Boards designed for mounting active component directly to heatsinks share a common universal mounting specificationso you can tap your holes once and then re-use those holes for future projects, very handy if you'd like to experiment with several designs on a single chassis!


 Please view the Burning Amplifier Configuration Guide to see how to piece together your desired Burning Amplifier configuration or view the board revision histories or SKU notes.


Burning Amplifier


Burning Amplifier

Burning Amplifier

Burning Amplifier
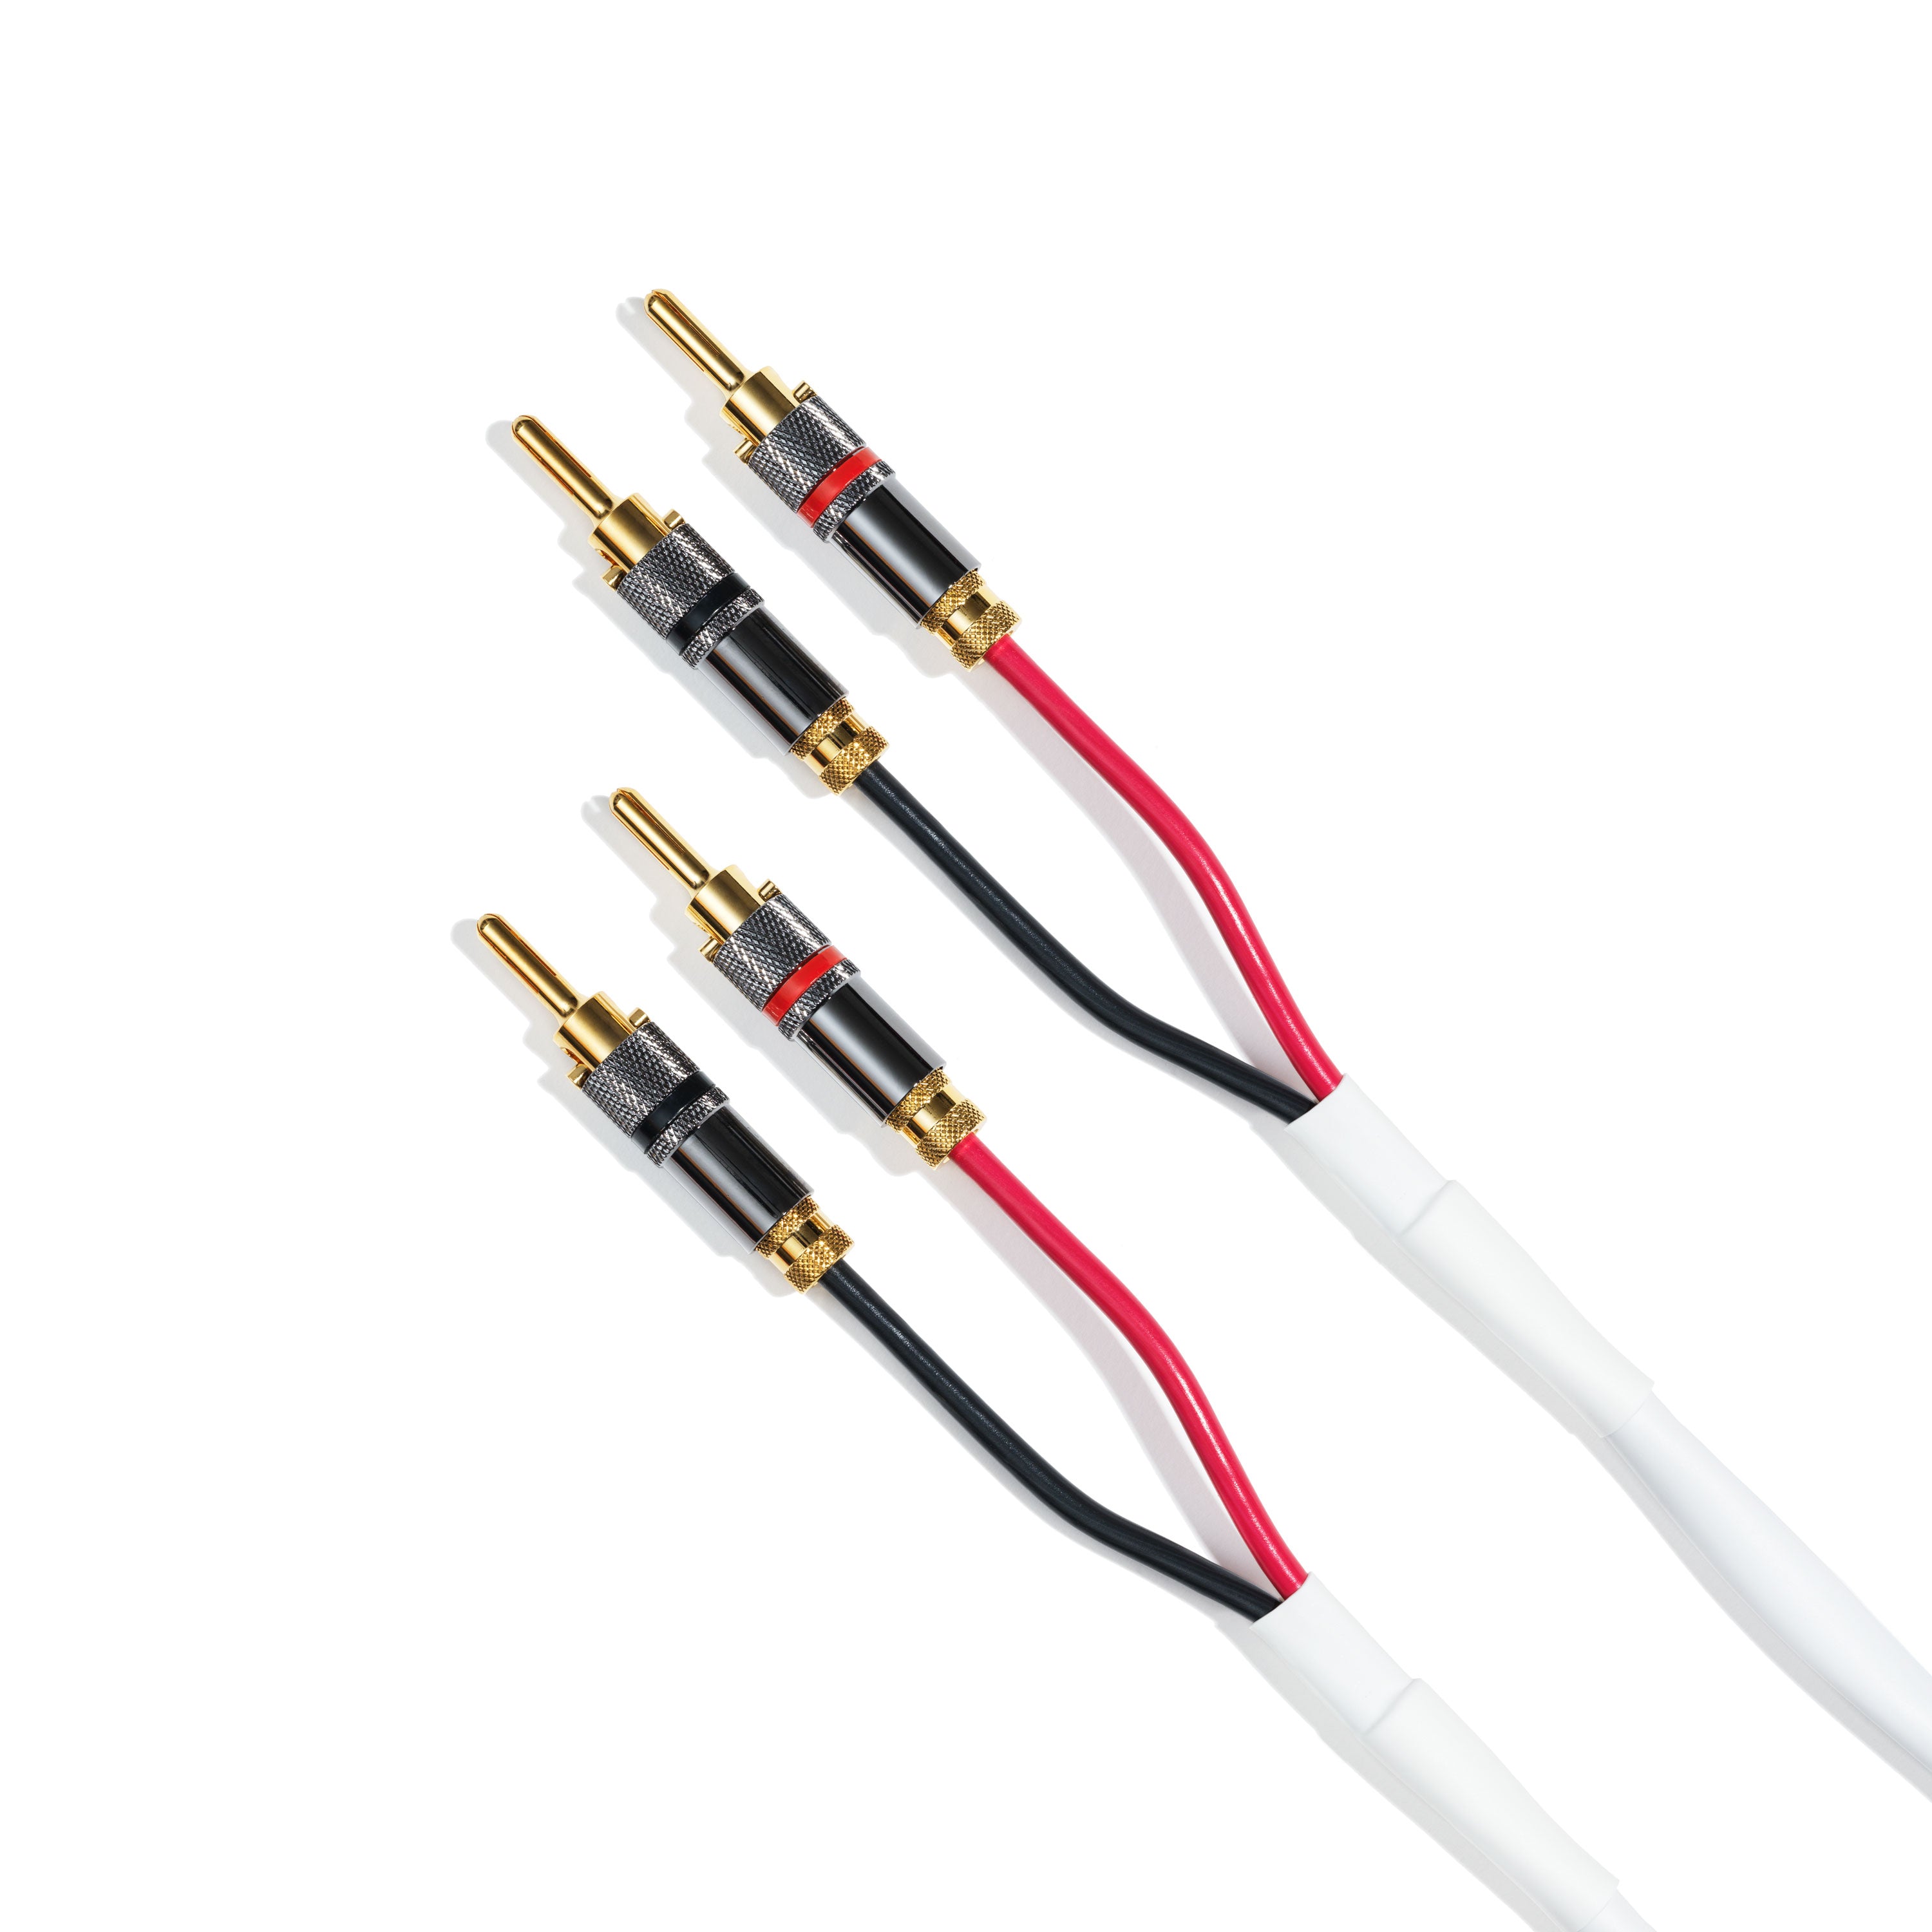
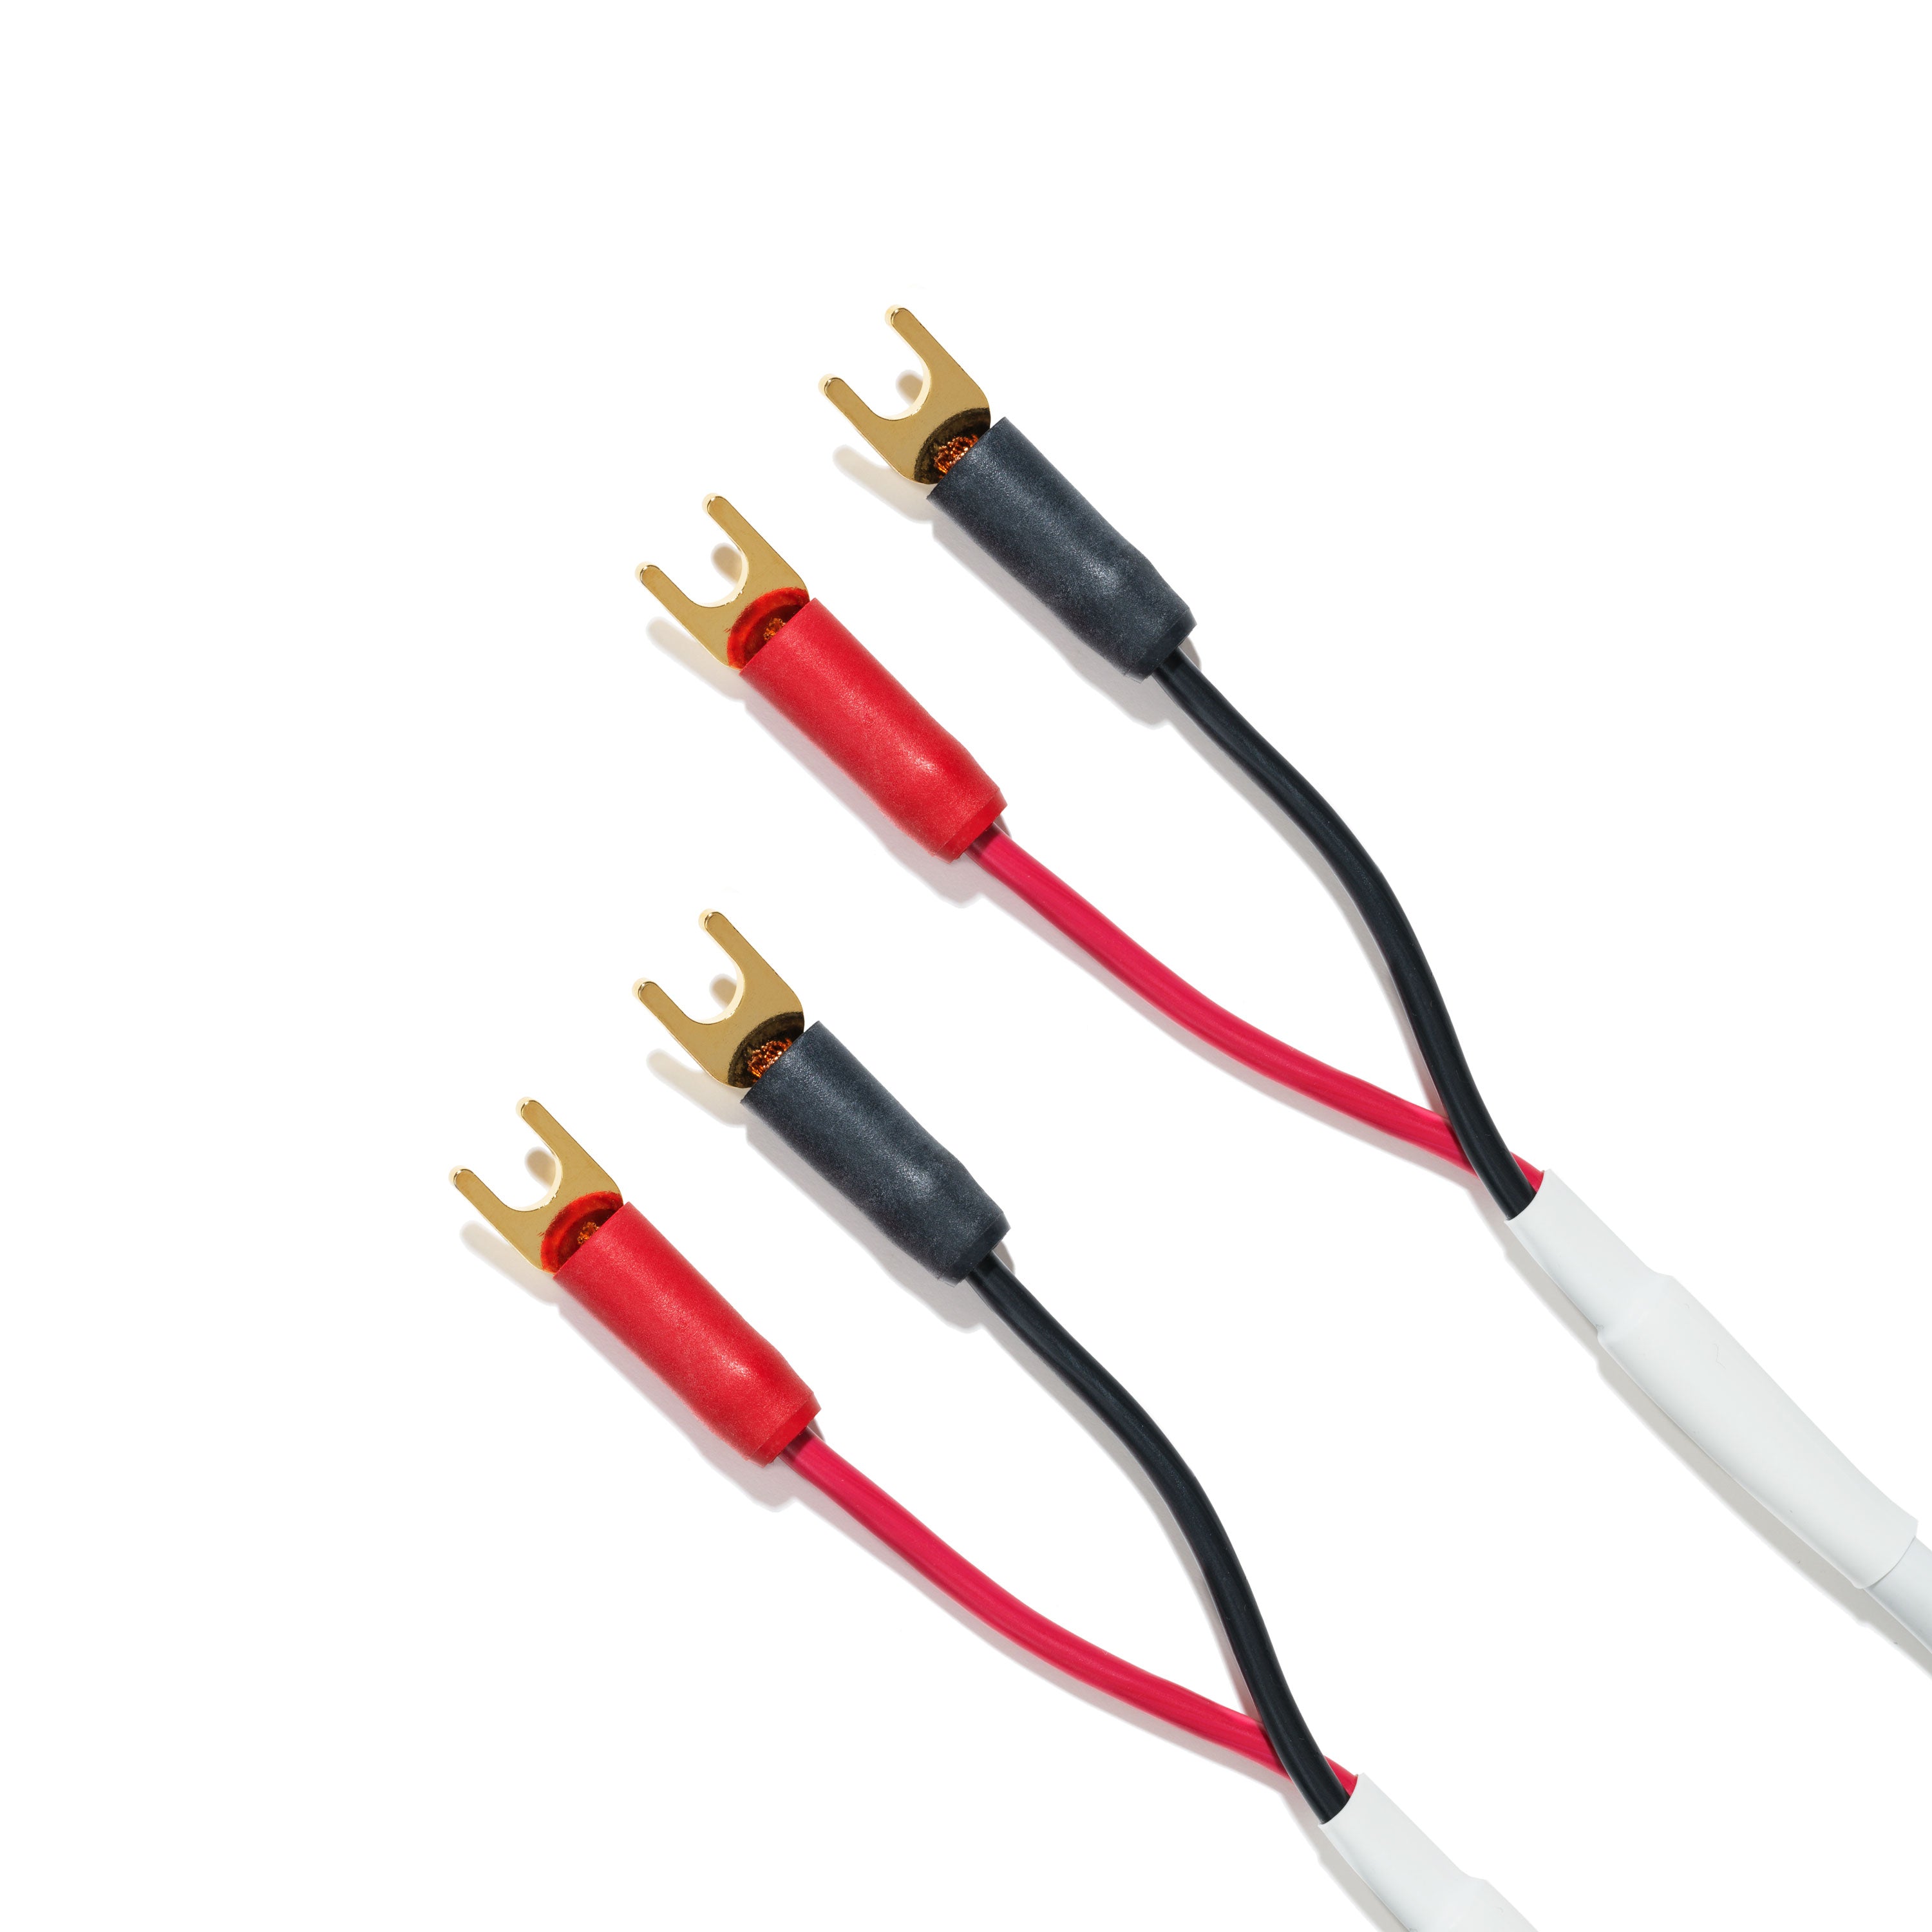
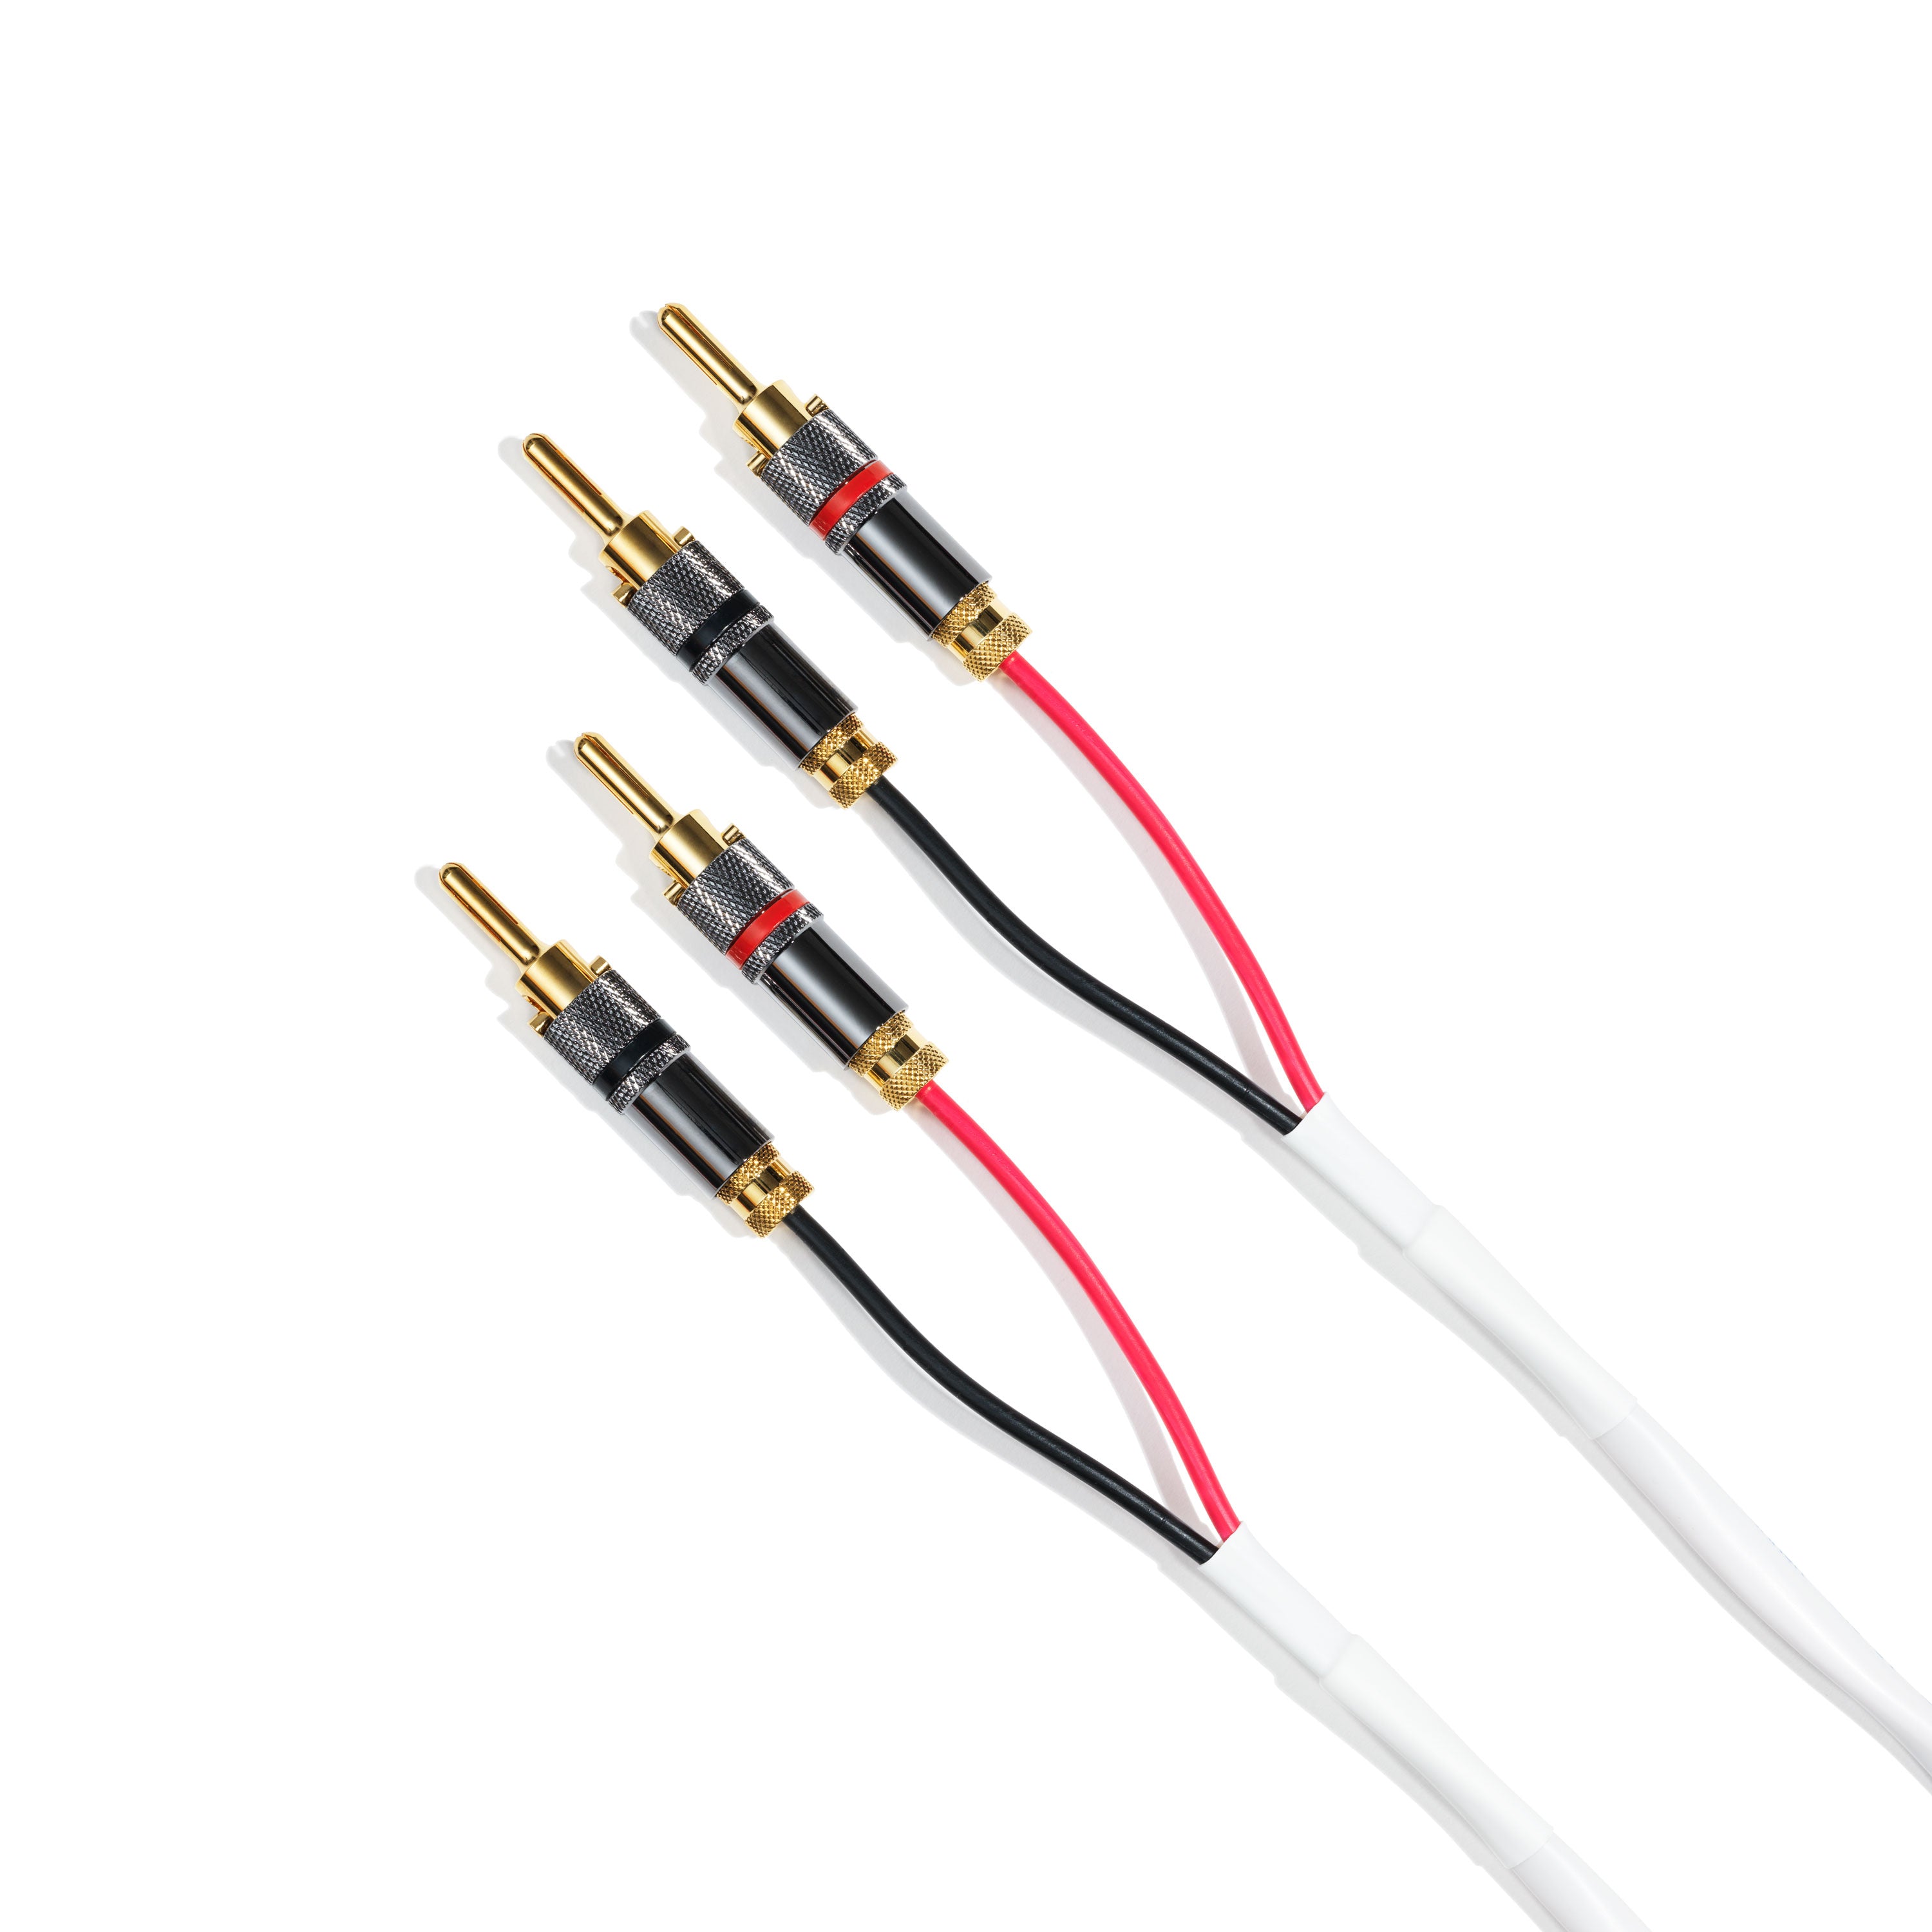
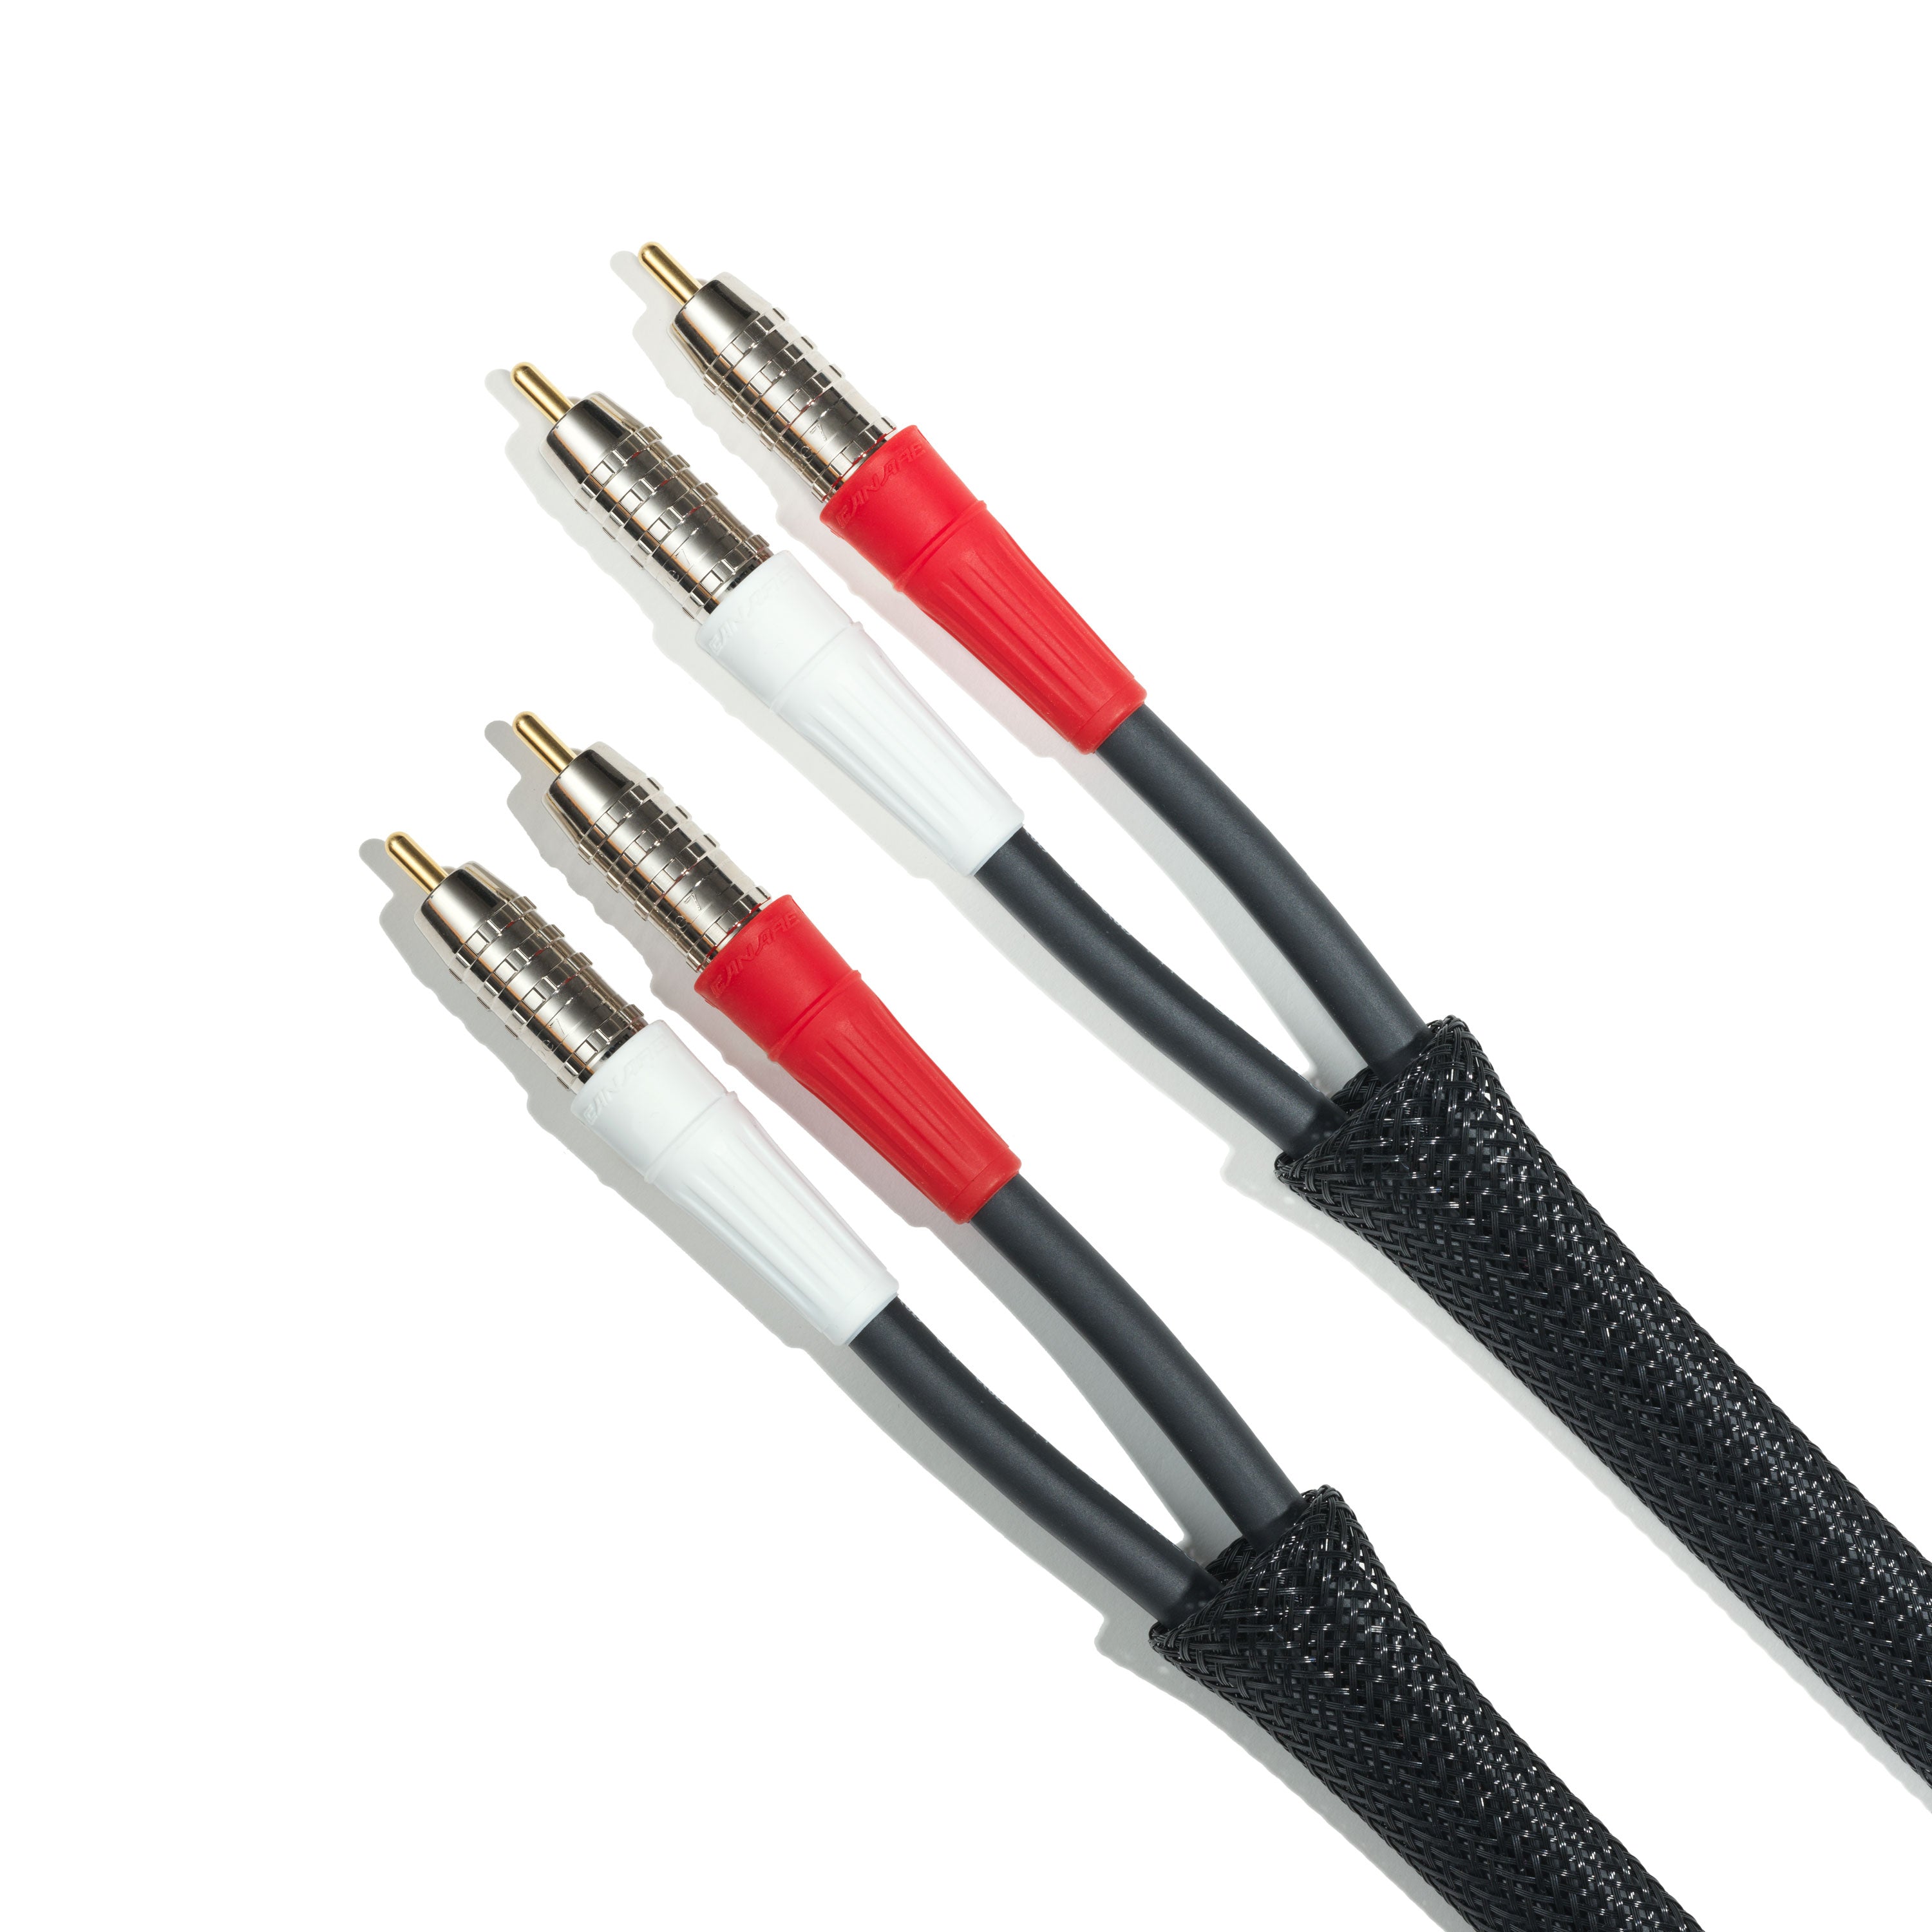
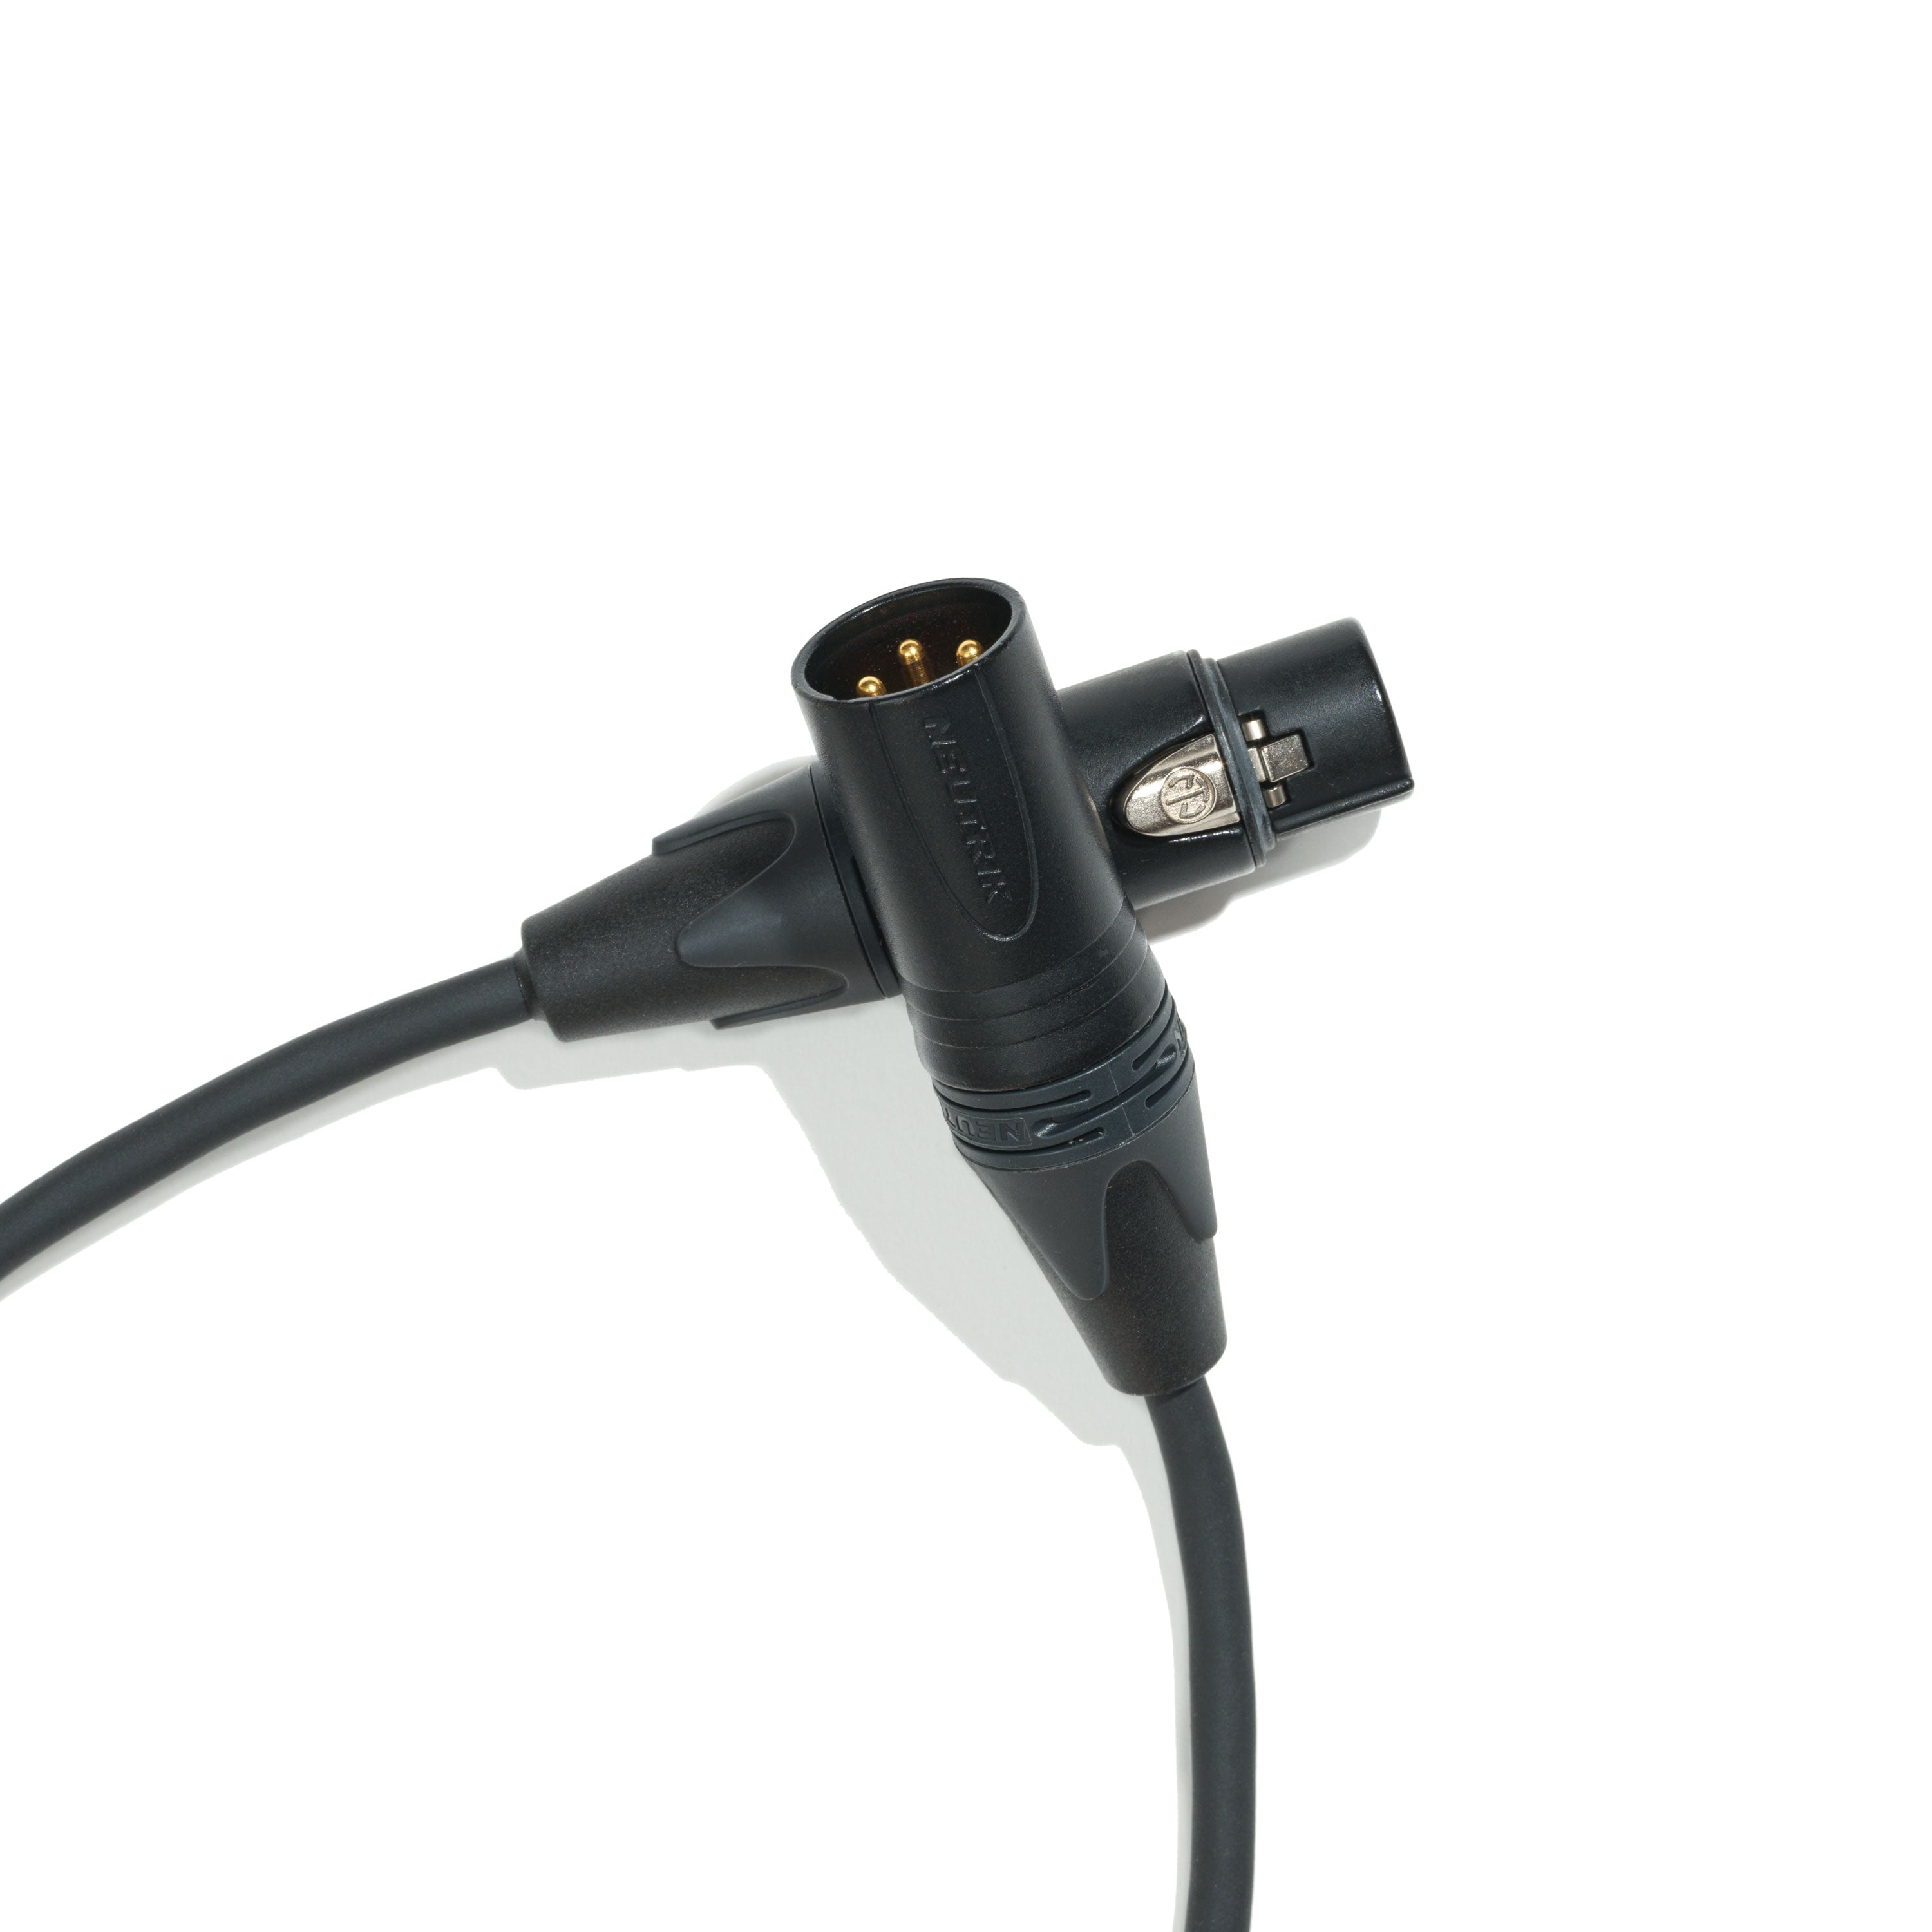
Cables
"Quality cables at reasonable prices"
All our cables are manufactured by Blue Jeans Cable, whose outstanding reputation for quality has been well known in DIY circles for many years.
Buy these cables once and you won't have to worry about your cable situation again.


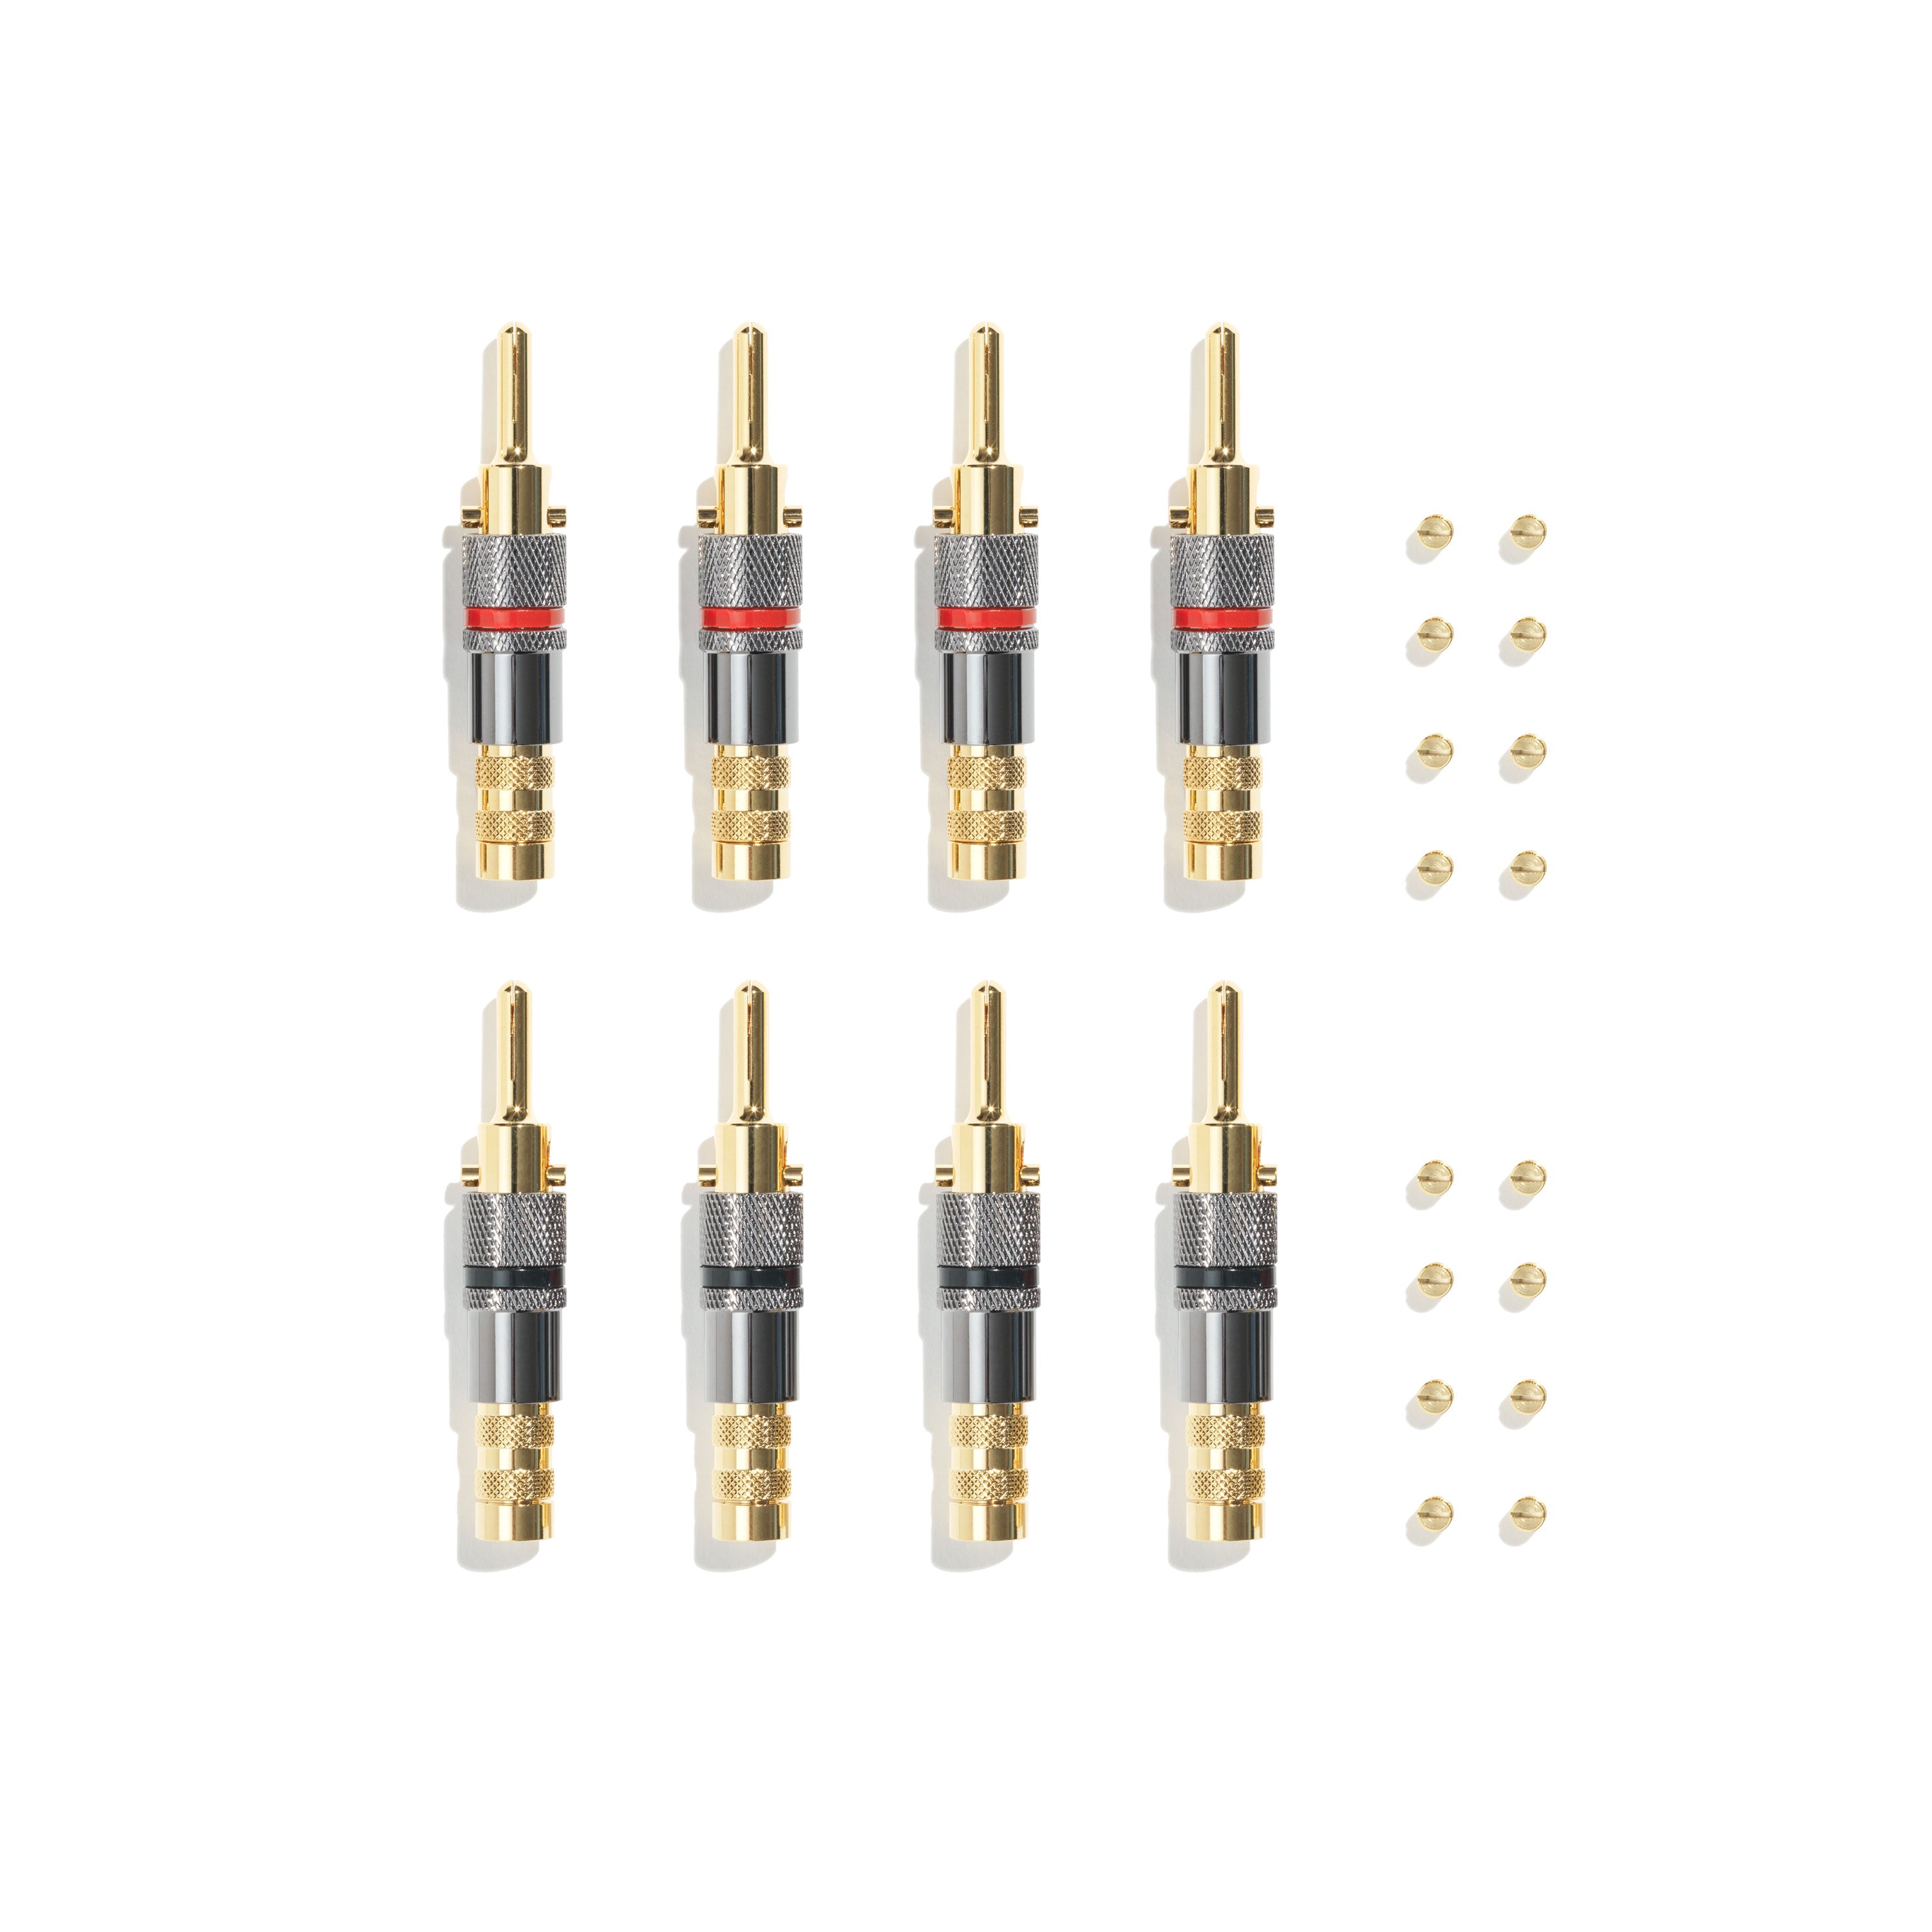
Chassis Accessories
View collection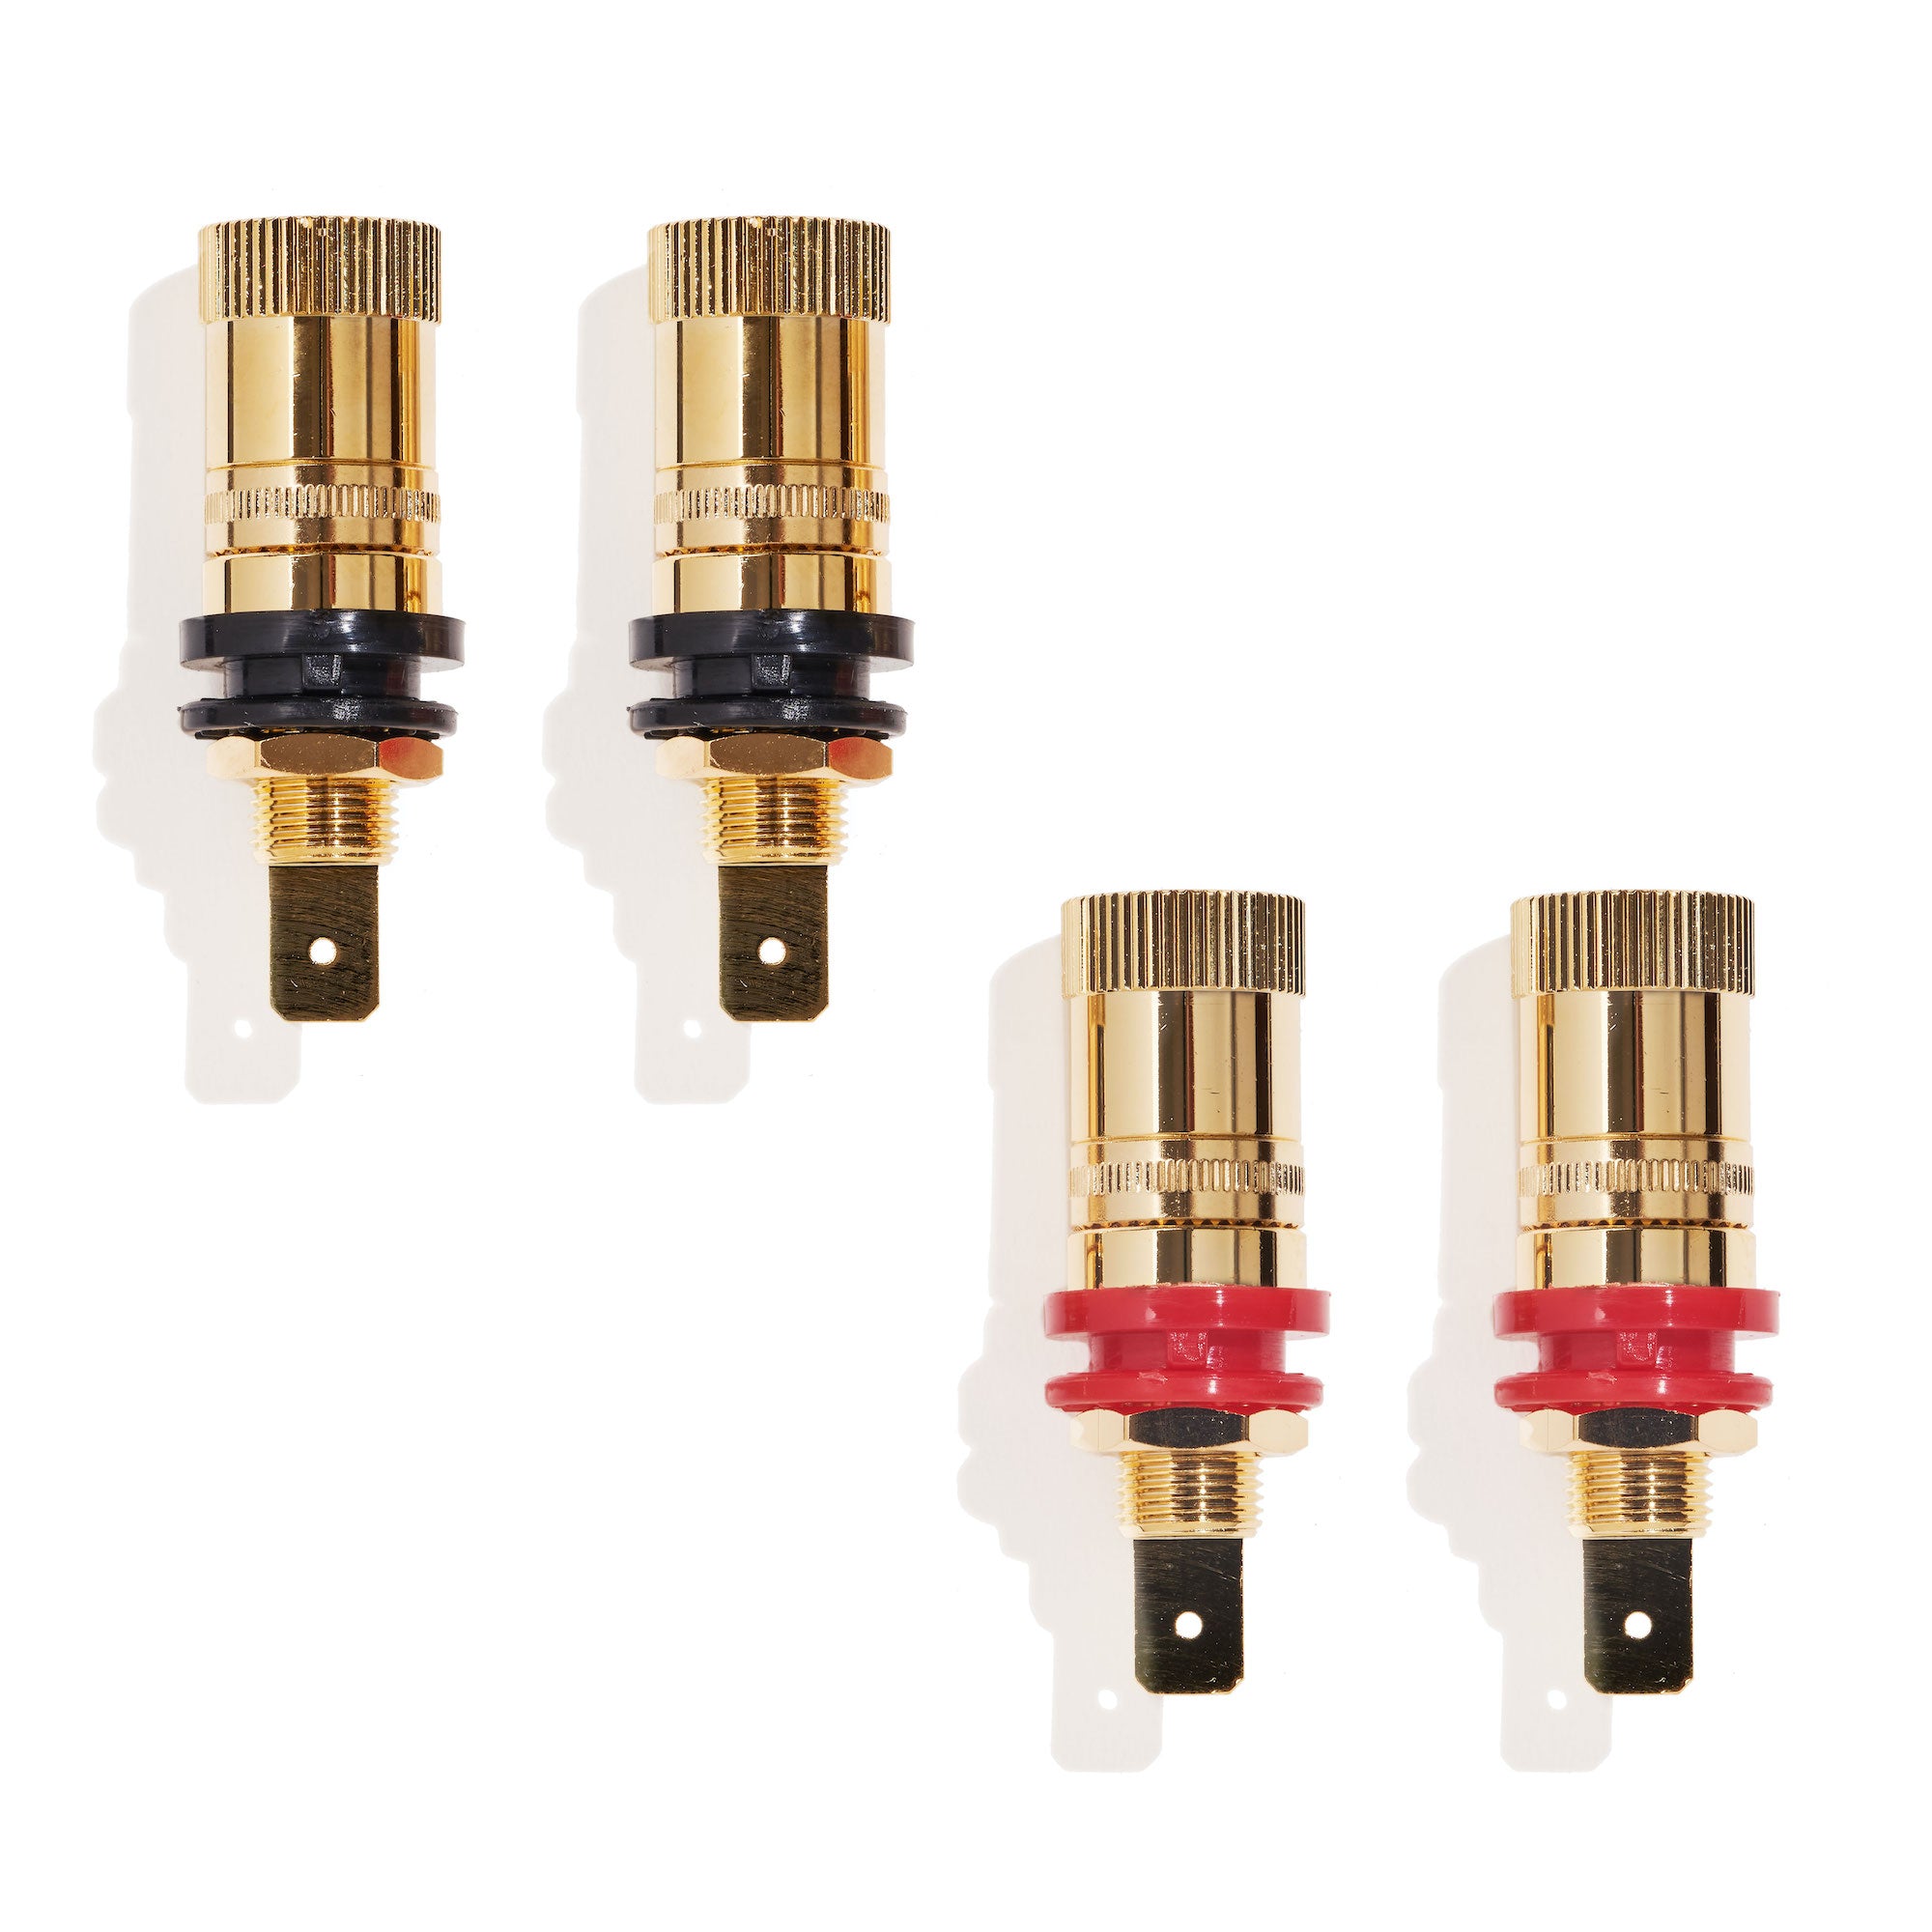

Clearance
We have a very limited number of left-over bits and pieces, mainly dribs and drabs that our warehouse lost and then found again. We're happy to clear them out, and pass on the savings to you. All these items from from our PA warehouse in the US and do not include shipping.
View collection


Crossovers / Equalizers
View collection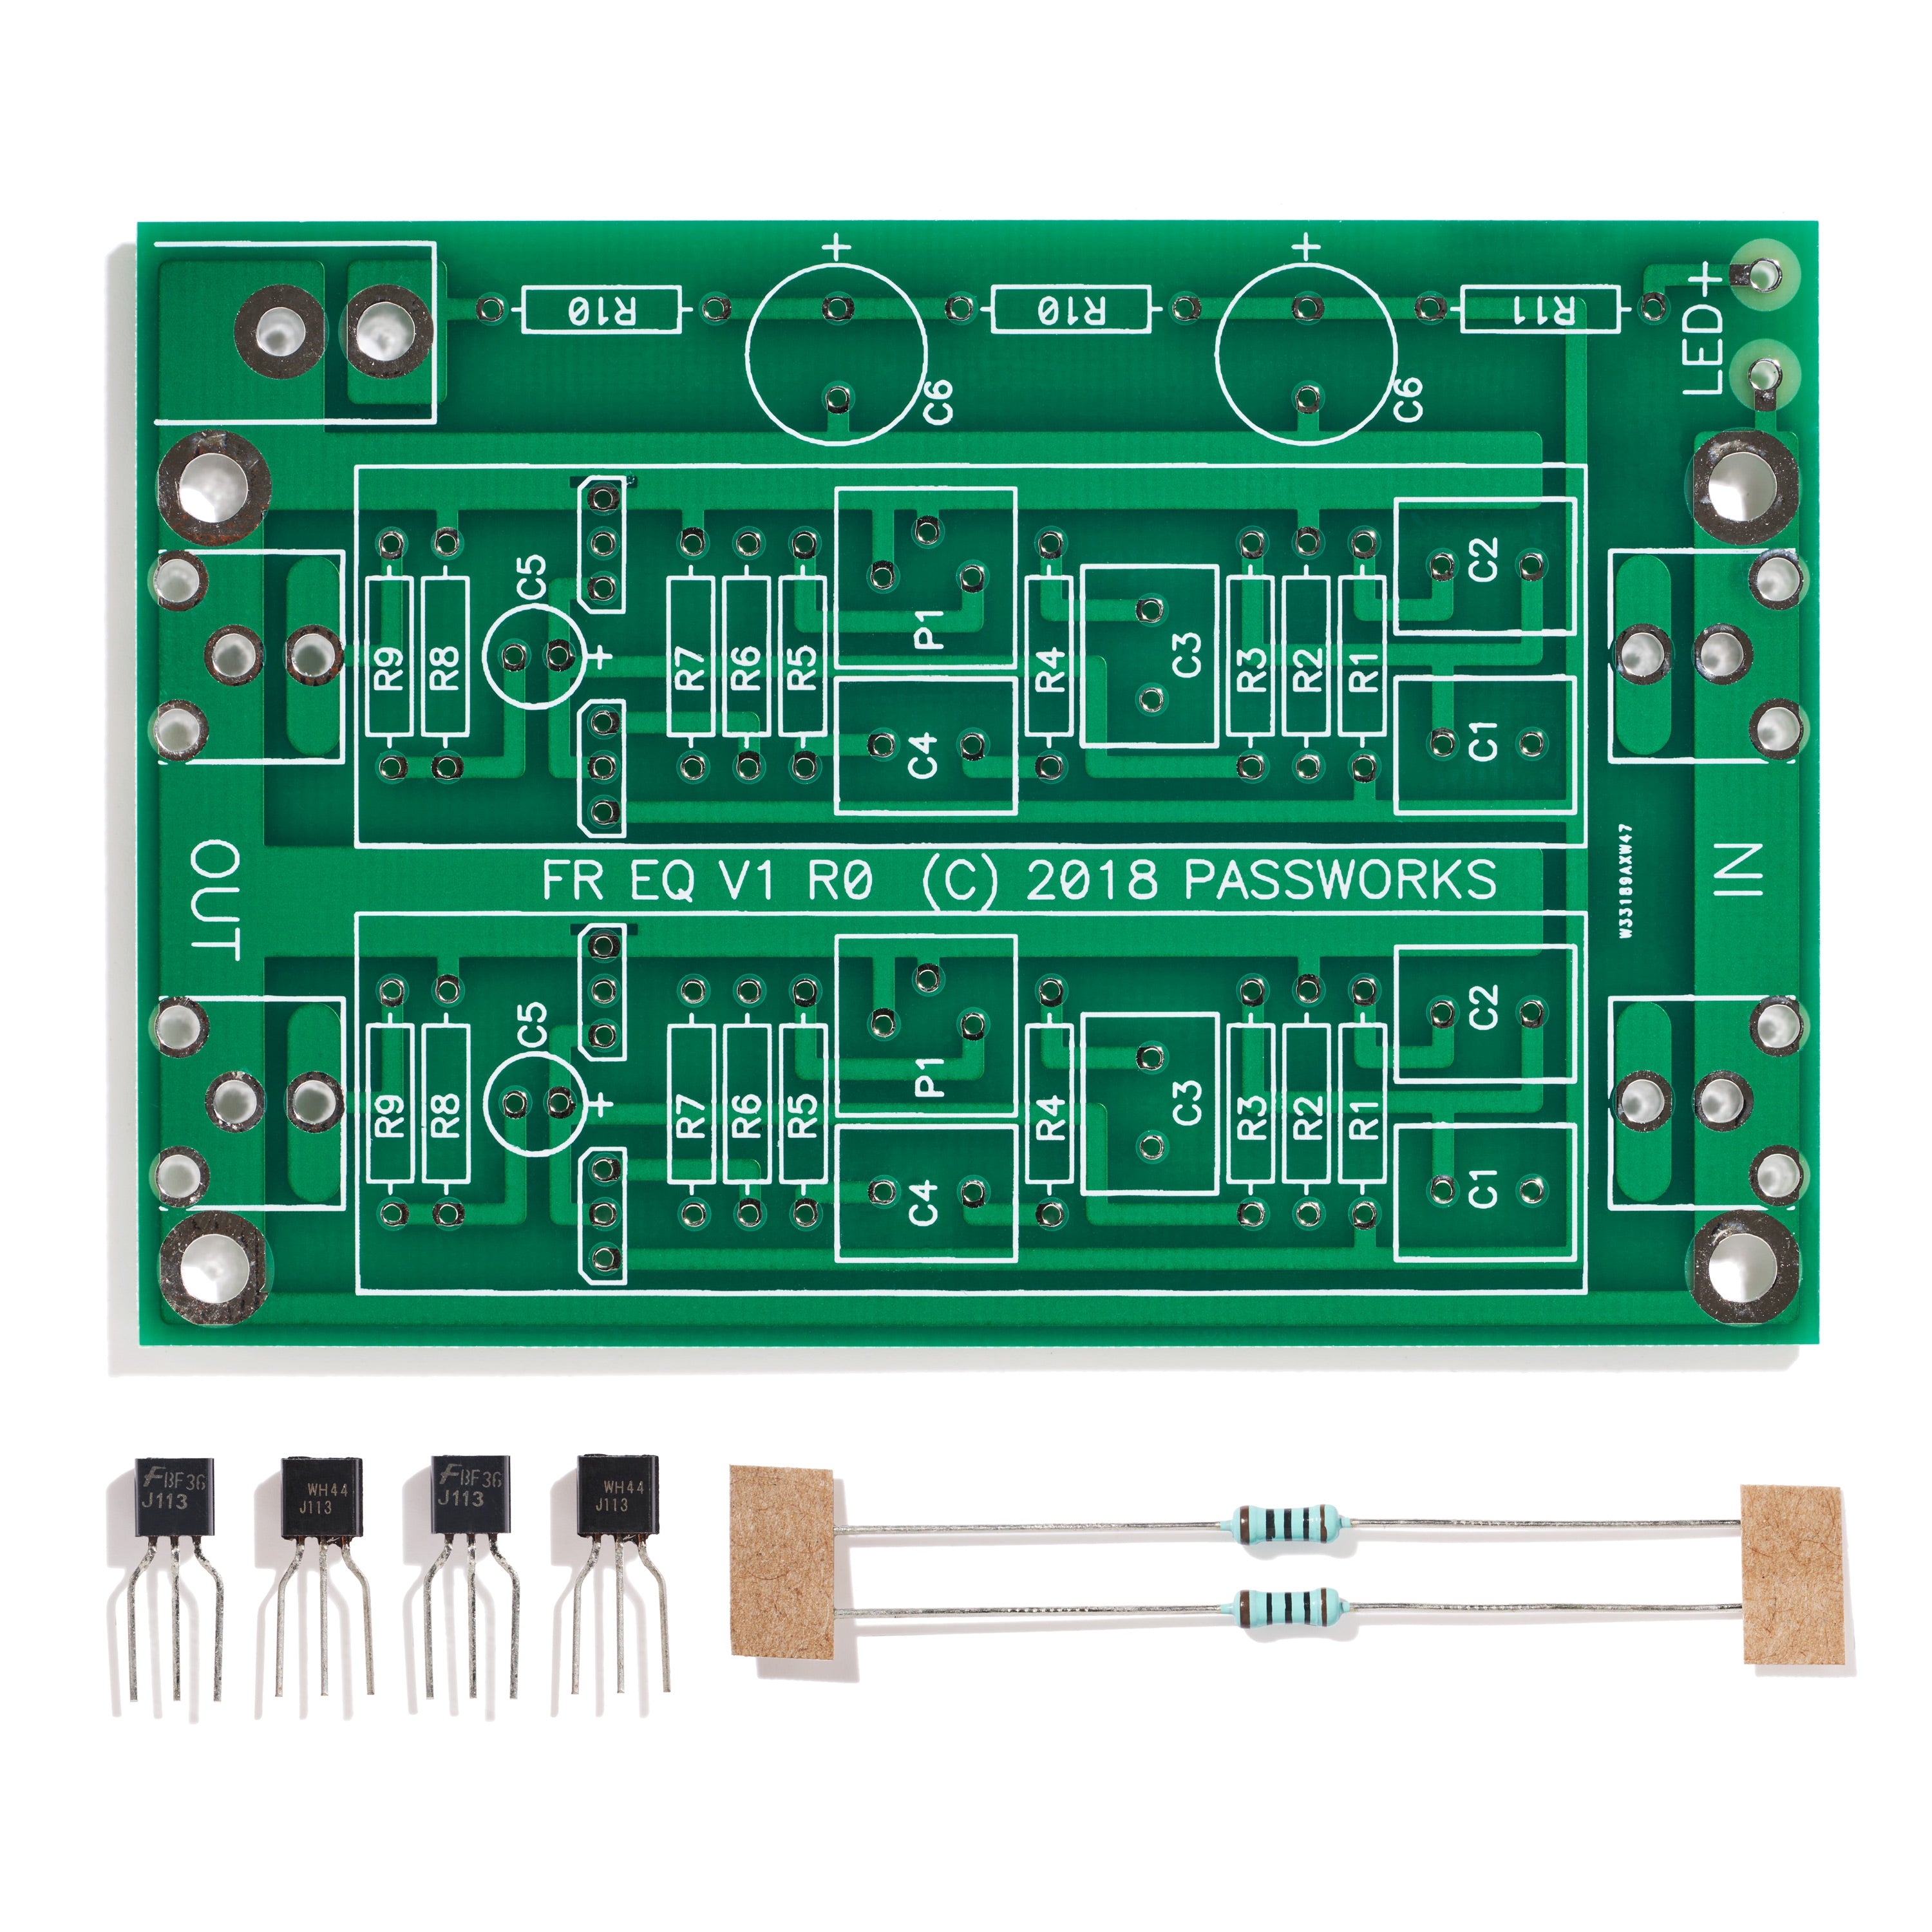


Custom Project Chassis
View collection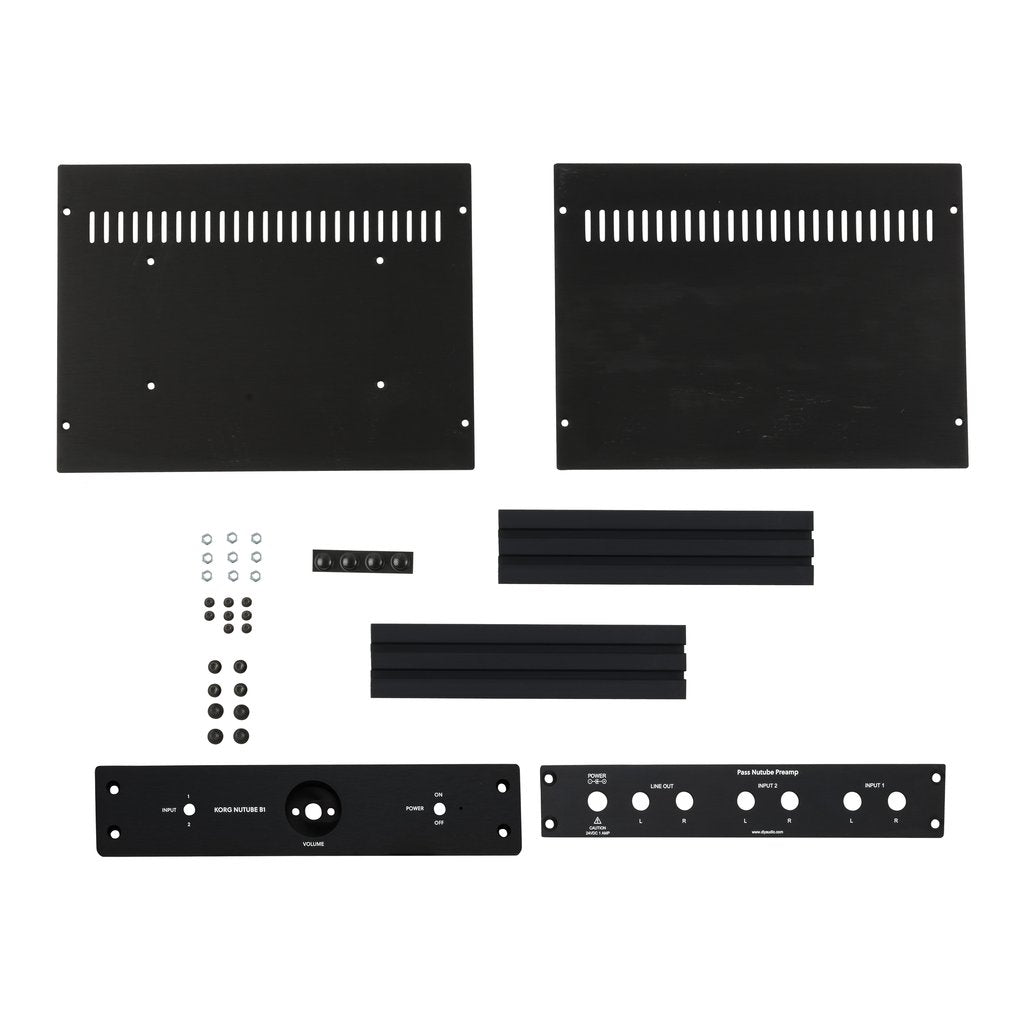
diyAudio Deluxe Chassis
View collectionEqualizers
View collectionHeadphone Amplifiers
View collection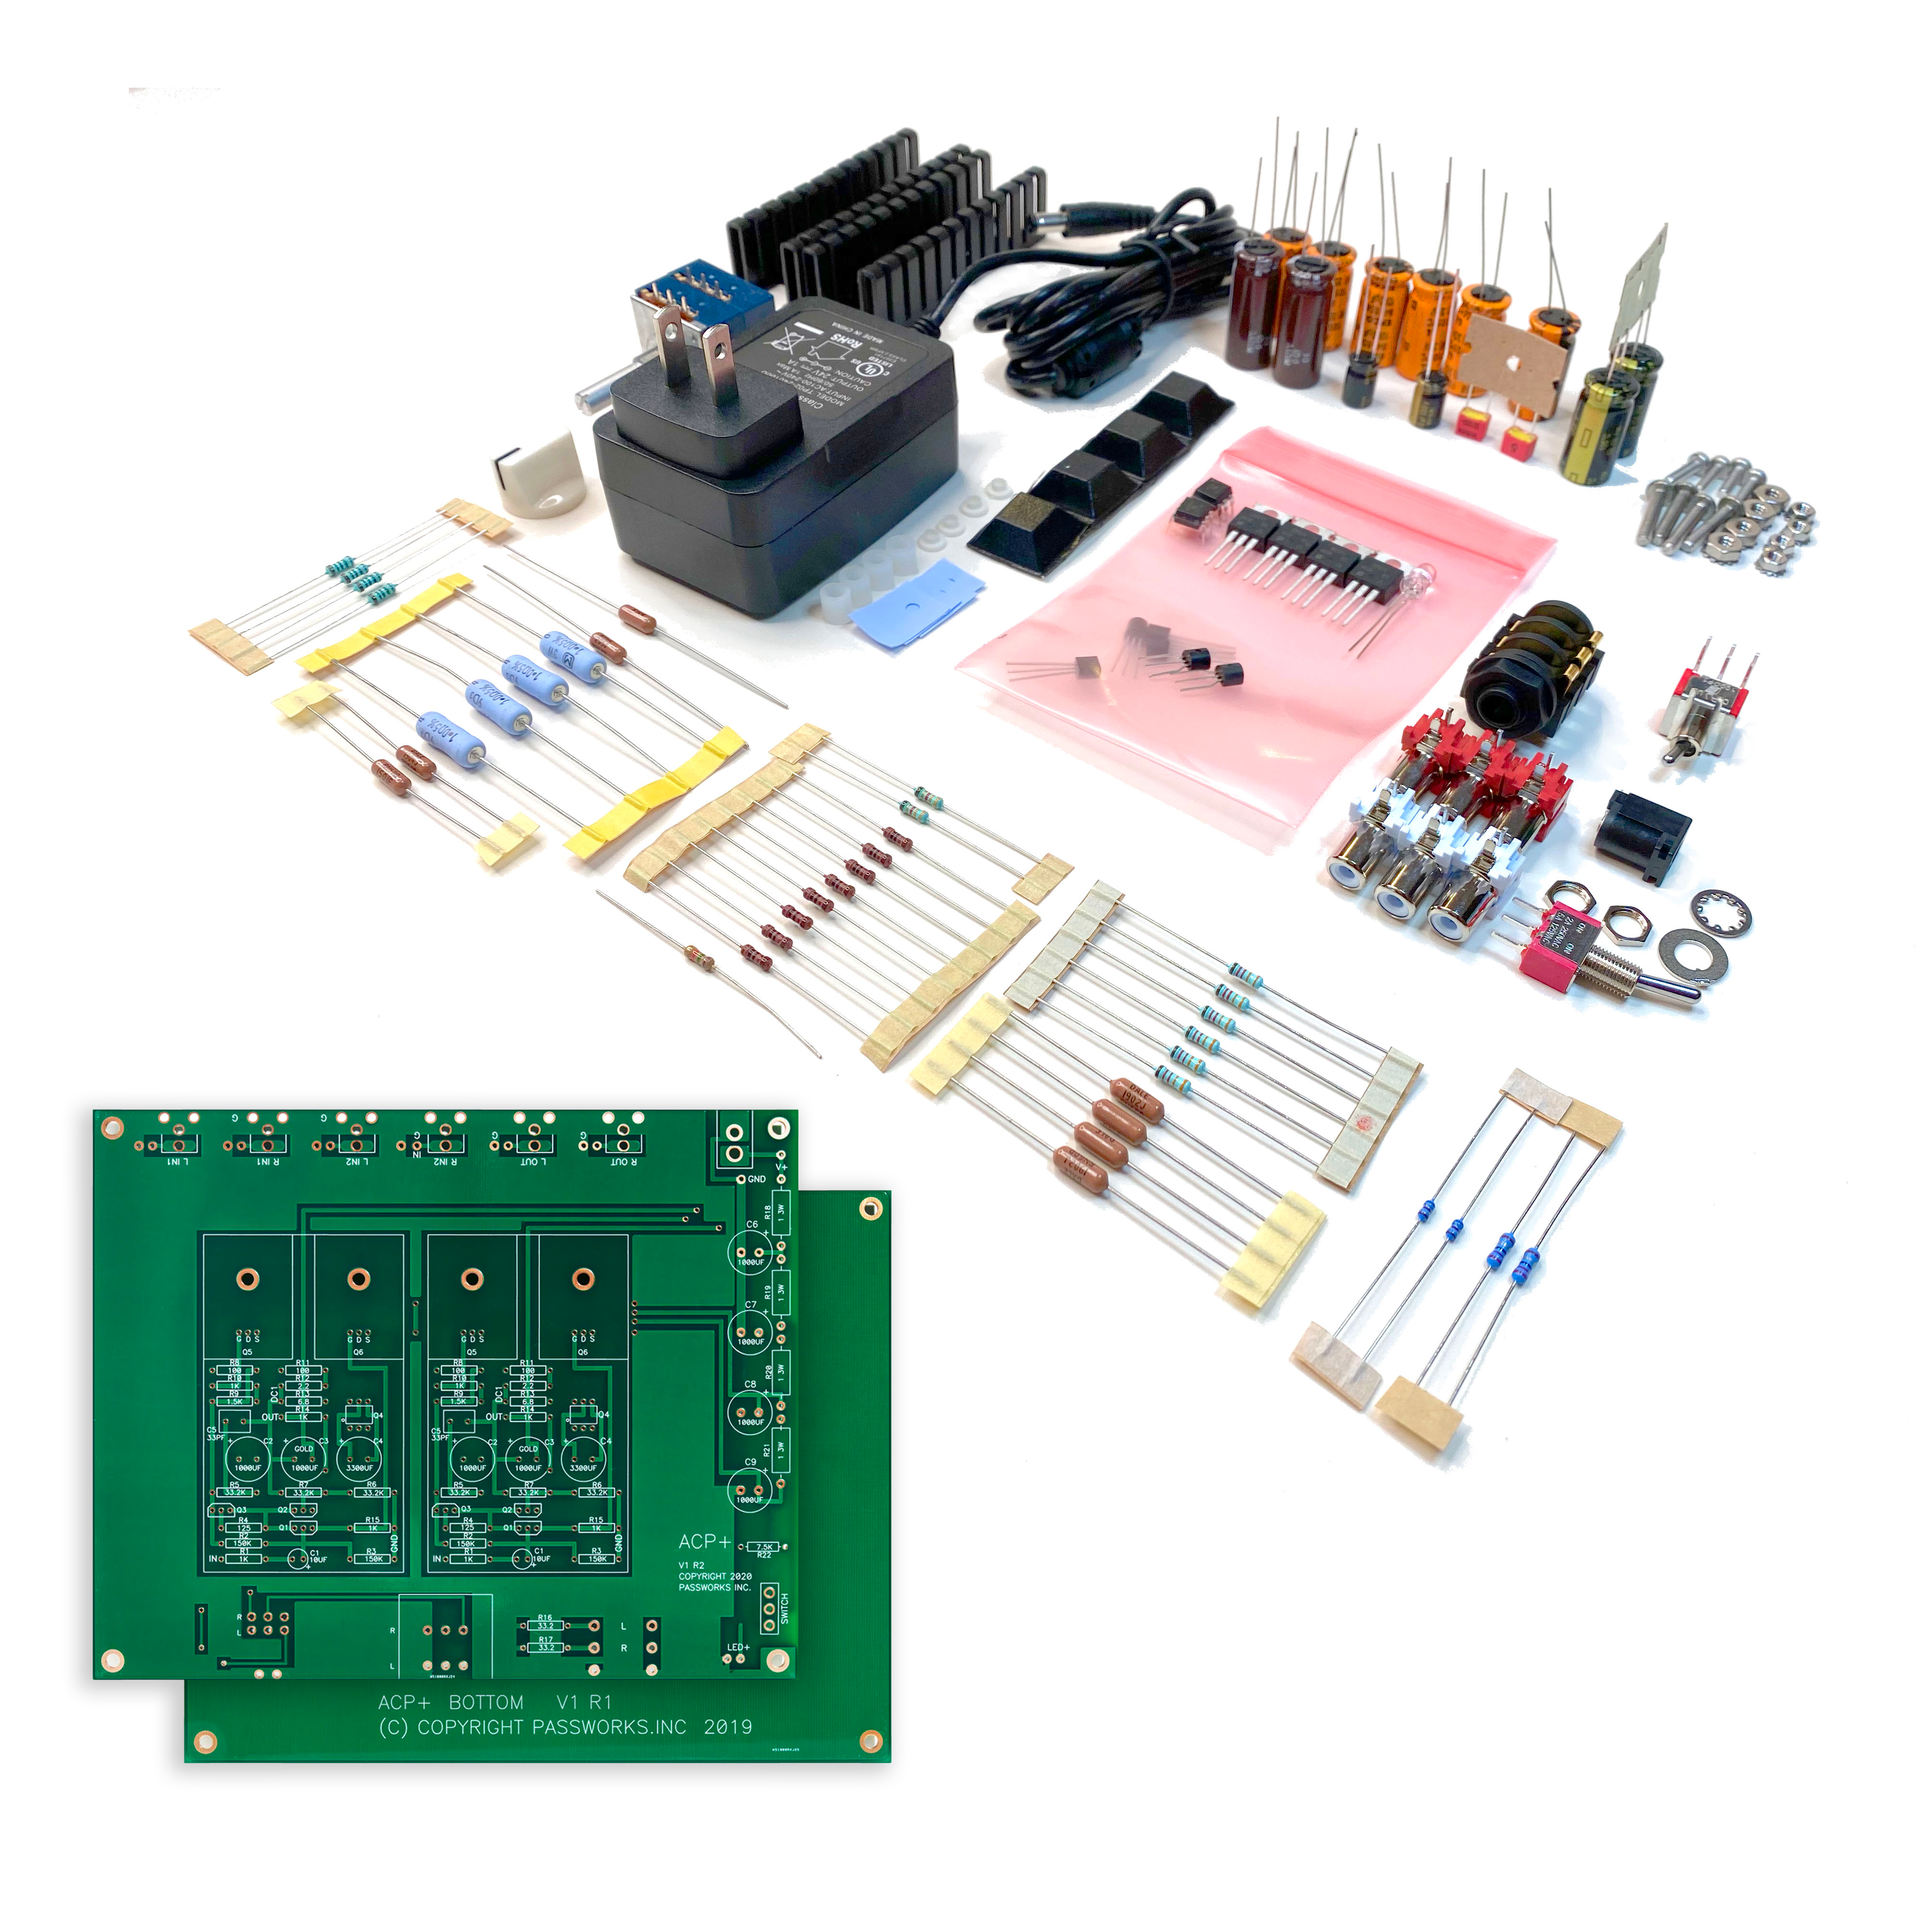


JFETs / MOSFETs / Opamps / Tubes
View collection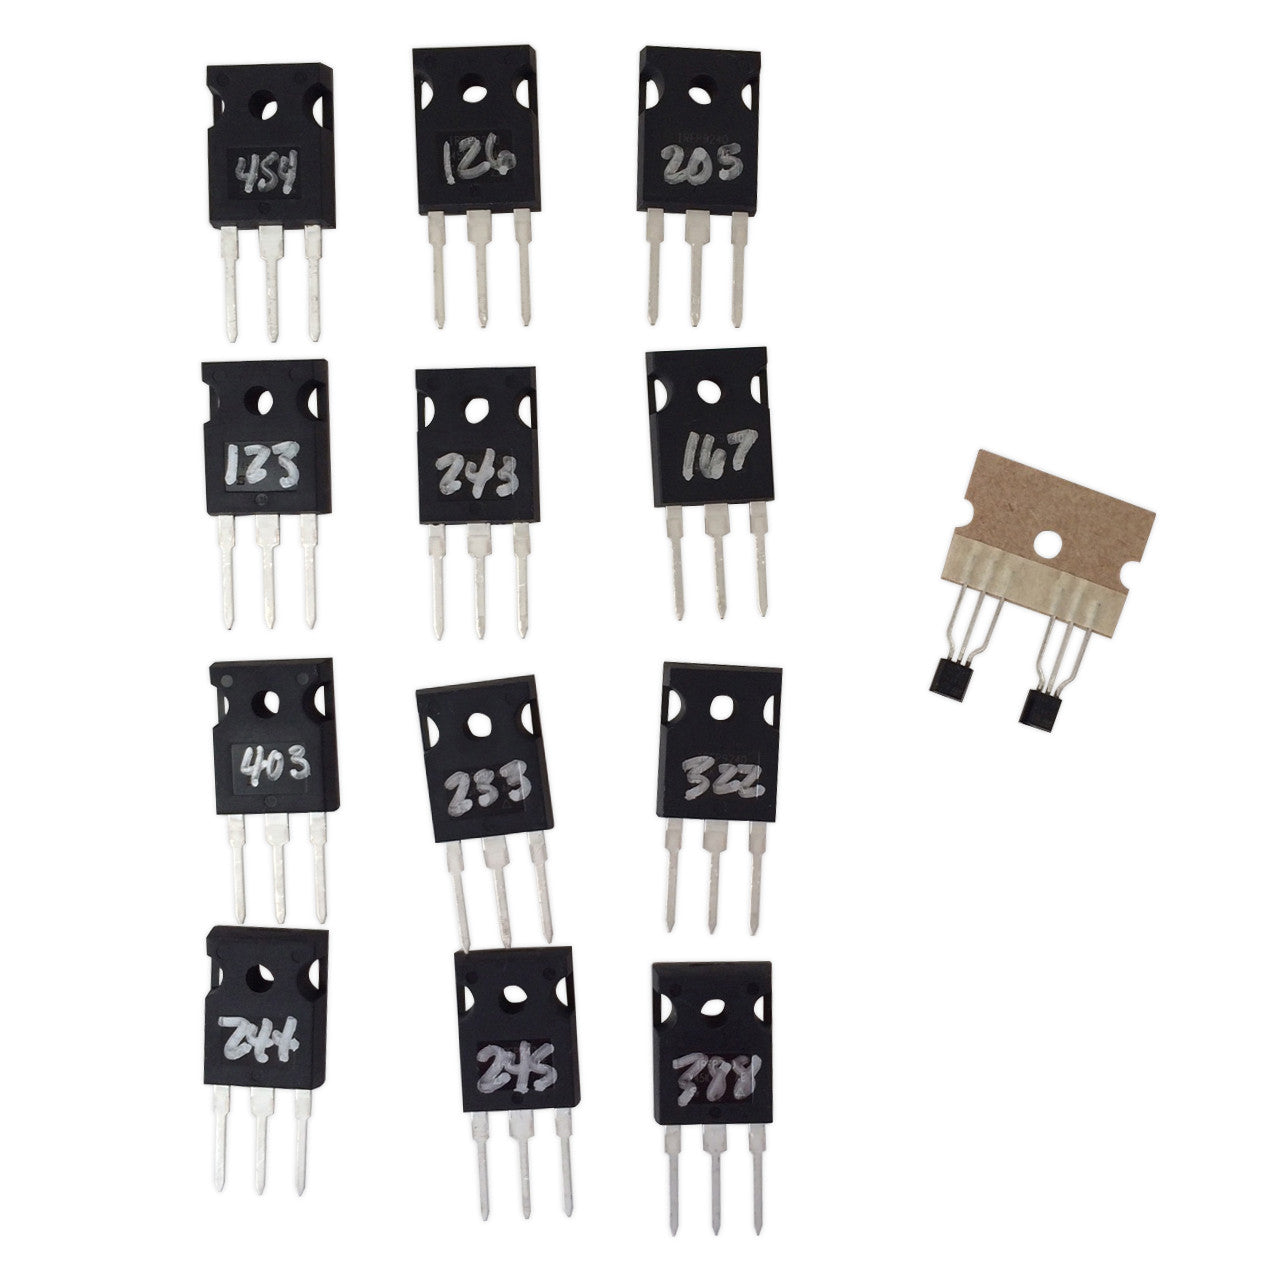


Power Amplifiers / Output Stages
View collection
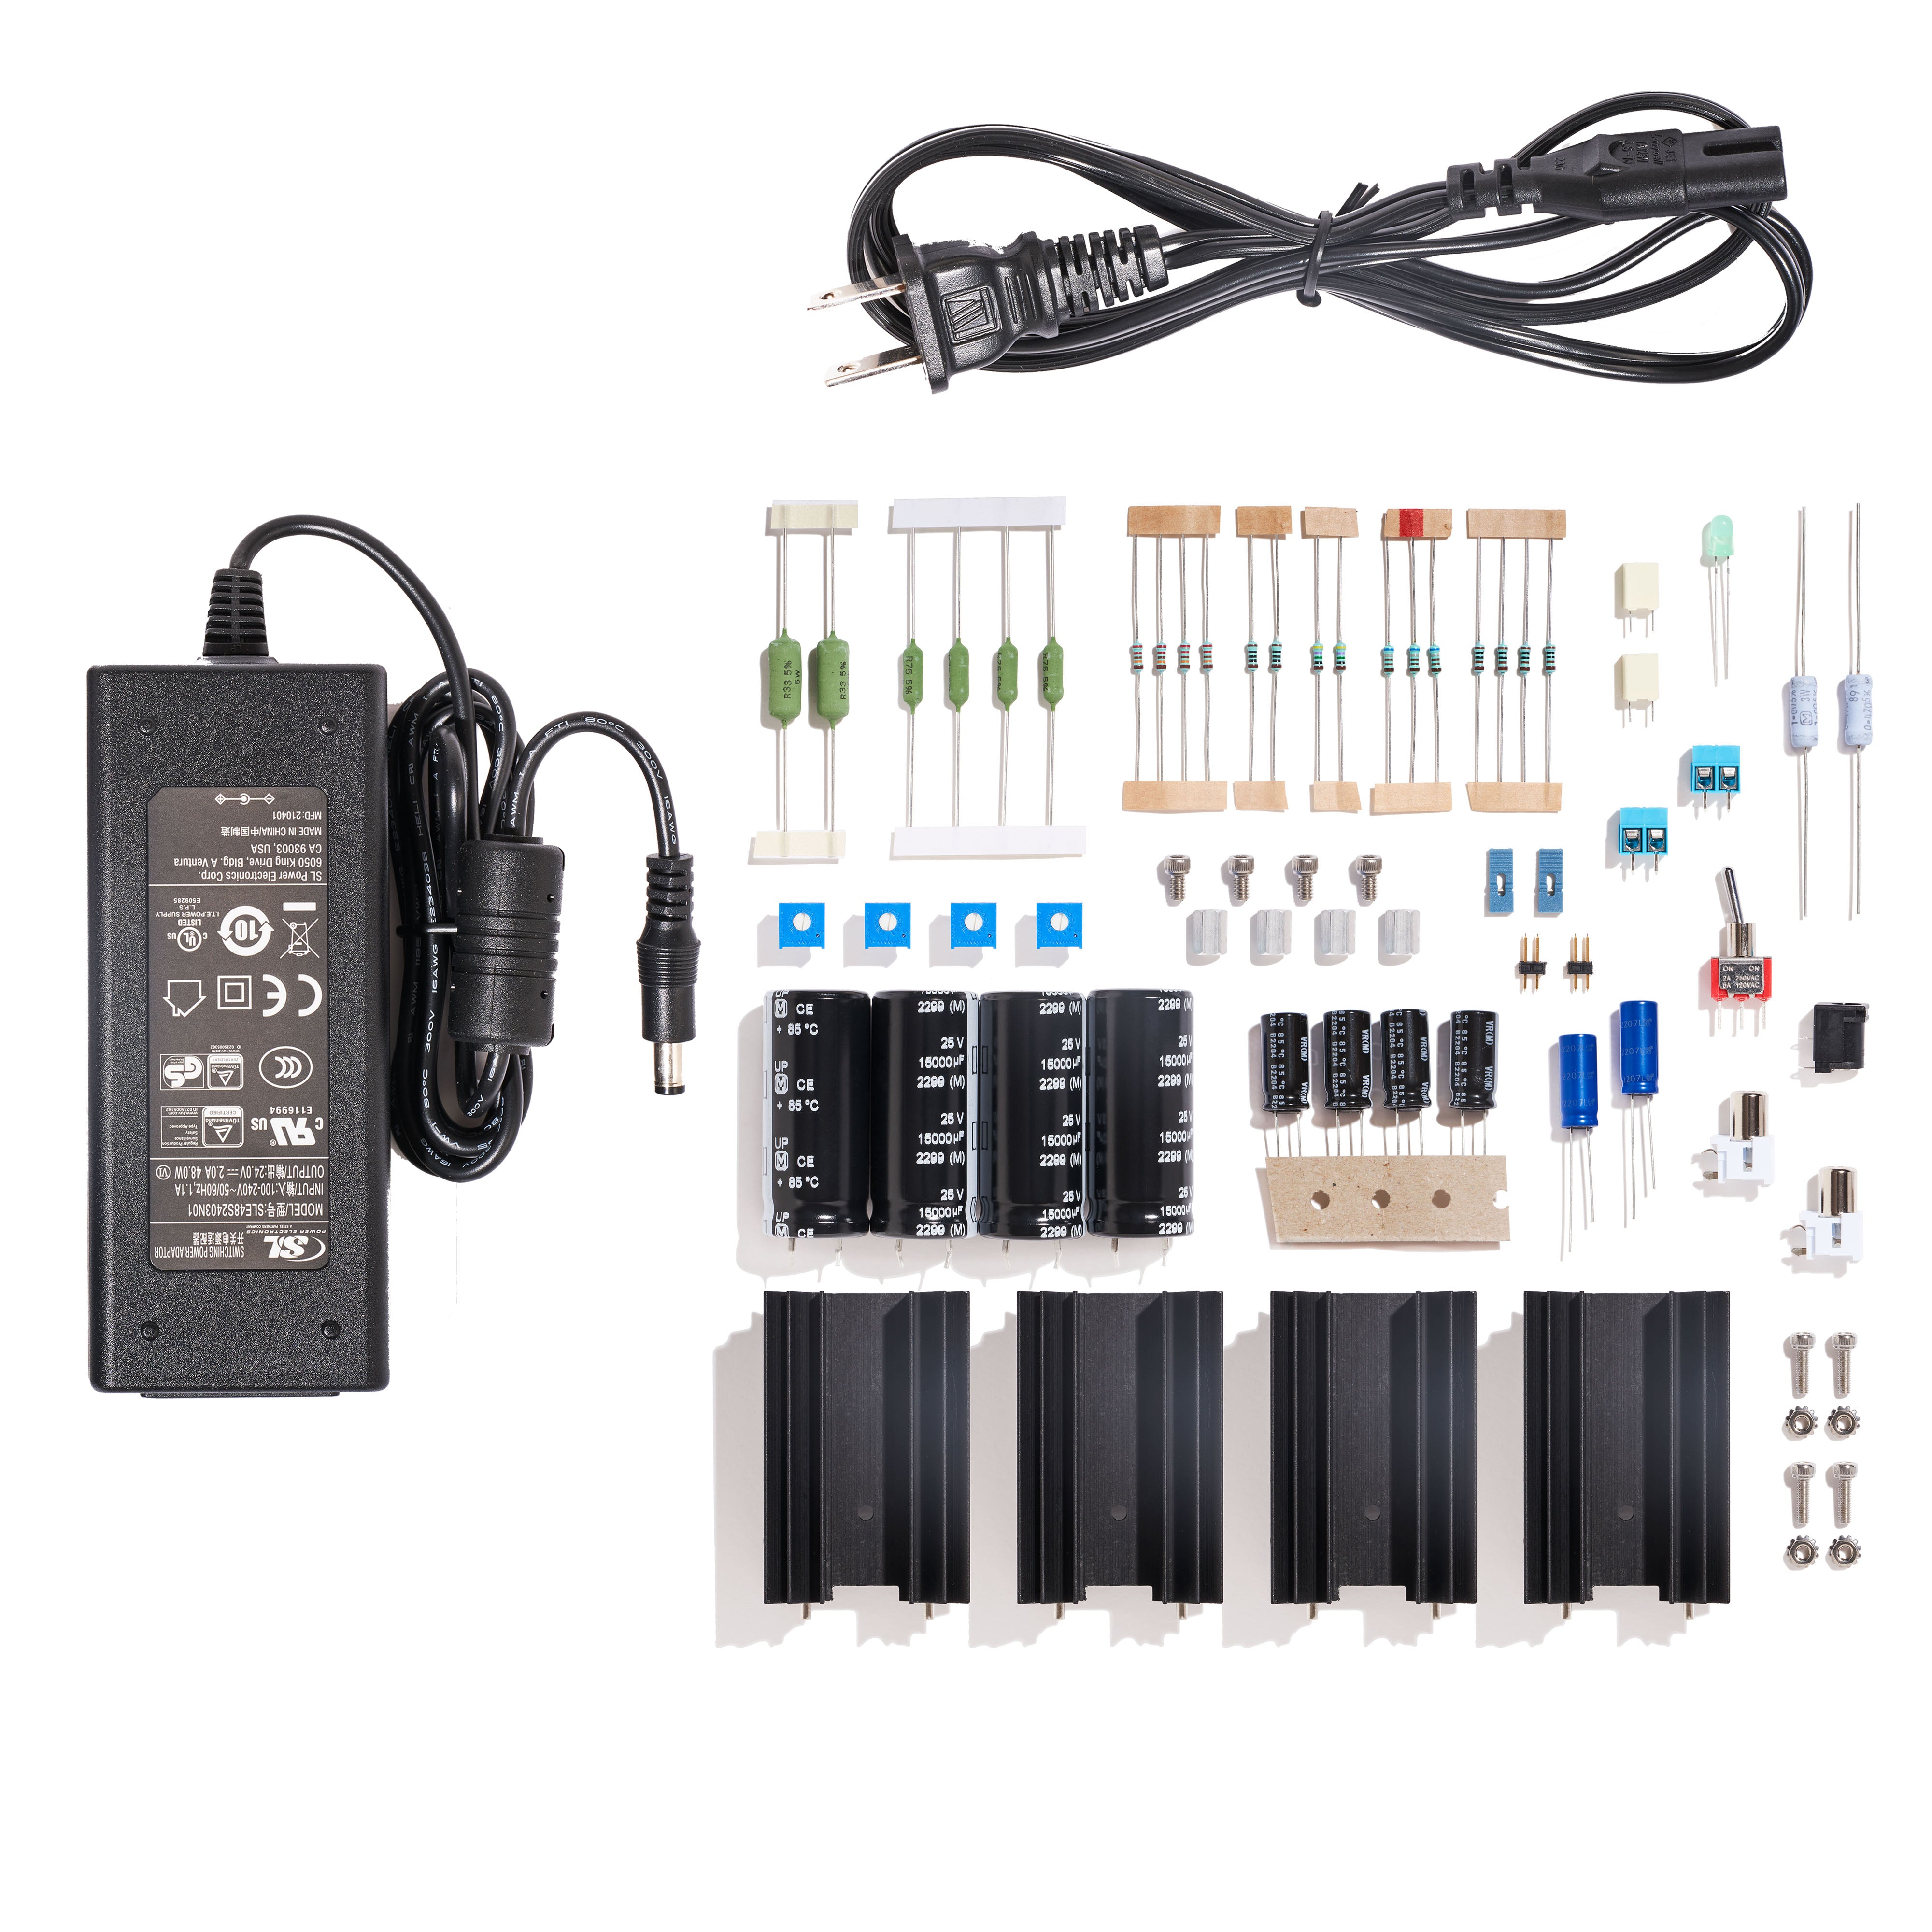
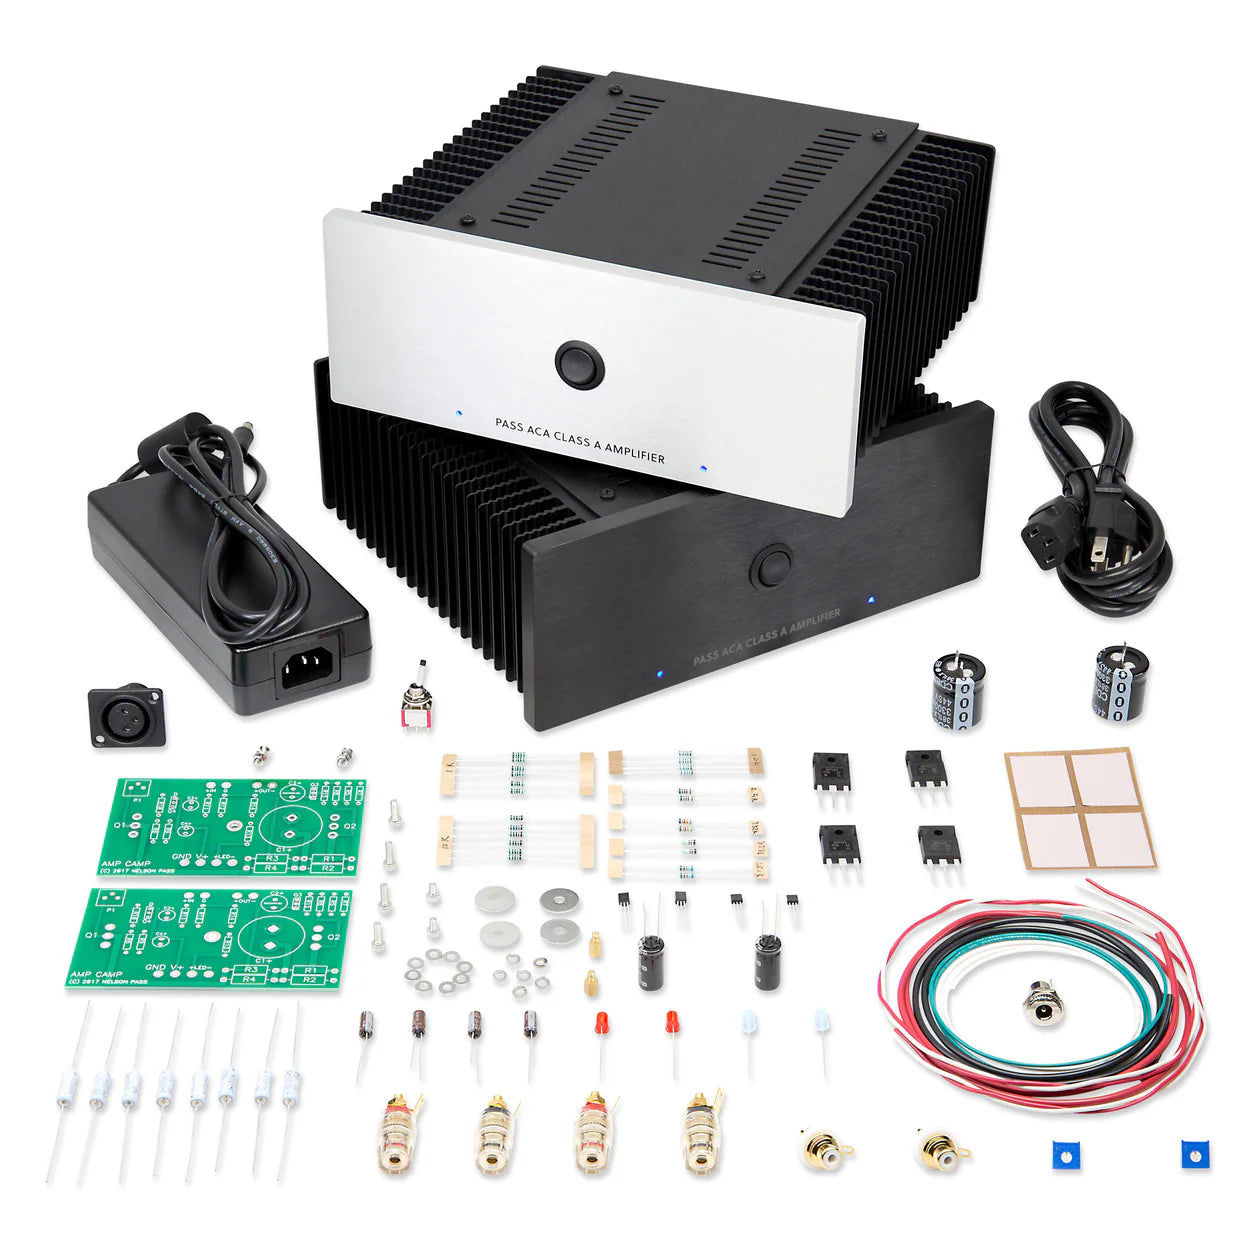
Amp Camp Amp Mini


Power Supplies
View collection


Preamplifiers / Buffers / Phono Stages / Input Stages
View collection
Iron Pre


BA3 Preamplifier

Iron Pre
BA3 Preamplifier

BA2018 Linestage


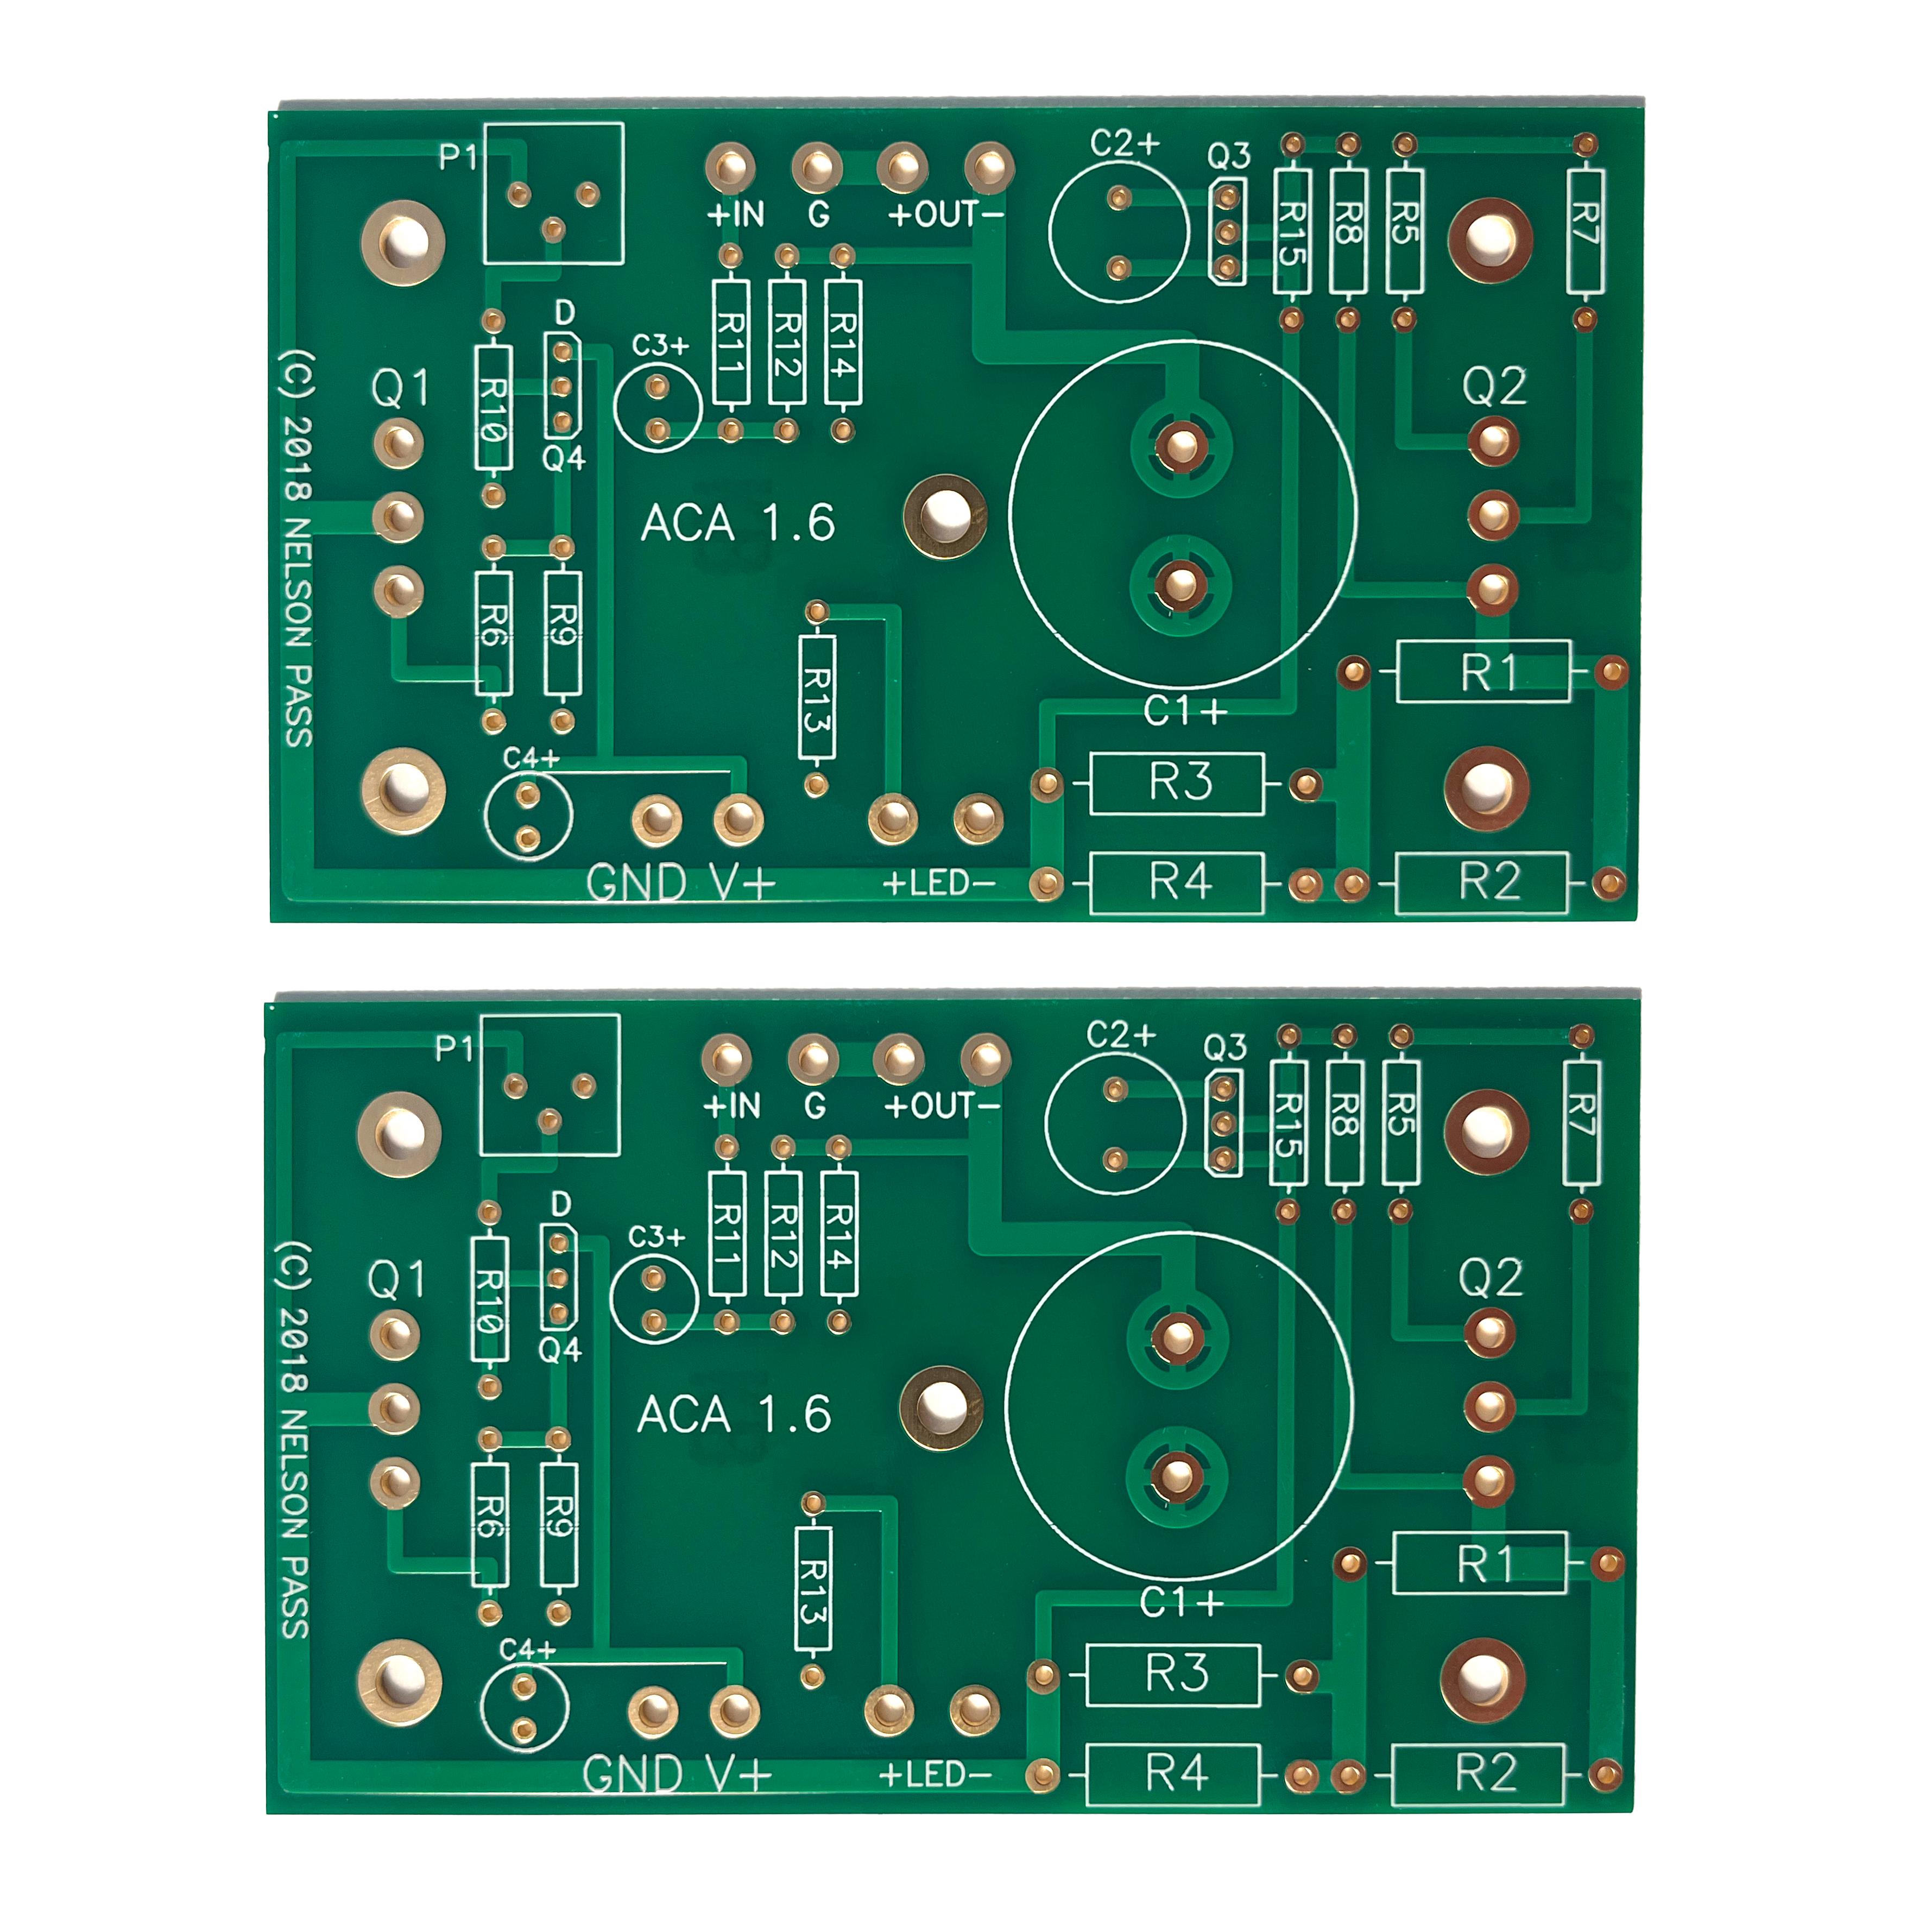
Project: ACA Mini
The ACA Mini has become one of the top recommendations as an answer to the question "What amplifier should I build first?". The entire project can be completed in an afternoon or two. It's perfect for dorm rooms, small spaces, dens, listening rooms, and everything in-between.
The Complete Build Guide and the full kit with all the parts you need, make this project accessible to almost everyone with a soldering iron and some basic tools.
And... it sounds pretty fabulous too.
Pair it with an ACP+ for an absolutely amazing headphone amp, pre-amp, amplifier combination / mini-system.
Learn more and discuss the ACA Mini in the DIY ACA Mini thread at diyAudio.
View collection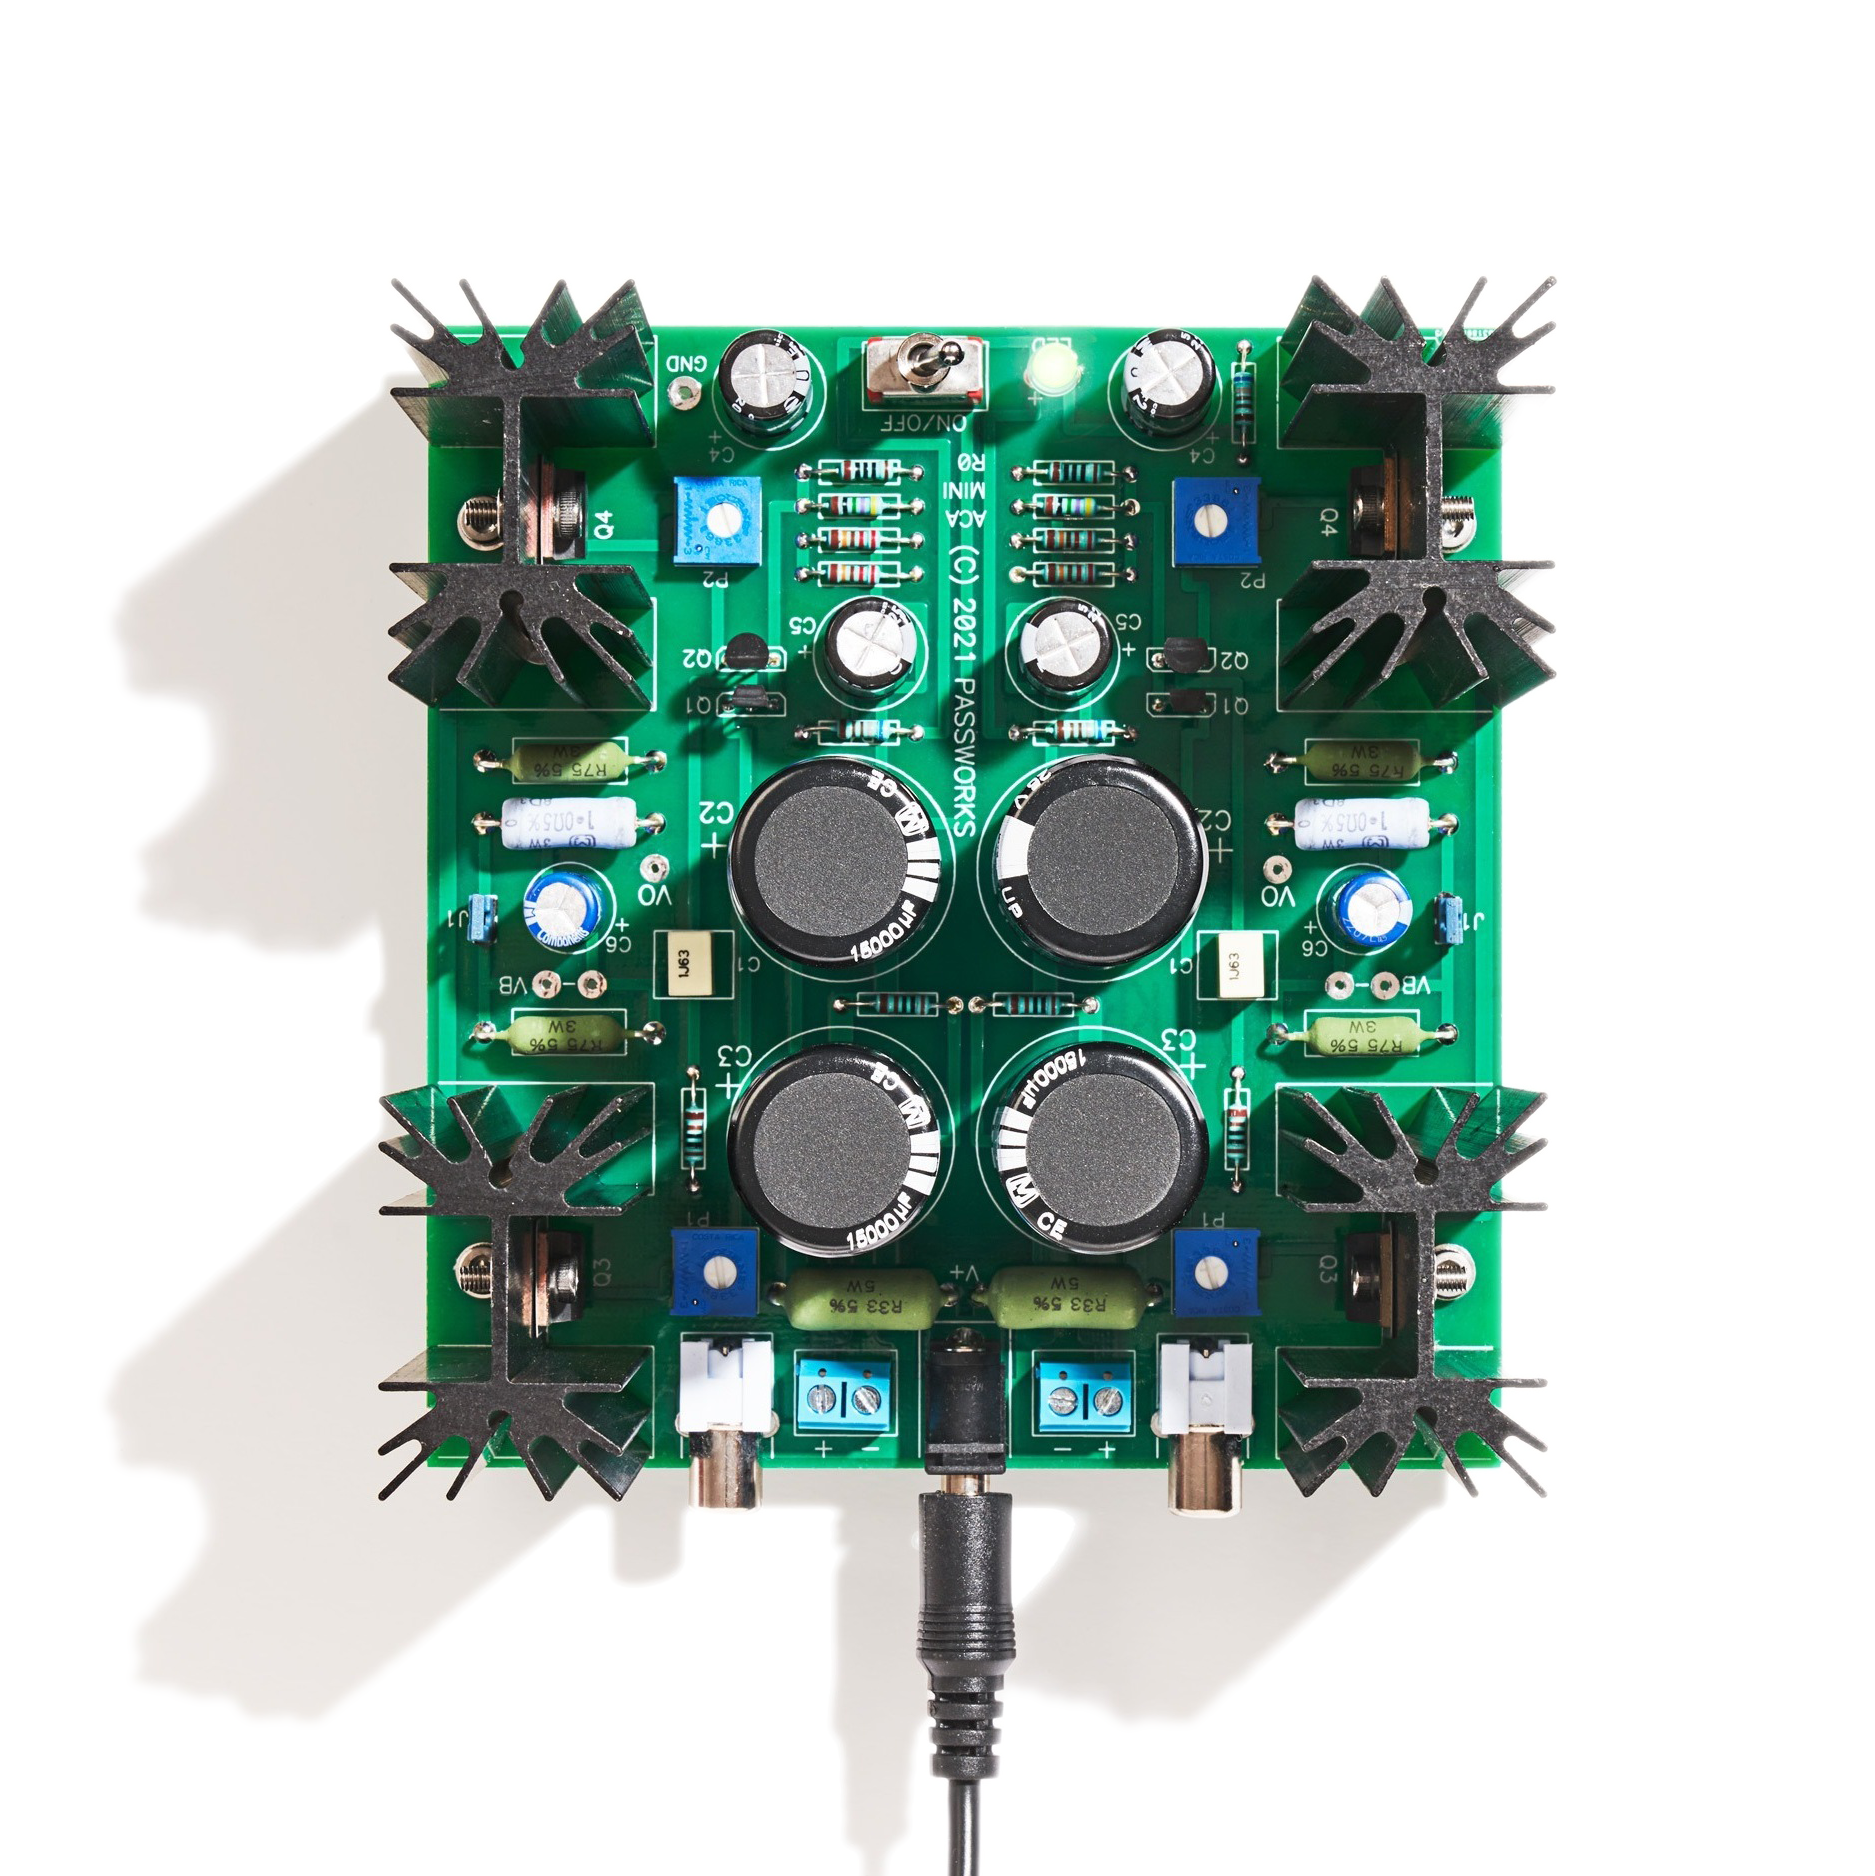
Amp Camp Amp Mini

Amp Camp Amp Mini
Amp Camp Amp Mini
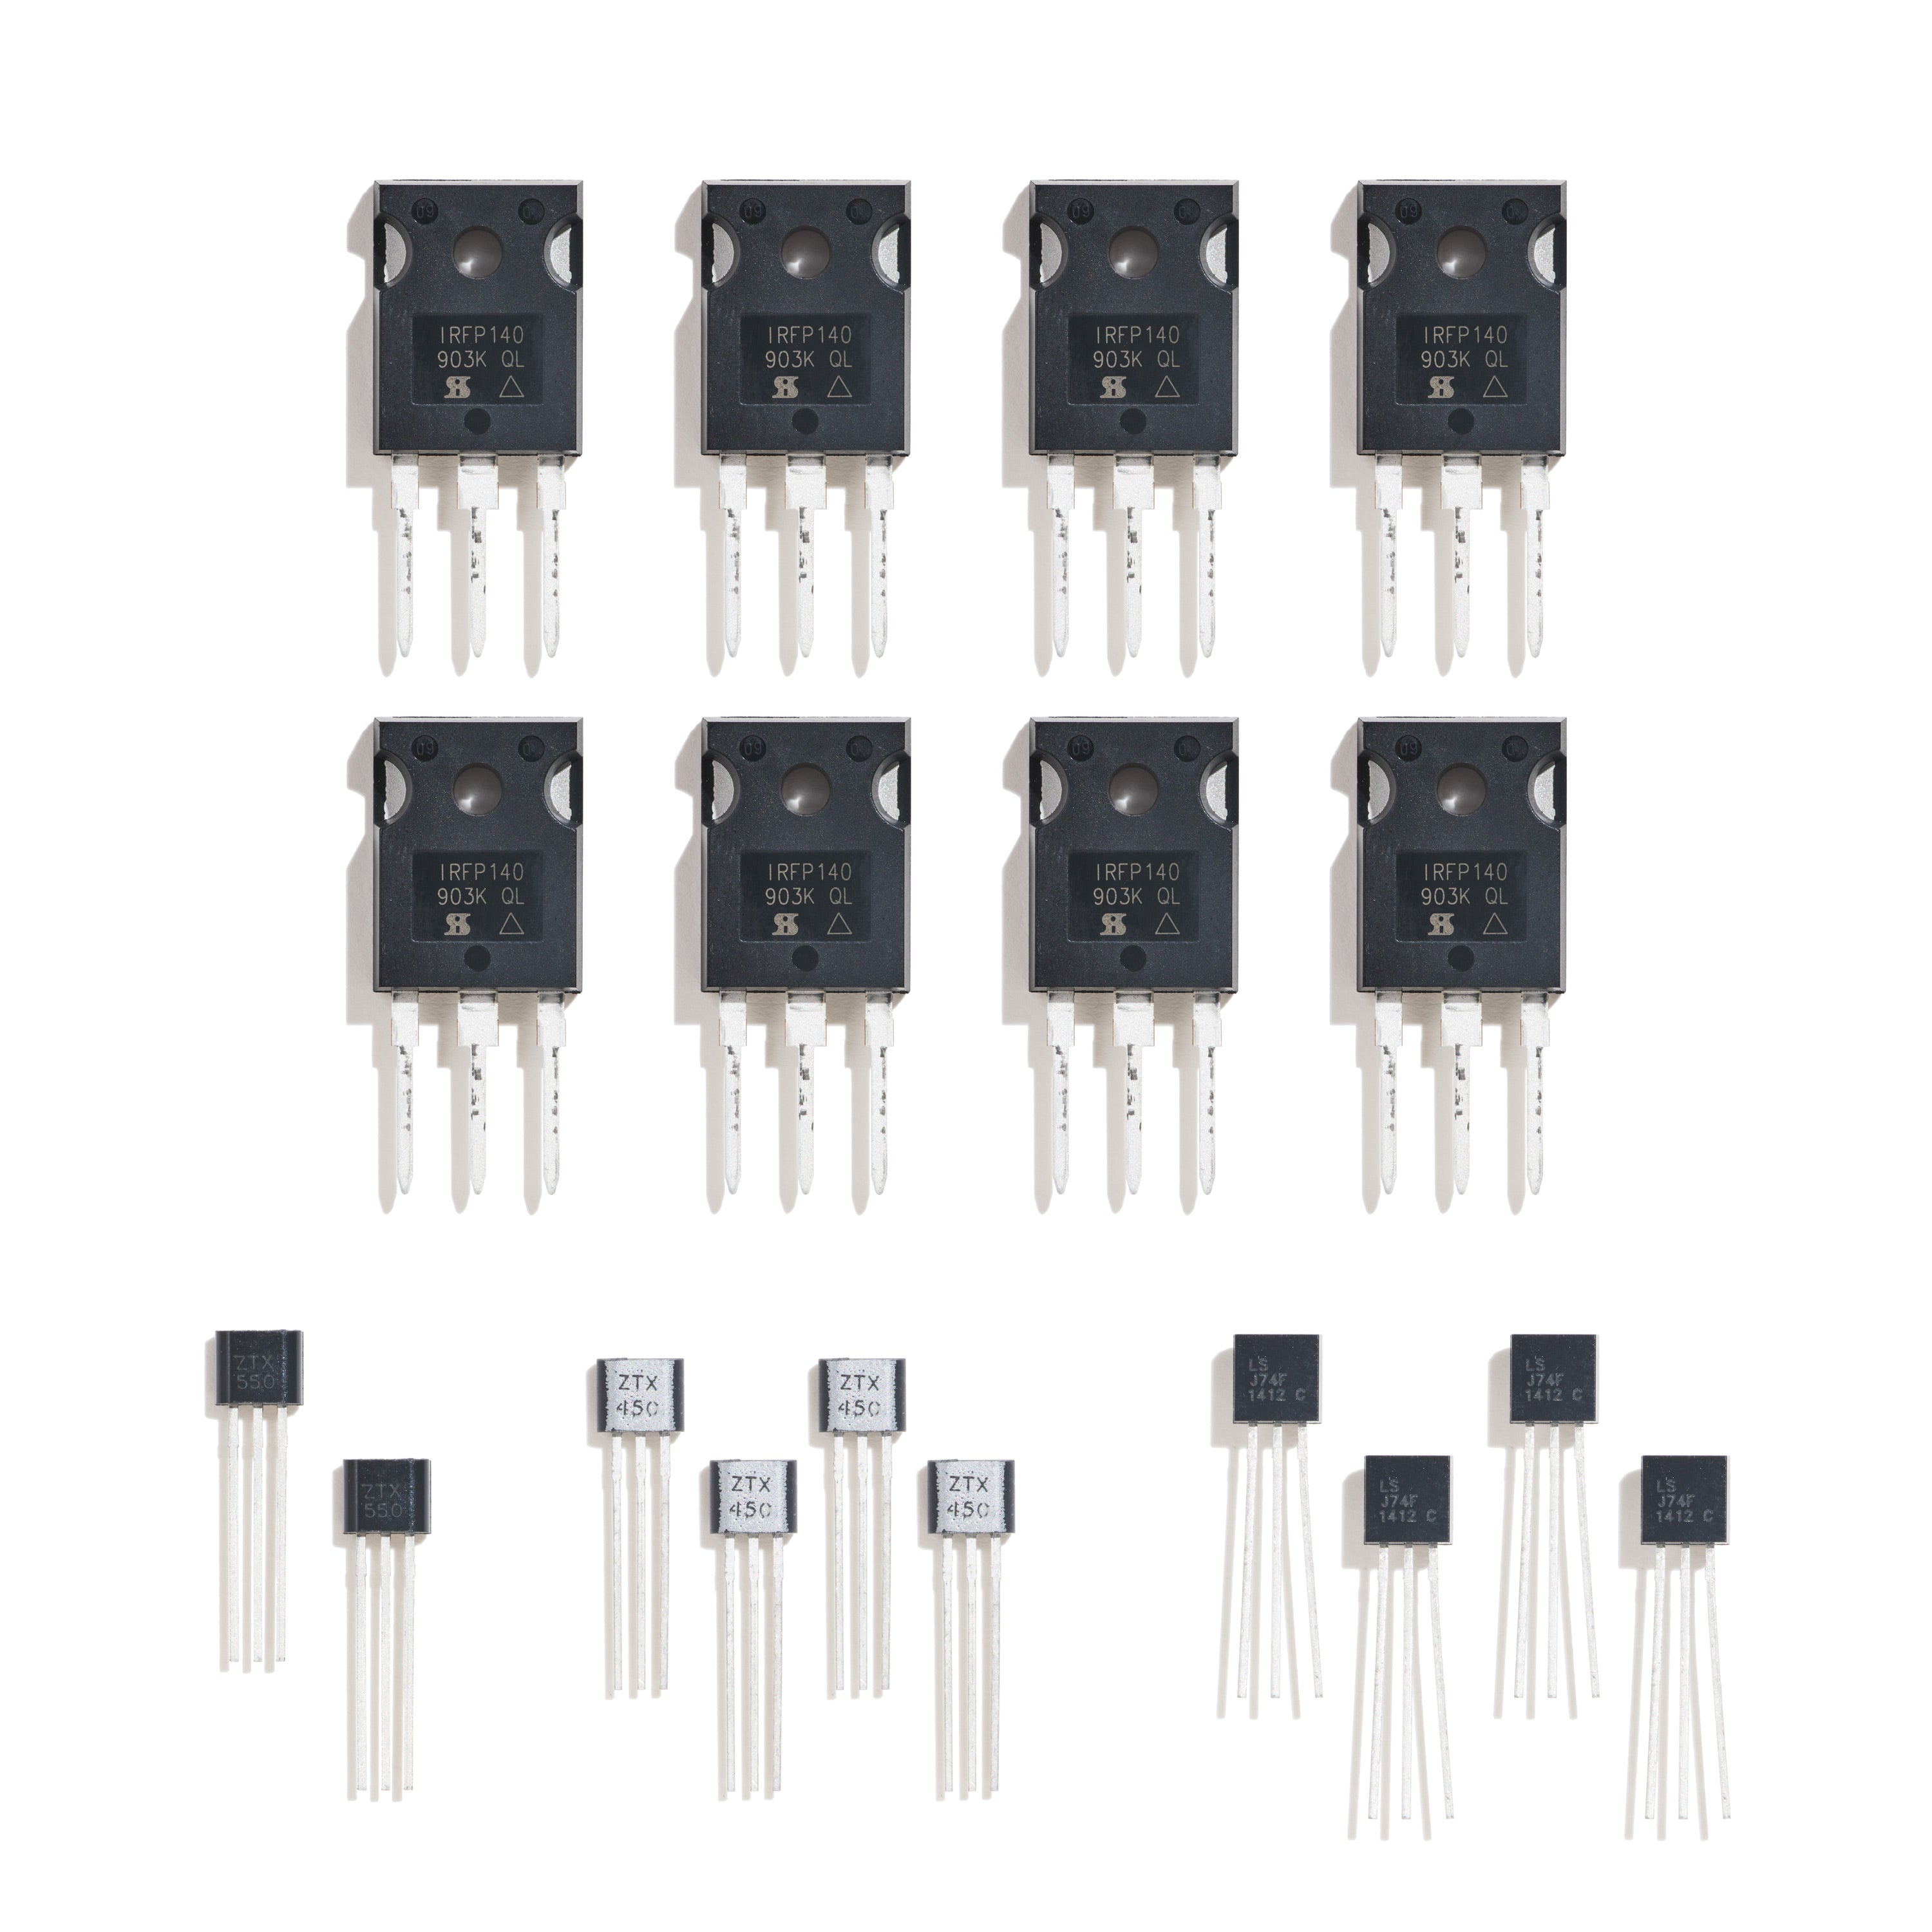
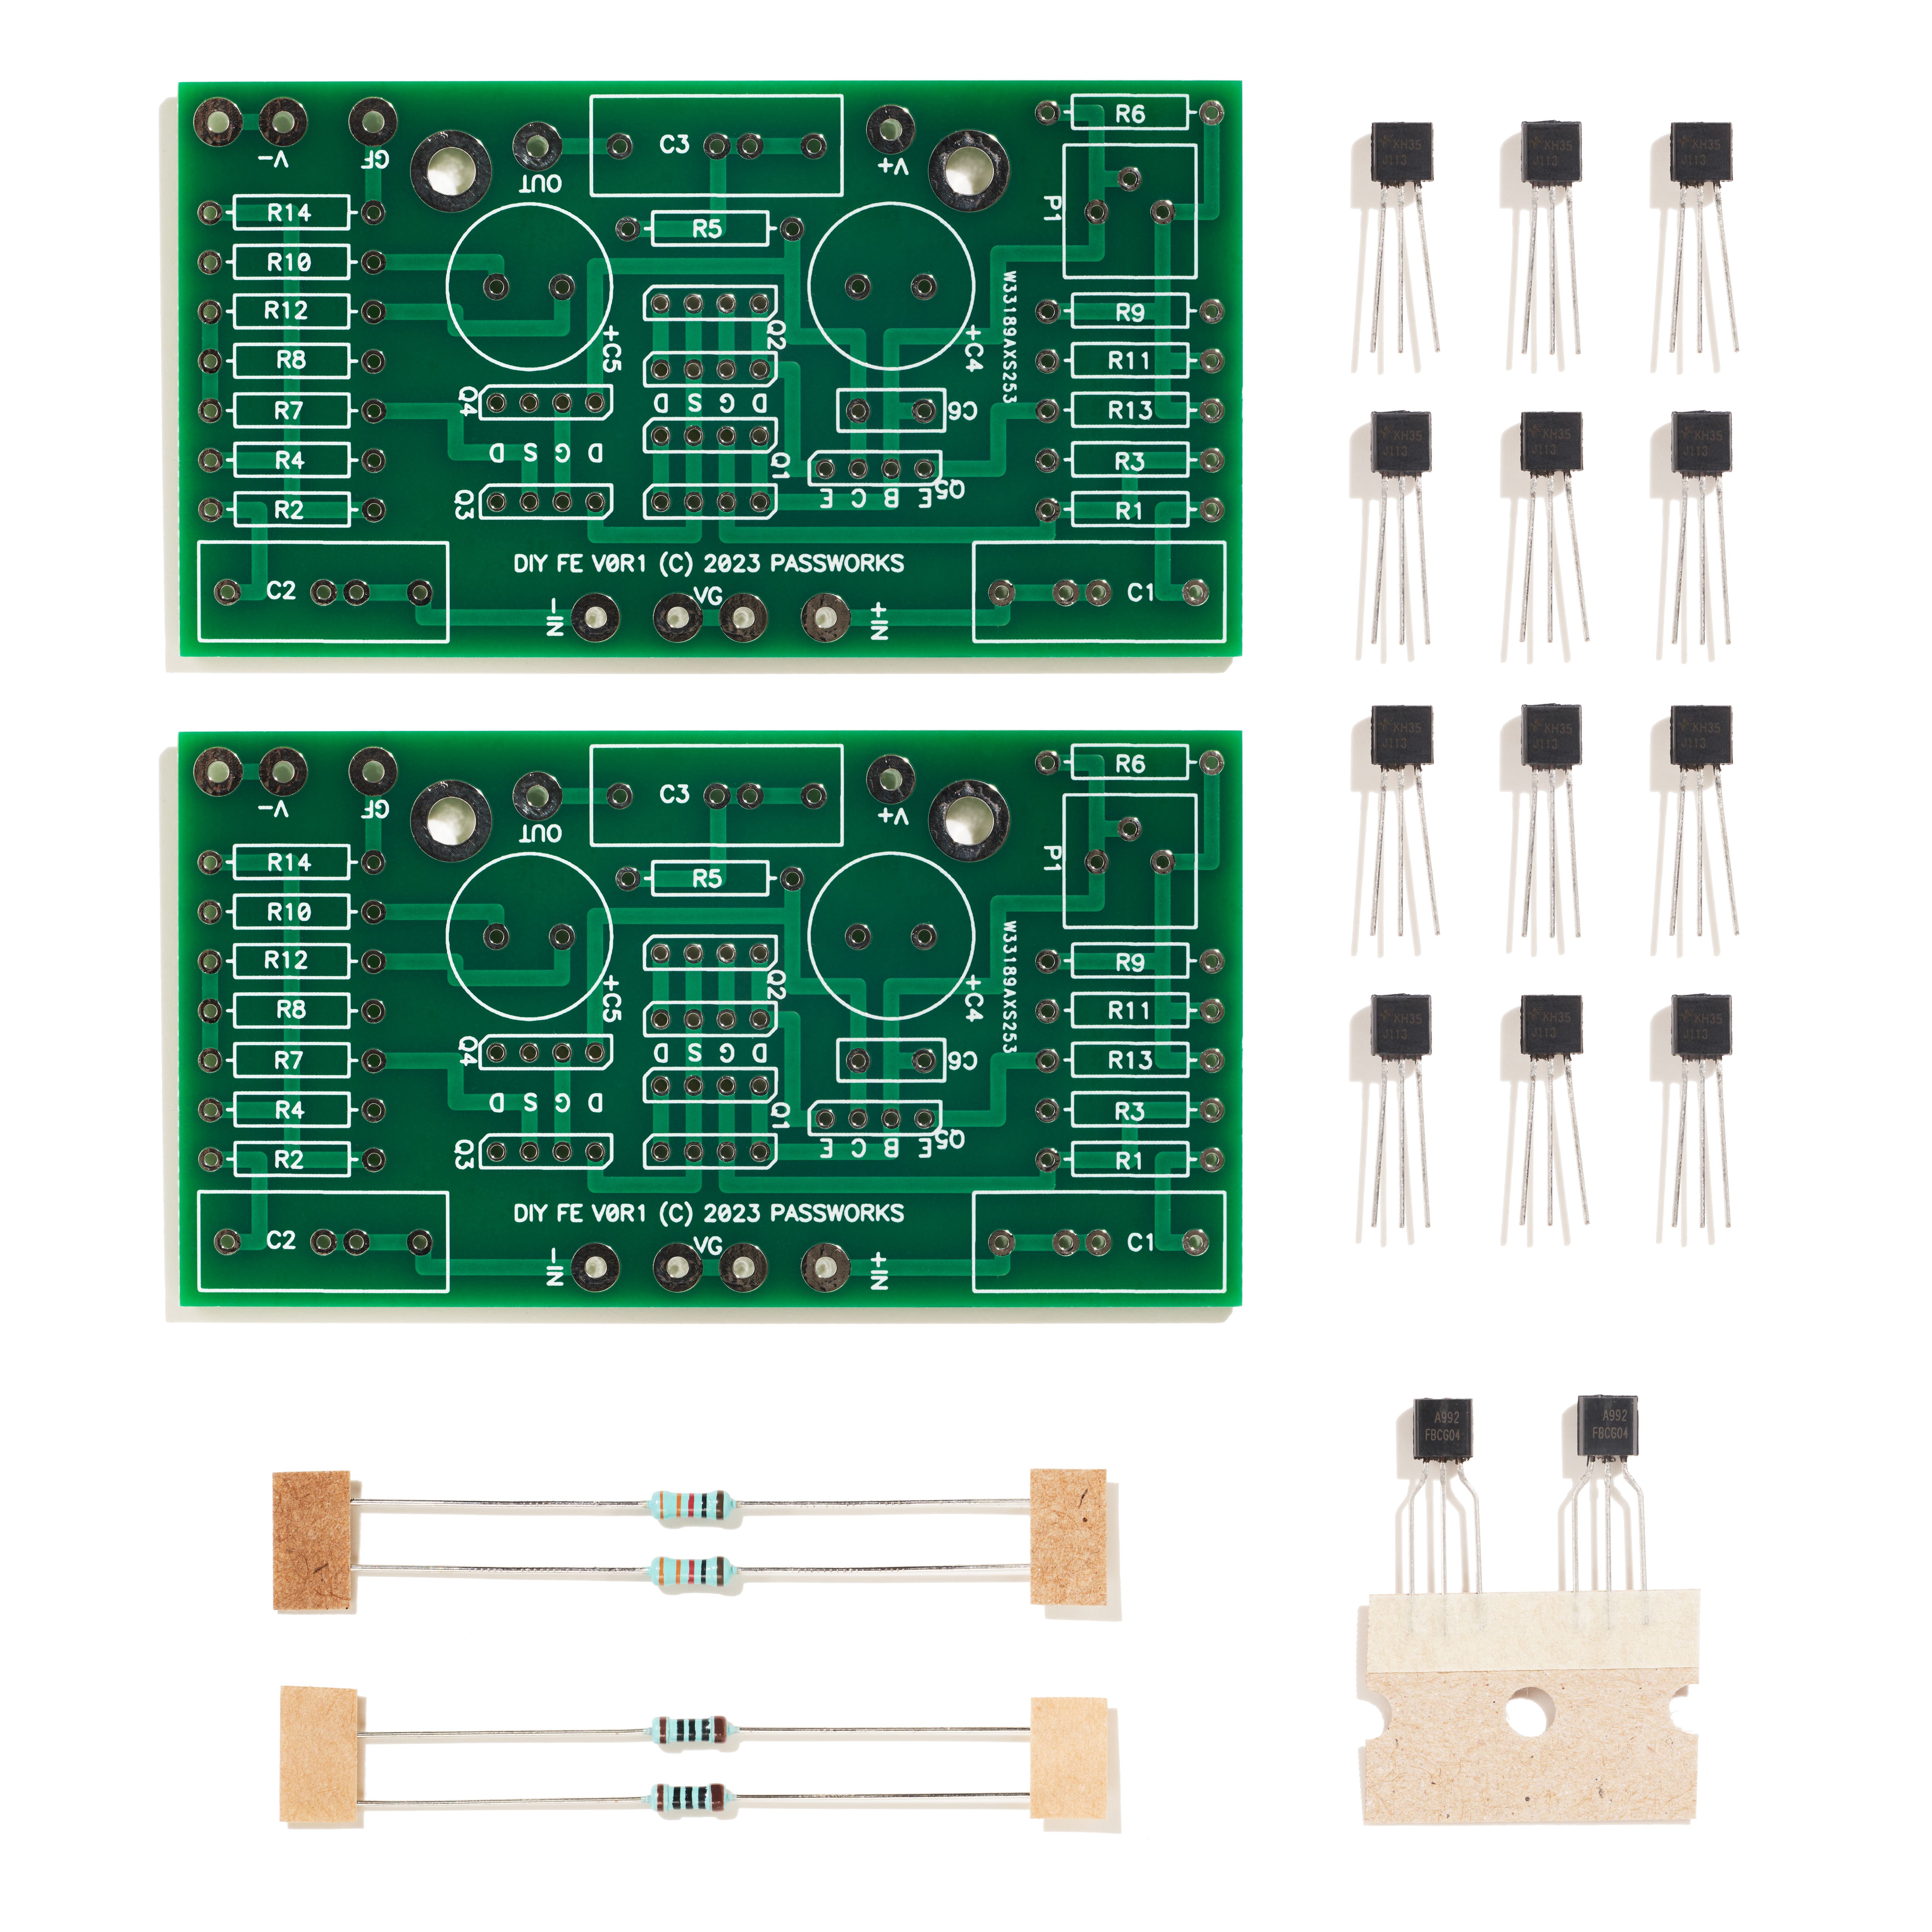
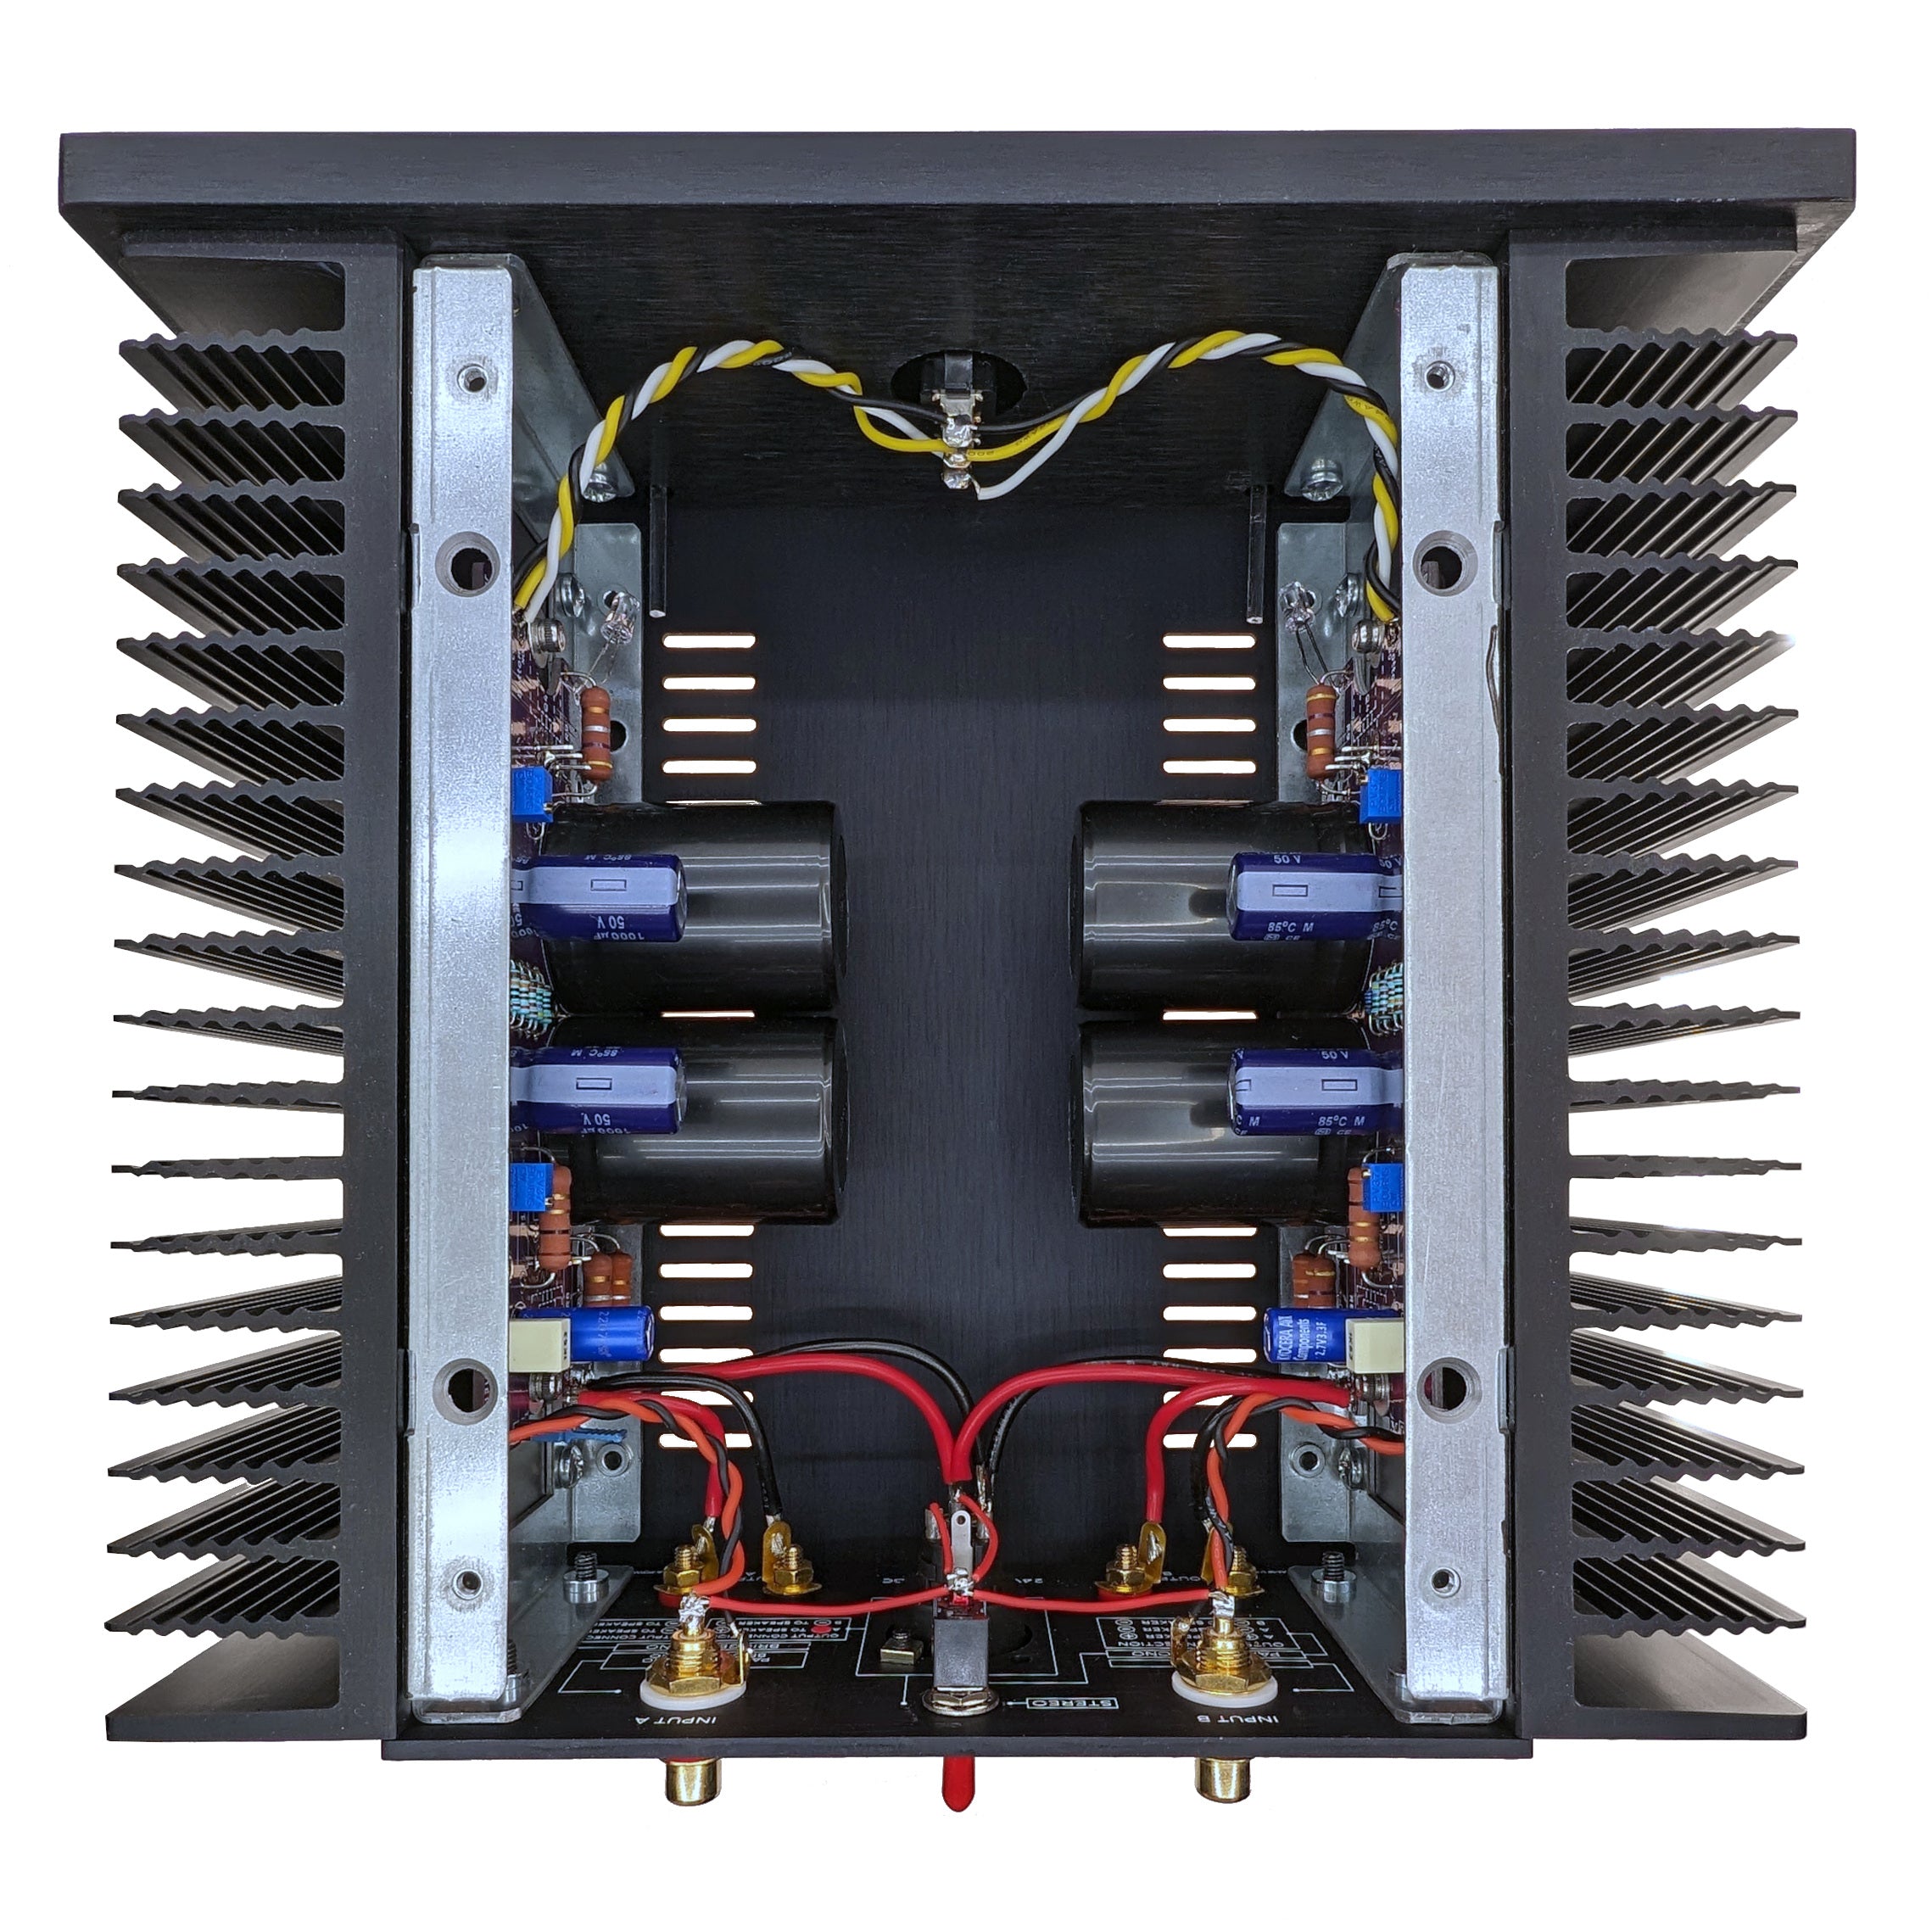
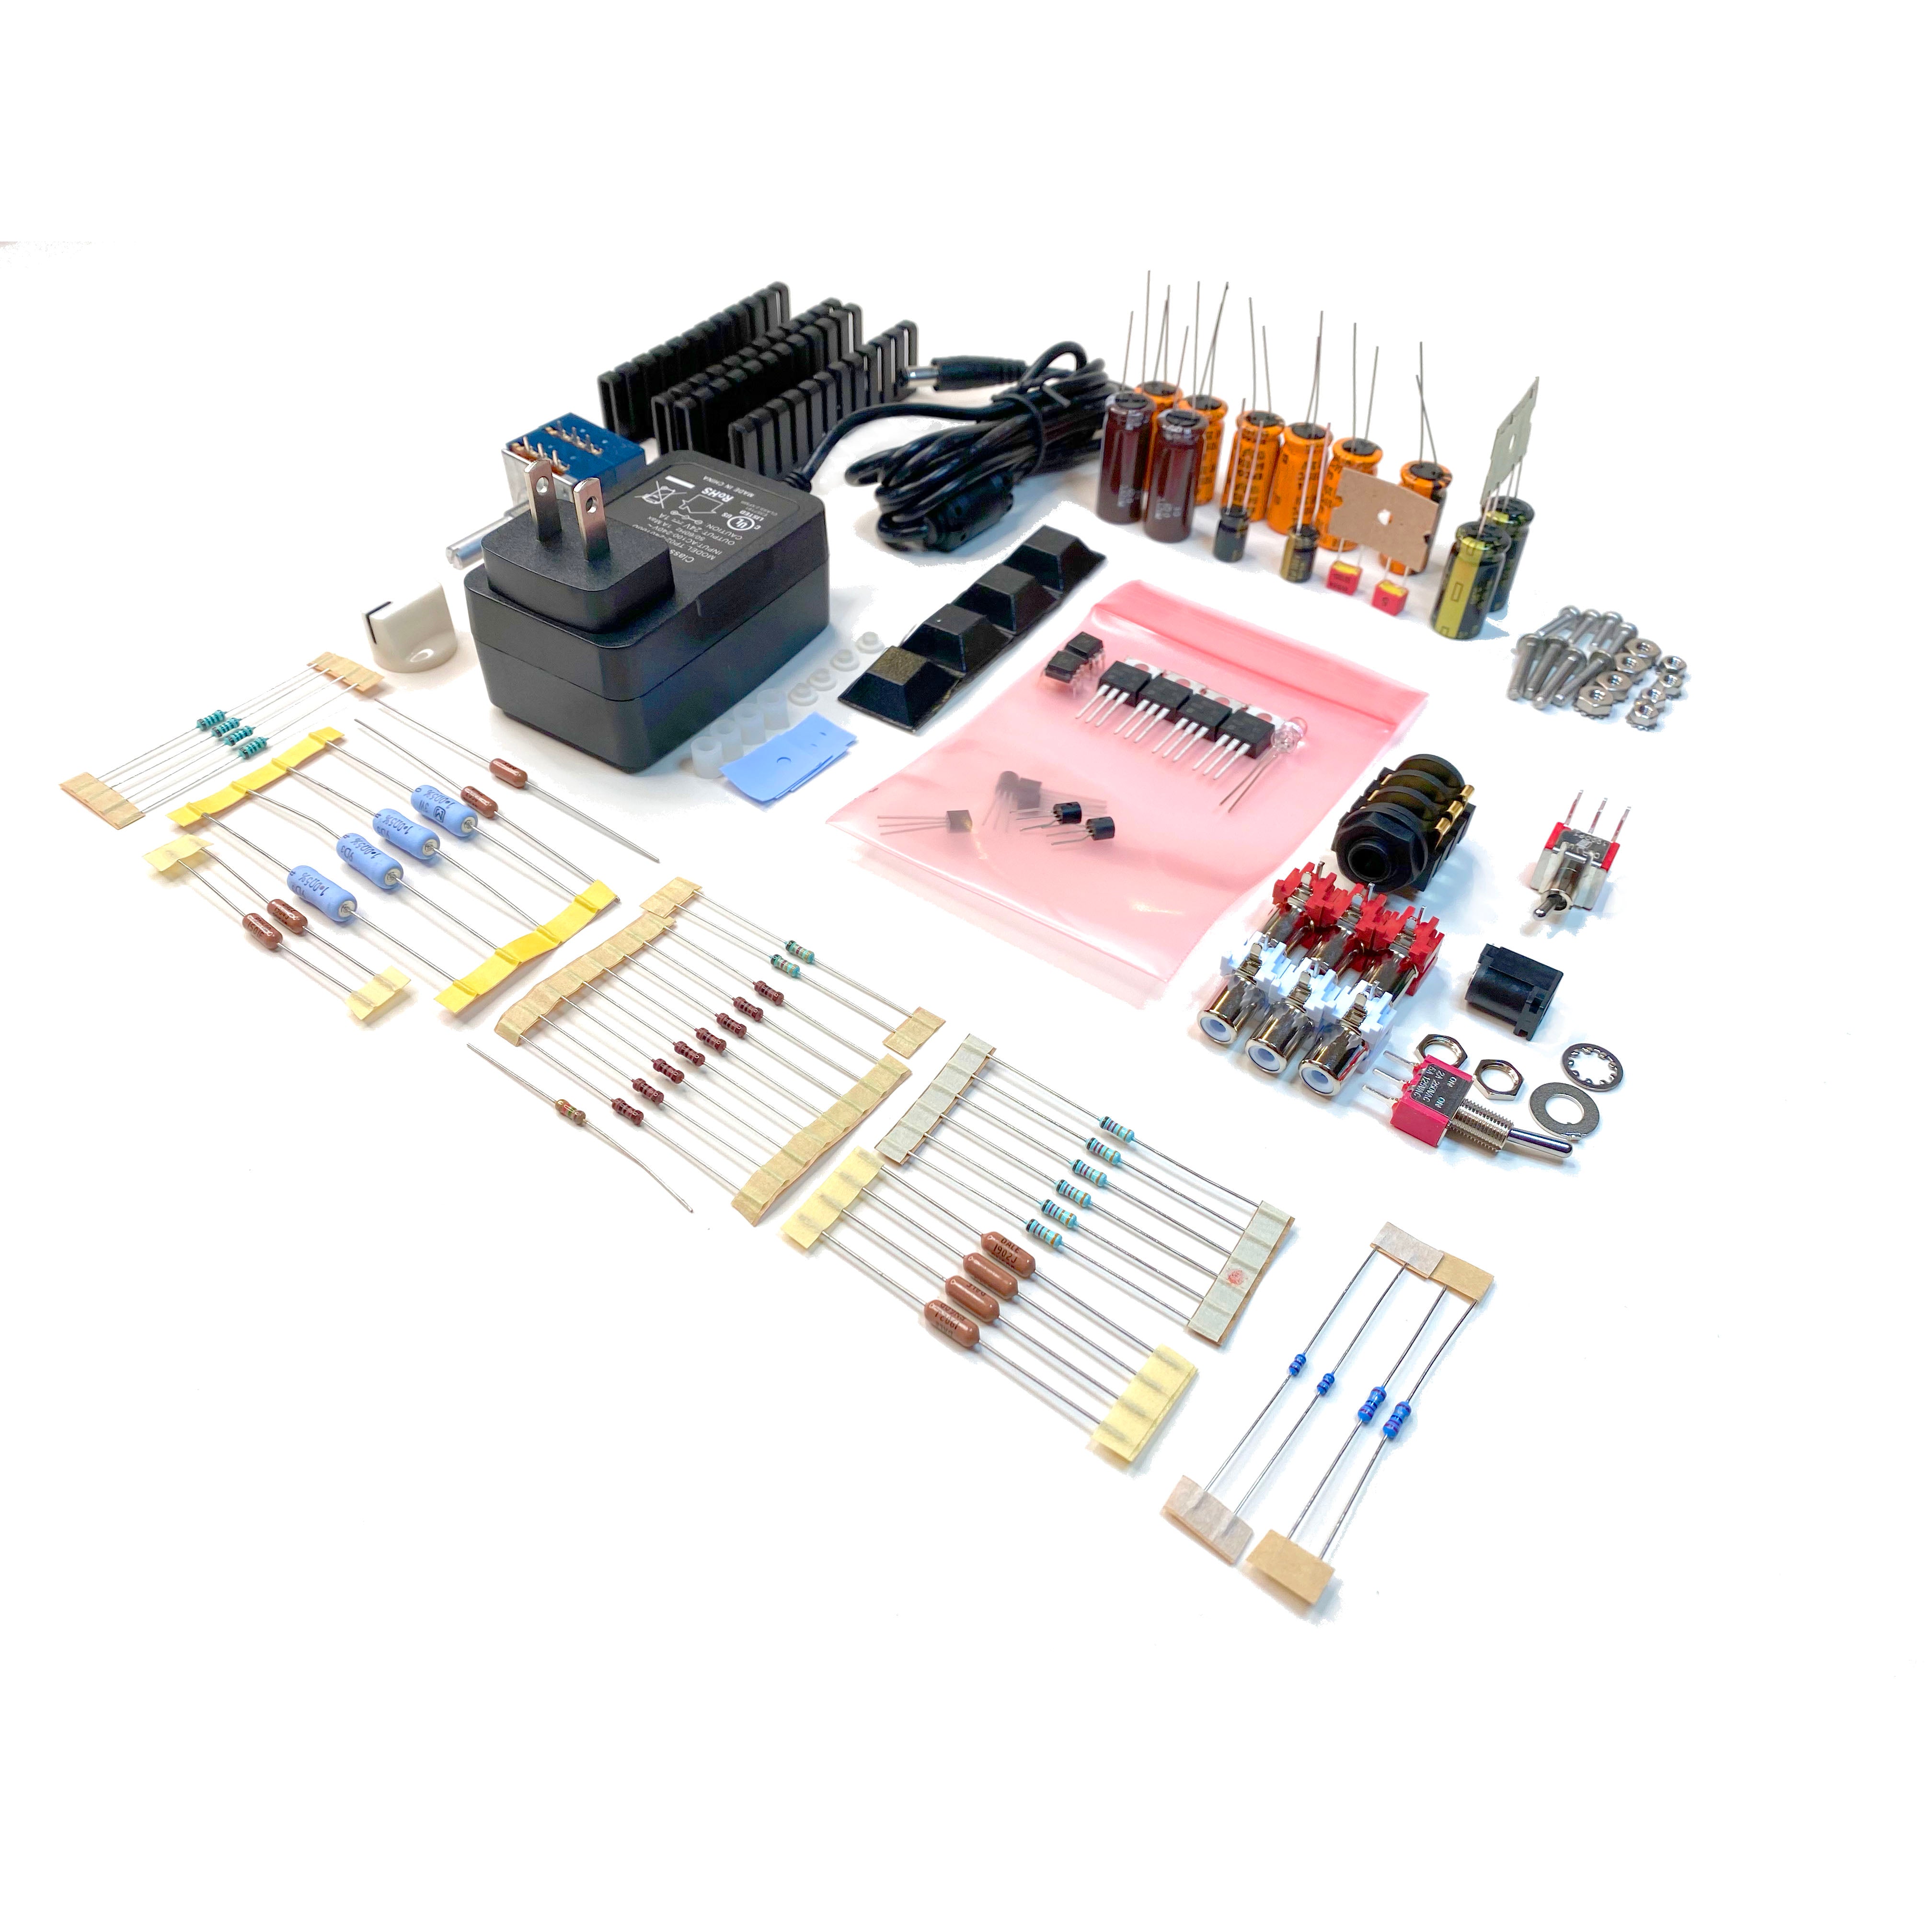
Project: ACA MinMax

The ACA MinMax combines Nelson Pass’ ACA Mini with the diyAudio Store's Amp Camp Amp chassis to get the most out of this design. Strategic part upgrades enable a 36V power supply and 850mA bias current per channel. This kit is for those who want a bit more power out of the Amp Camp series while keeping the original design philosophy of an easy to build, safe, and great sounding class A amplifier.
Can be operated in stereo, balanced mono, or parallel mono configurations.
Features:
- Larger heatsinks of the Amp Camp Amp chassis allow for higher bias current
- Left and right “mirrored” PCBs for simplified chassis wiring
- Power supply voltage increased to 36V
- Capacitors upgraded to 50V
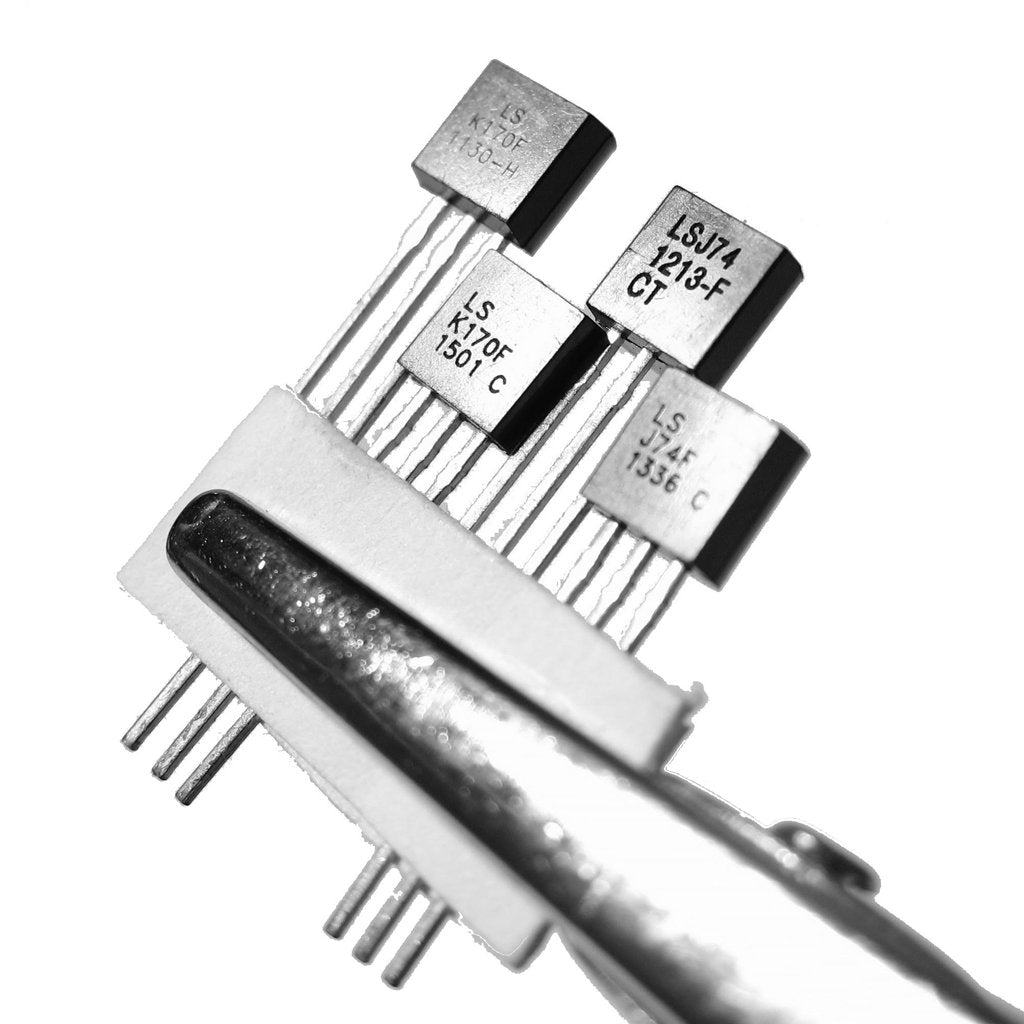
- 2SK170 / 2SJ74 input JFETs and IRFP140 / 9140 MOSFETs sourced directly from Nelson Pass
- Larger TO-247 output transistors and alumina thermal pads help keep parts cool
- Multi-turn potentiometers for finer control when setting bias and offset voltage
- Optional gate resistors (100 ohm provided)
- PCBs support TO-247 and TO-220 footprints for diy-ers who want to experiment with MOSFET variations
Please be aware, the ACA chassis has markings on the back panel which do not correlate to this design. The panel can be installed normally and markings can be ignored or blacked out with a marker. Alternatively the panel can be flipped putting the markings on the inside, however two 1/8” (3.2mm) holes must be drilled to mount the XLR connector.
View collection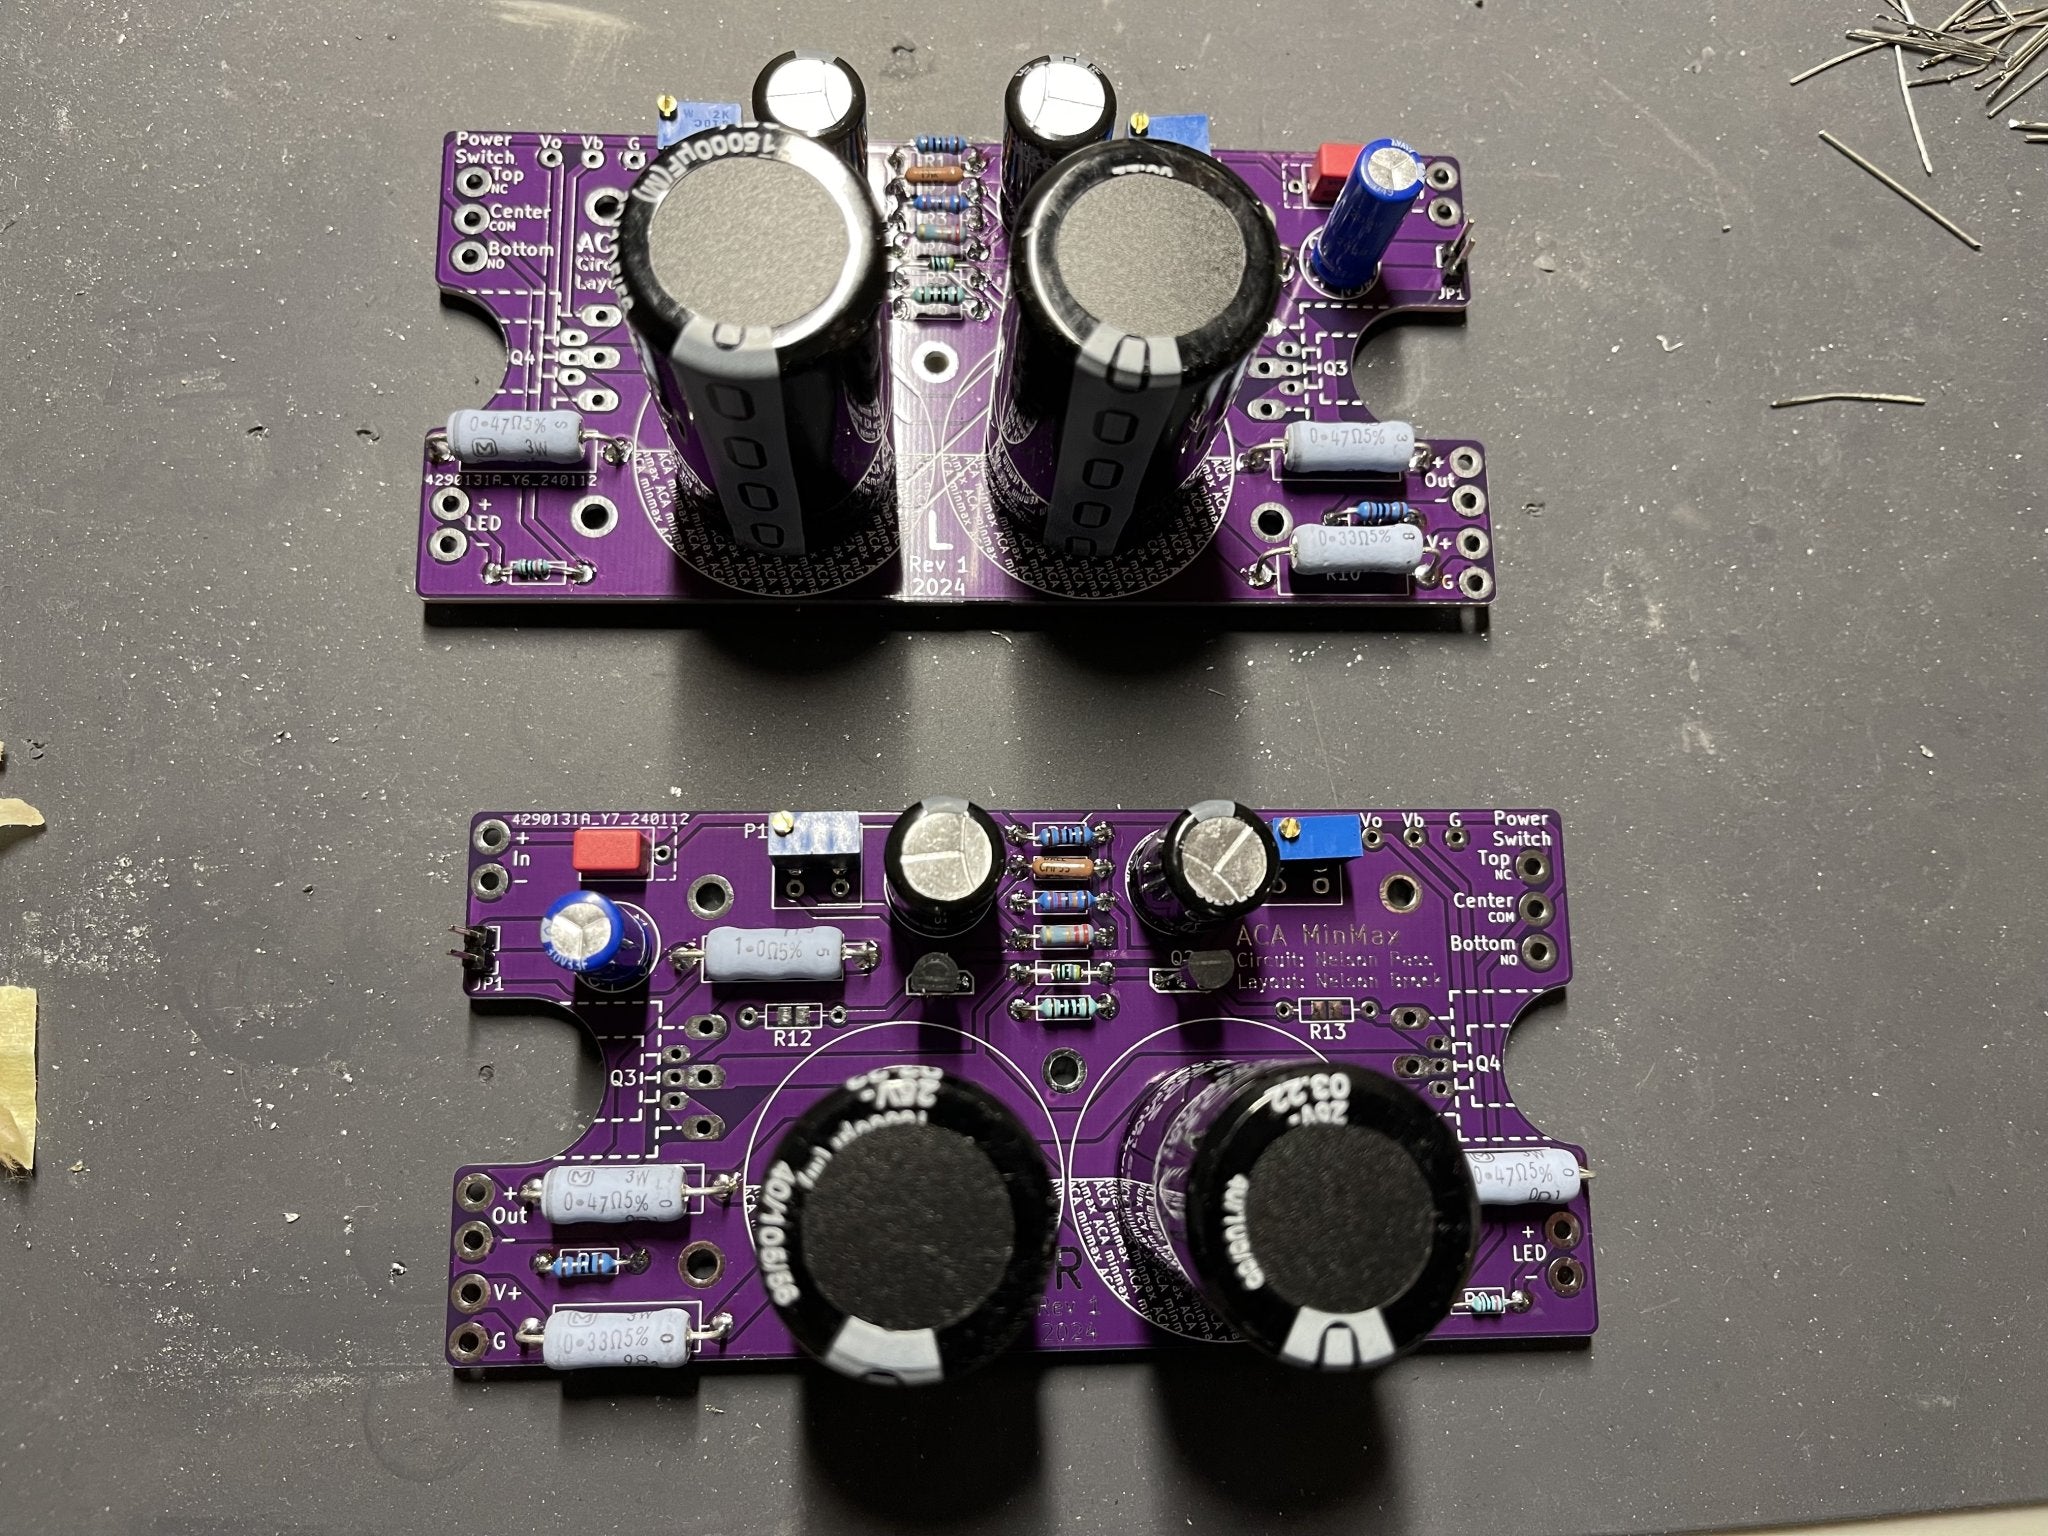
ACA MinMax


ACA MinMax
Project: Aleph Jzm
This is the Aleph J a la Zen Mod, or AJzm.
100 kits are available for immediate purchase. In addition, we are taking a set number of pre-orders for the next batch, which is expected to ship no later than July 2024. Learn how pre-orders work.
The Nelson Pass designed First Watt Aleph J is a classic. Various versions of the Aleph J have been built by DIYers for years, and the Aleph J is often a DIYer’s first First Watt. The illustrious Zen Mod created this version of the Aleph J to make the build more approachable to newer builders while maintaining all the characteristics of the original. For more advanced DIYers and those that like to experiment, there are options to use a variety of JFETs and customize the circuit to suit individual tastes.
We hope you’ll enjoy it as much as the 100’s of others that have built this fantastic amplifier. Click here for a brief video to learn more about Zen Mod and the project.
What’s in the kit?
All the components you’ll need to complete a pair of amplifier boards including: PCBs; passive devices; and all active devices, including 8 matched JFETs.
What Will You Need To Complete A Working Amplifier?
You’ll need a power supply, chassis, wiring, and a few other parts to complete a working amplifier.
All the major components are available through the diyAudio store. These Power Supply PCBs are suitable for all First Watt amplifiers. We also have a full line of Deluxe Chassis perfect for this project. The two most common choices are the Deluxe 4U and the larger Deluxe 5U, however we heartily encourage you to consider the PASSdiy chassis currently available for pre-order until May 31st 2024. We also have a back panel parts kit to make life easier. Don’t forget the Keratherm.
The complete build guide contains links with suggestions for almost everything you need including tools to complete your project.
What If I Have Questions?
This project is intended for intermediate to advanced DIYers. It’s a wonderful second amplifier project after an Amp Camp Amp. Patient beginners willing to study should have no trouble following the build guide. The builder must know how to identify parts from schematics, match those parts to PCB locations based on the silkscreen, and have good soldering skills. Most importantly, all builders are responsible for their own safety and must understand essential safety practices and precautions when dealing with mains powered electronics.
The complete build guide is the first resource for builders and includes helpful resources. For any other questions, Mighty Zen Mod and other forum members are ever-present in the support thread.
Note - Photos include parts available at the time of publishing. Individual components are subject to change based on availability.
View collection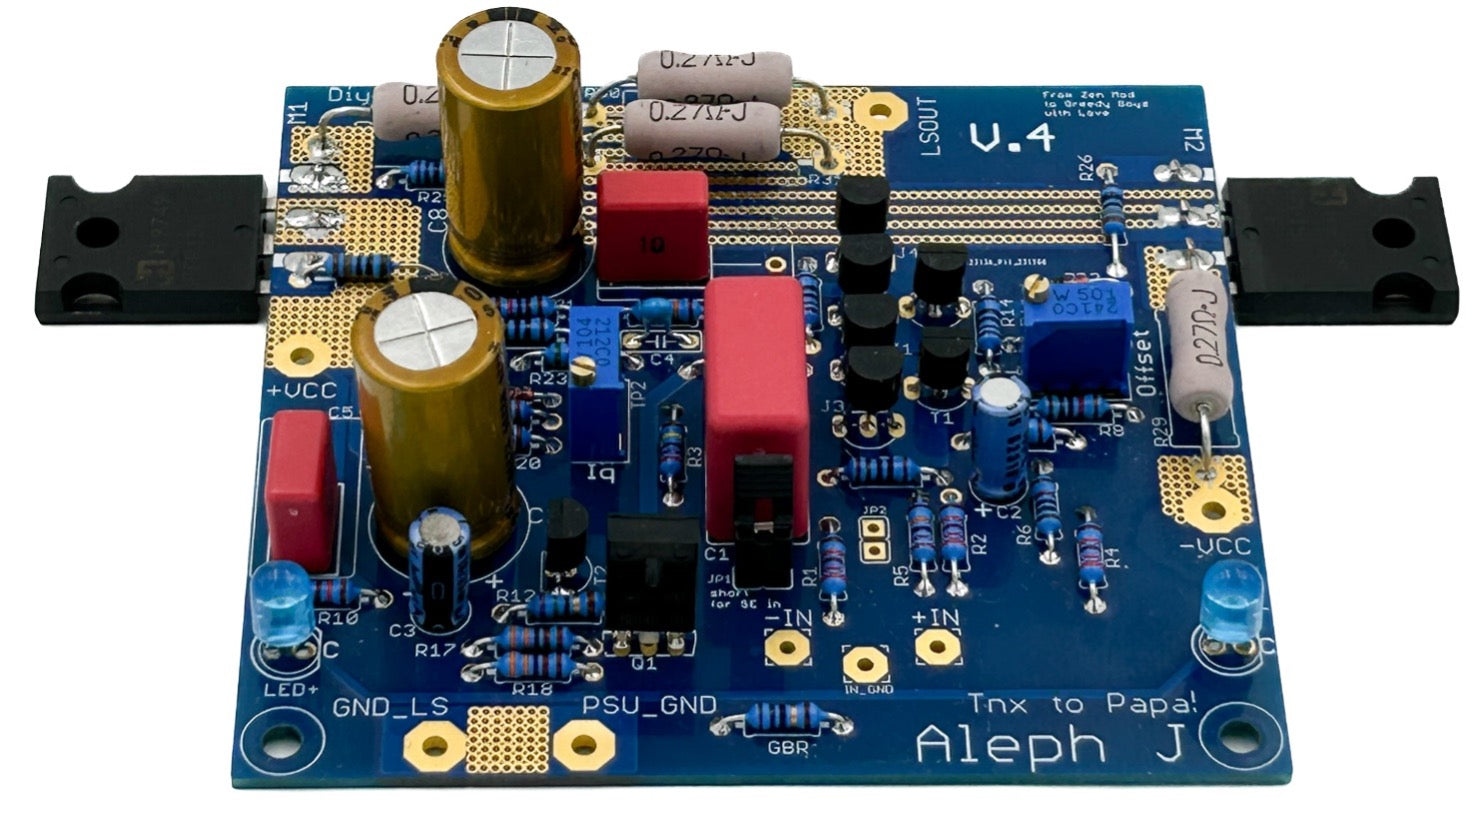
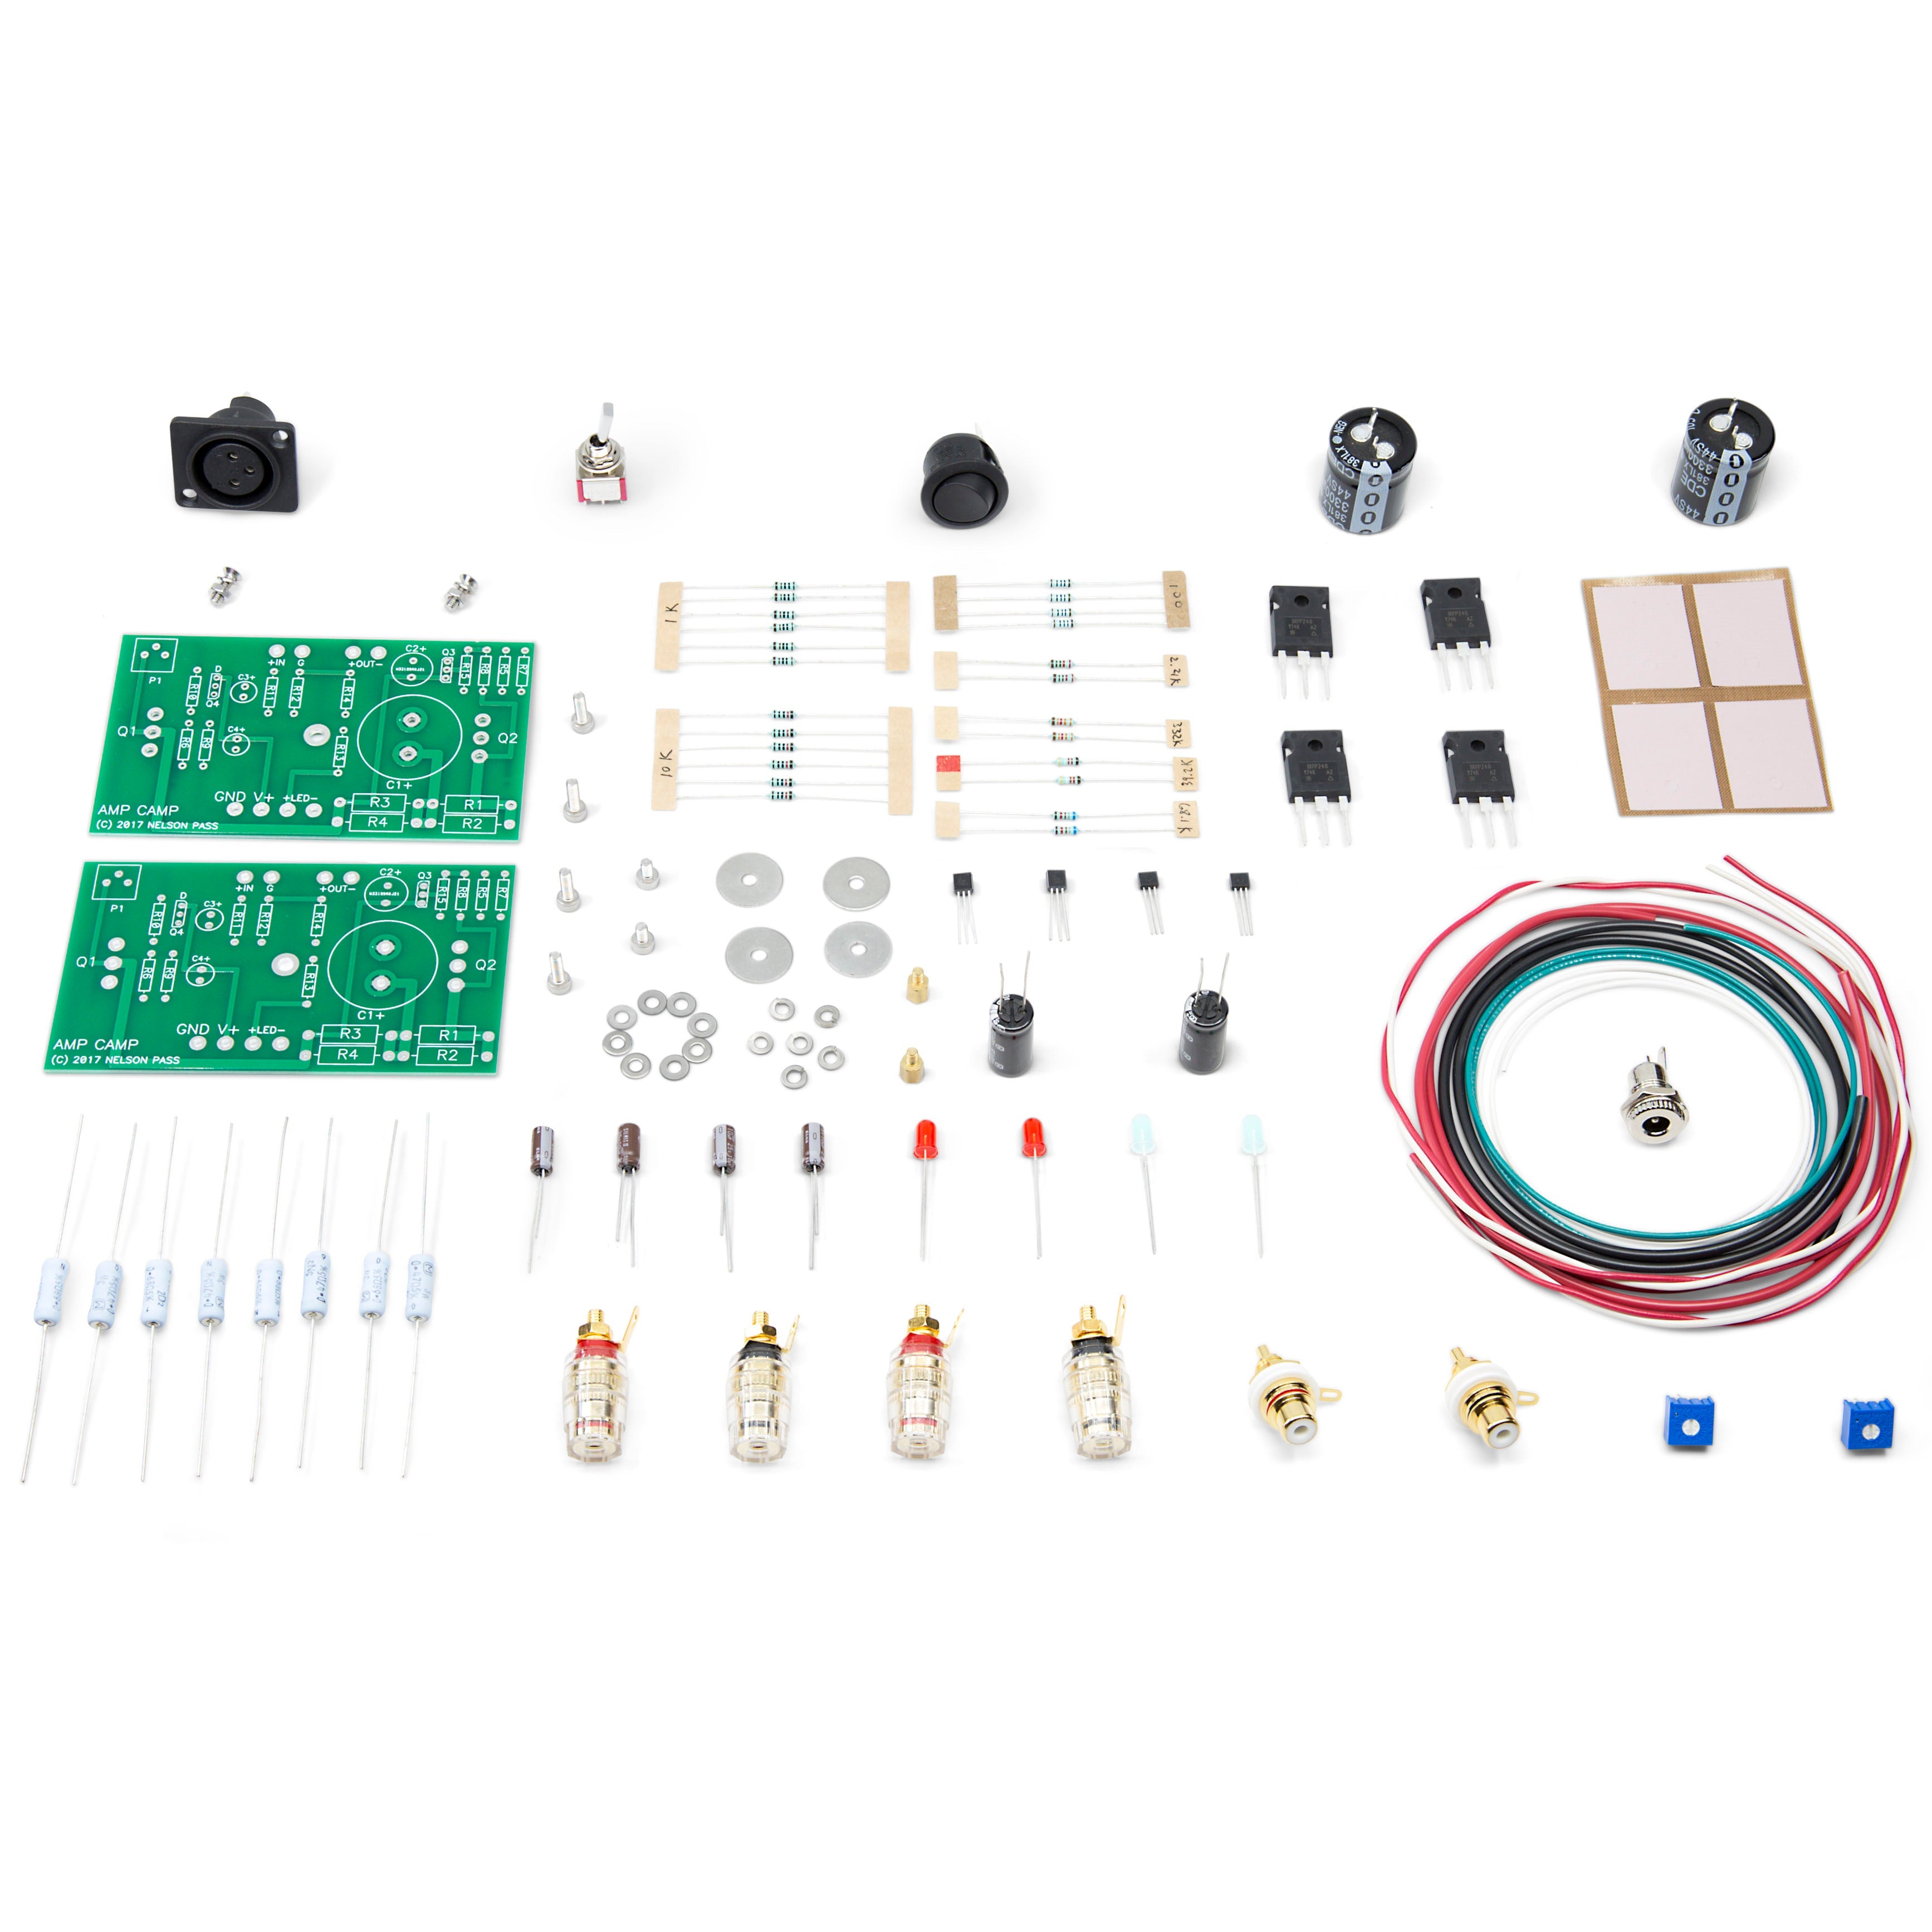
Project: Amp Camp Amp
 The Amp Camp Amp was created by Nelson Pass for a special event called "Amp Camp" in which 20 people built their very first amplifier from start to finish in one afternoon. The event was held outdoors on a lovely sunny day in California and all attendees walked away with a fully functioning amplifier and a smile on their dials.
Naturally, other people wanted share that same amazing experience of successfully building their first amplifier so diyAudio has created the three essential ingredients you need for that same journey - the parts, the instructions, and the community.
Read more in the Amp Camp Amp article hosted on diyAudio.
 How does it sound?
Once you build the Amp Camp Amp you'll never look at power and distortion figures the same way again.
Each channel is just 8 watts, but they're very good watts. In fact Nelson's DIY endeavors are called "First Watt" because in his own words "The first watt is the most important watt". The amp has enough power for medium to high efficiency speakers at normal listening levels. They sound even better bi-amped with an active crossover.
Watch TekThing build the ACA
TekThing is an awesome video blog for technology geeks. In this 30 minute video Patrick Norton talks about the history of the Amp Camp Amp, and then builds a channel from start to finish!
A step-by-step build guide and forum pit crew standing by to help to get to the finish line
The Amp Camp Amp Build Guide lets you follow step-by-step on your phone or tablet while you're actually building the amp or printed the guide as a PDF - it's never been easier to complete your Amp Camp Amp in one sitting!
If you need more help, there's hundreds of diyAudio members who consider it their mission to help any ACA builder get their first amplifier build completed. No question is a stupid question in the ACA thread, so join in the discussion and meet other first time and veteran builders in the Amp Camp Amp discussion thread.
Technical Specifications
- Frequency response: 10 - 20 kHz +/- 0.1 dB
- Power (stereo): 8W into 8 Ohms per channel
- Power (monoblock): 15W into 8 Ohms per channel. See ACA operation modes for details on monoblock operation.
- Power Measurement: Measured at clipping with 3% distortion
- Distortion: 0.7% at 1 Watt (primarily second order harmonic which being even-order is described as "sweet, tubey" and being low-order as "benign/inaudible")
- Input impedance: 10 Kohm
- Max Gain: 14dB
- Damping factor: 10
- Output noise: 100 uV
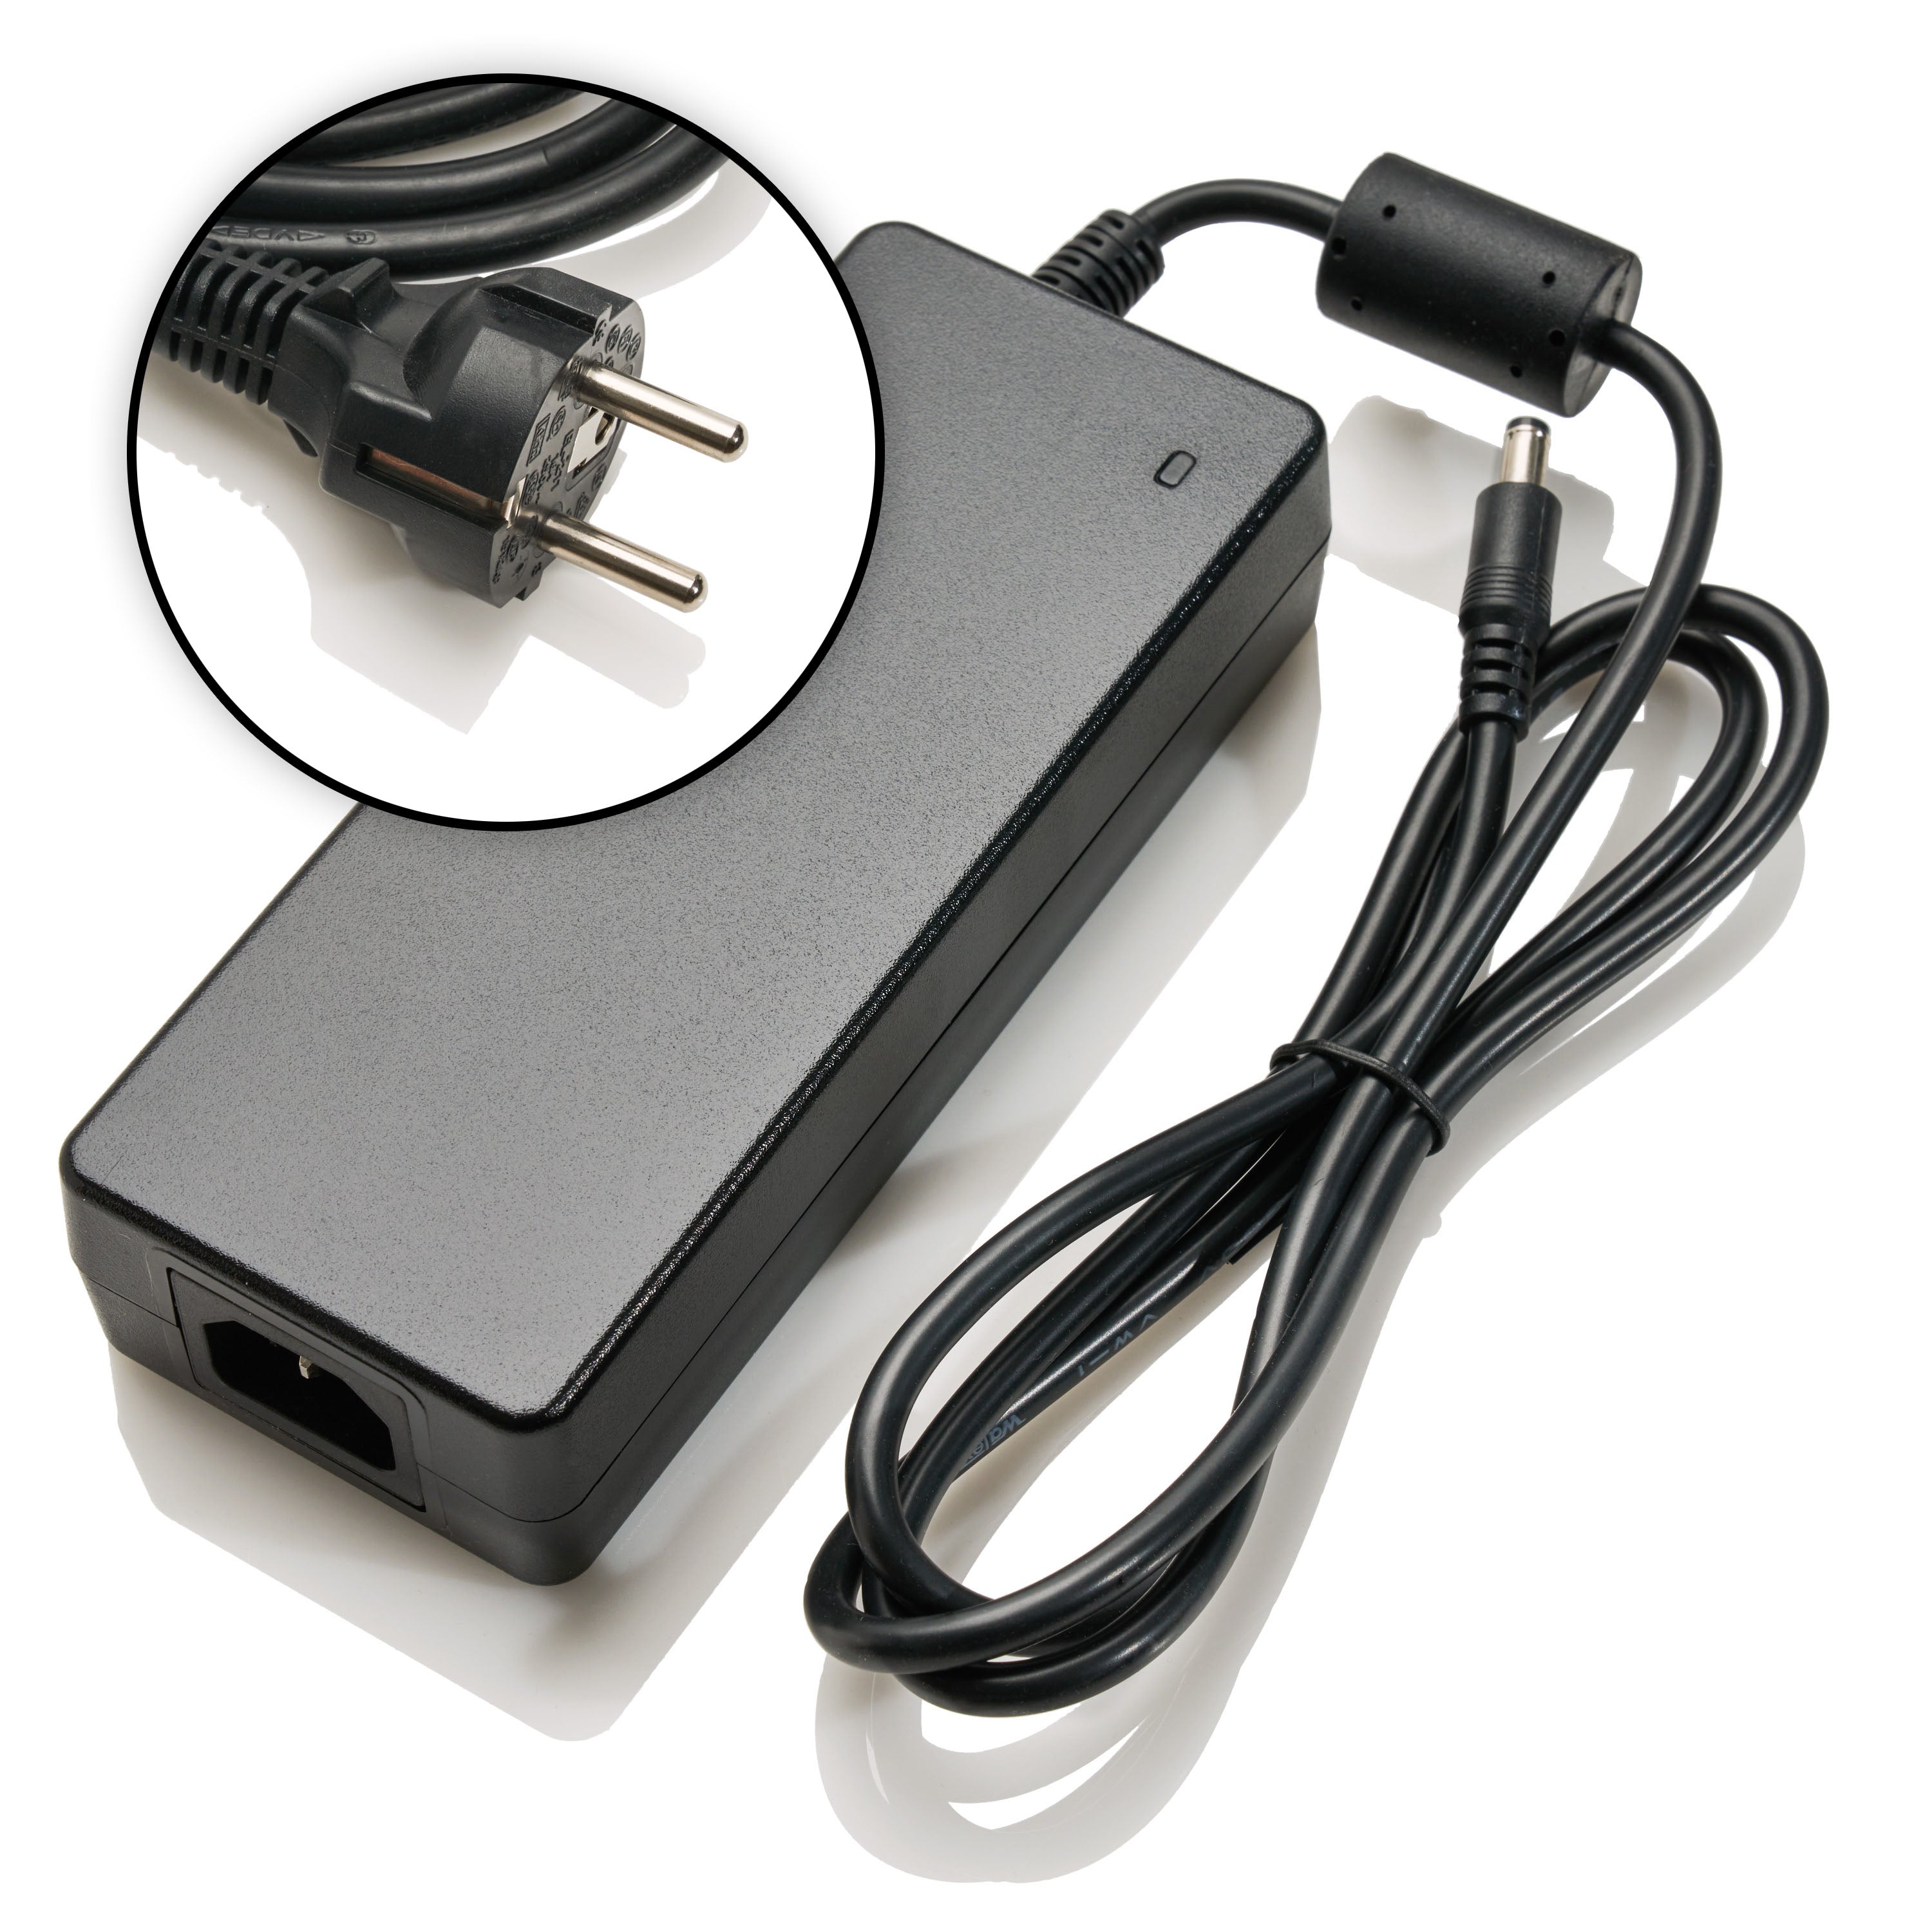
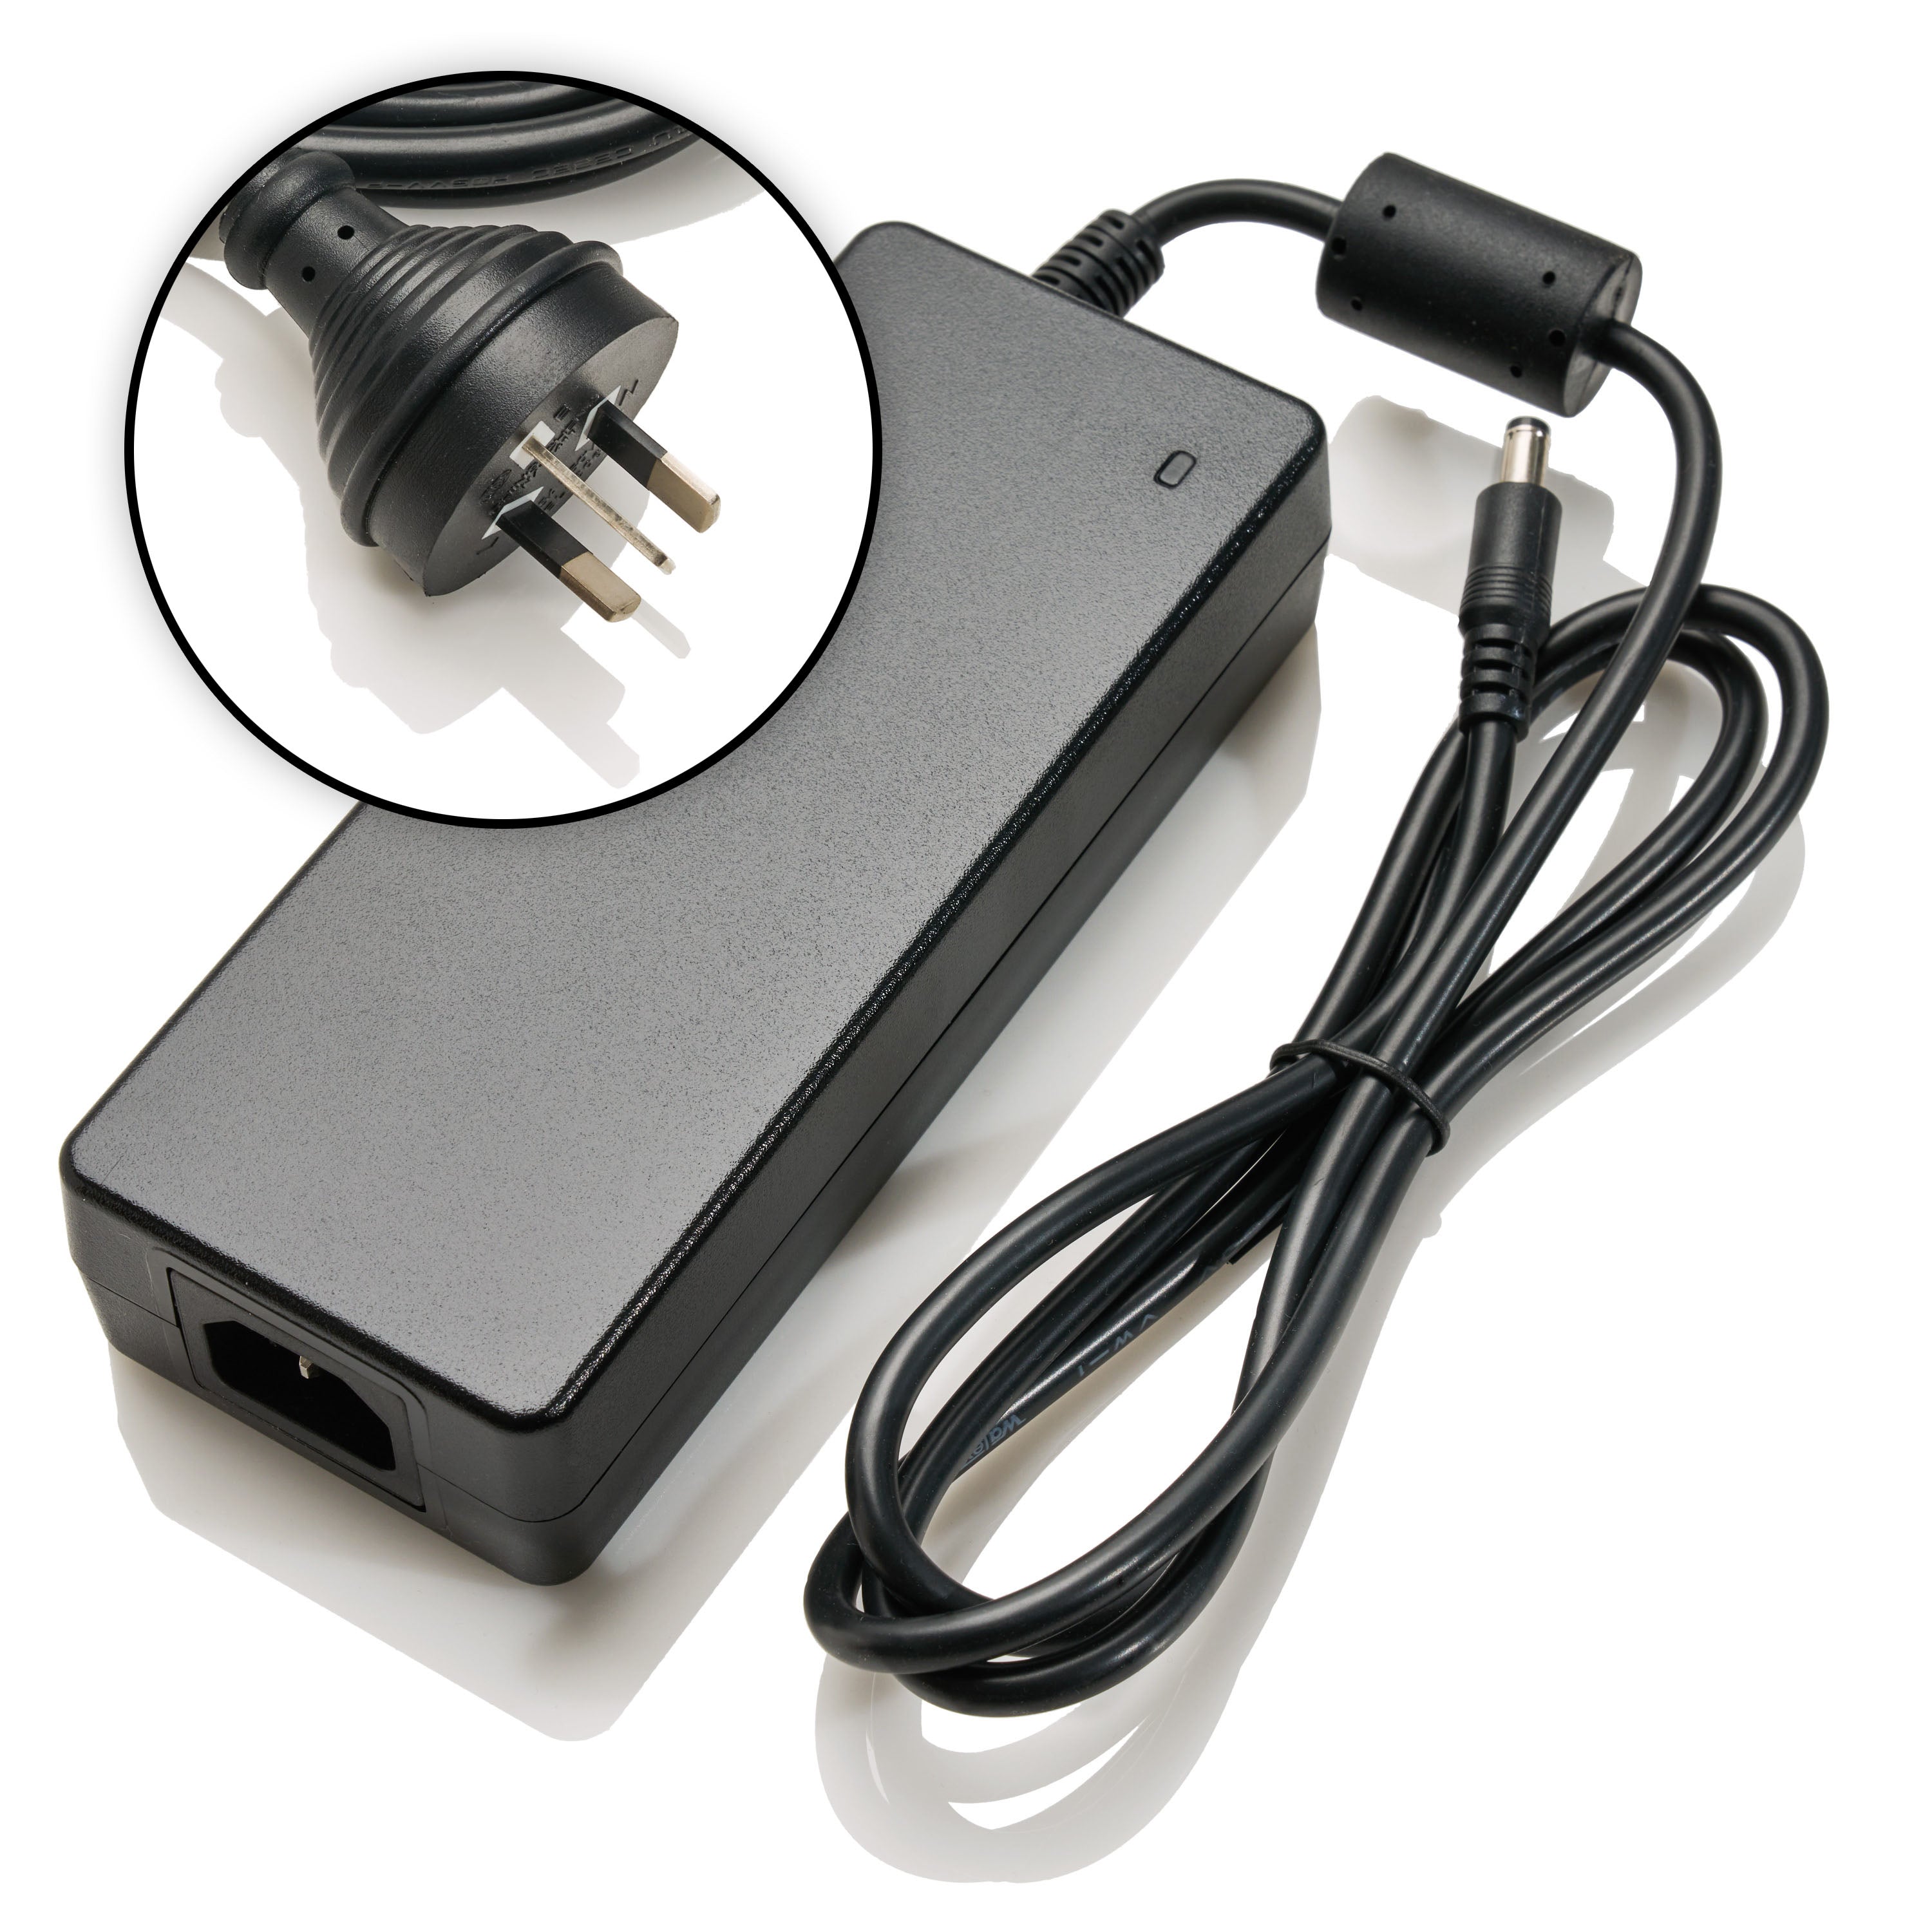
- Power supply input: Universal 86-264VAC 47-63HZ
- Power supply output: 24V 5A
- Heat dissipation: 20 Watts per Channel

Amp Camp Amp


Amp Camp Amp
Amp Camp Amp
Project: Amp Camp Preamp & Headphone Amplifier
View collection
Project: Analog Crossover Network
View collection
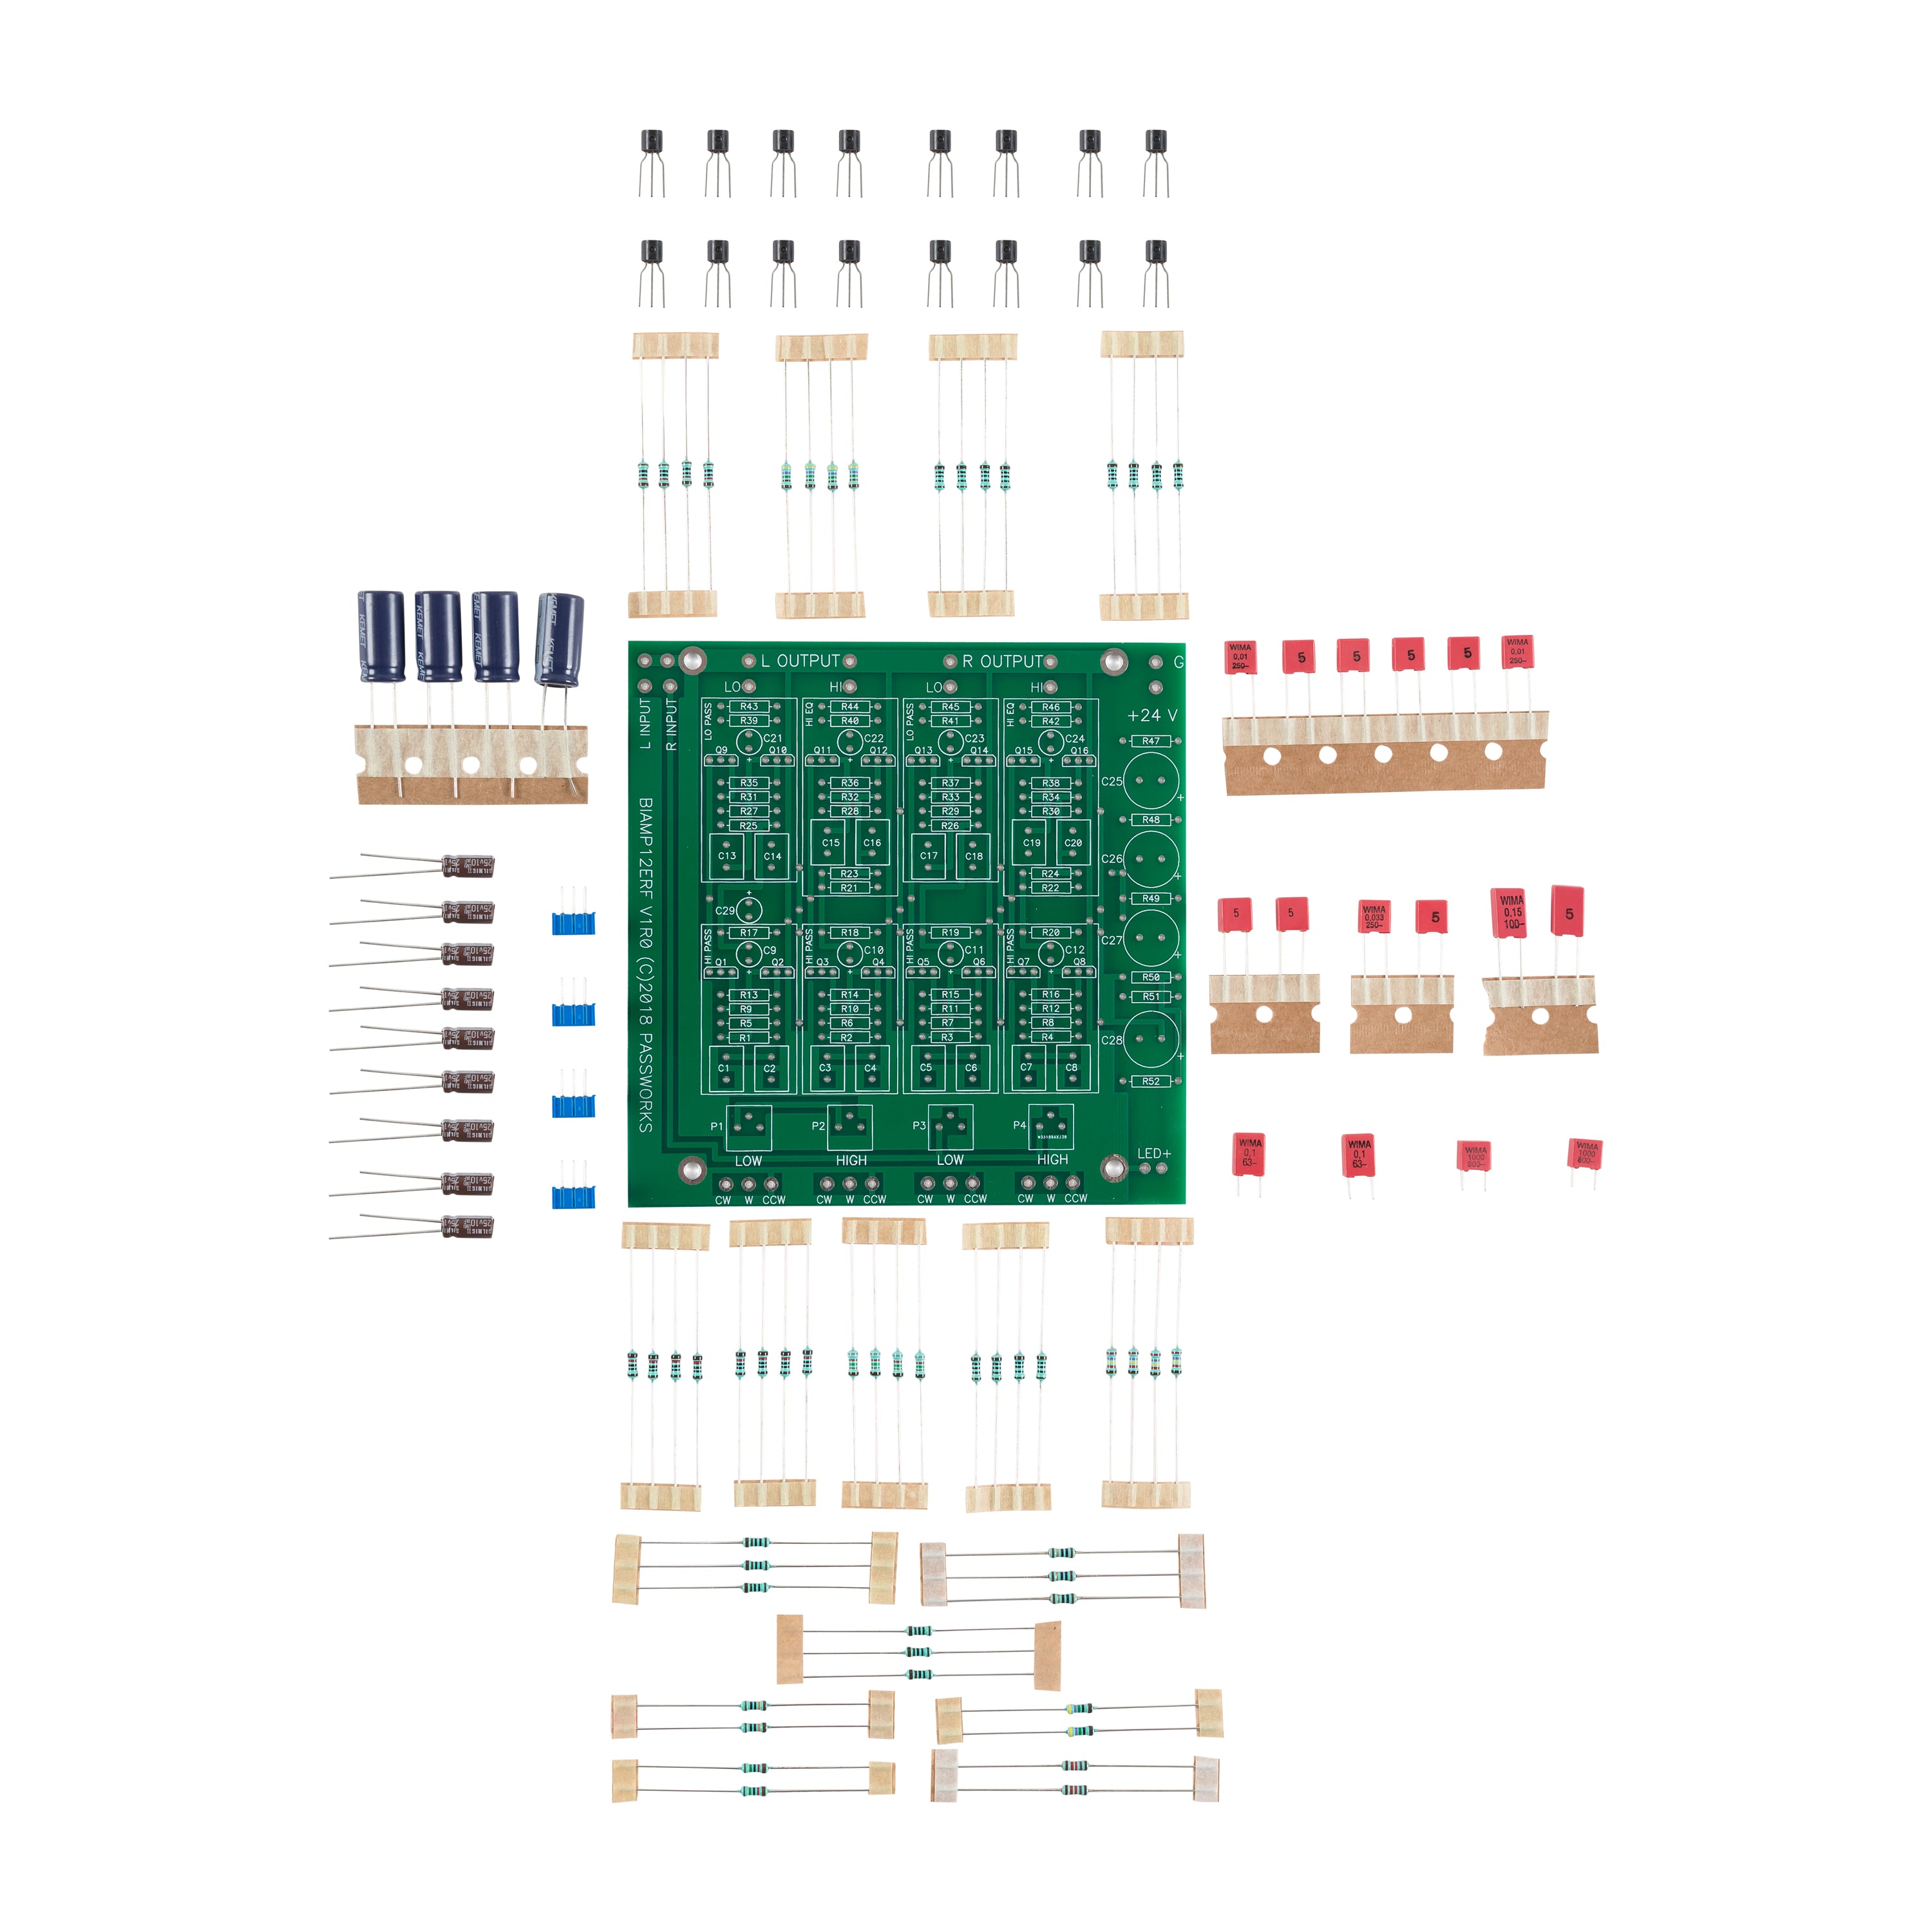
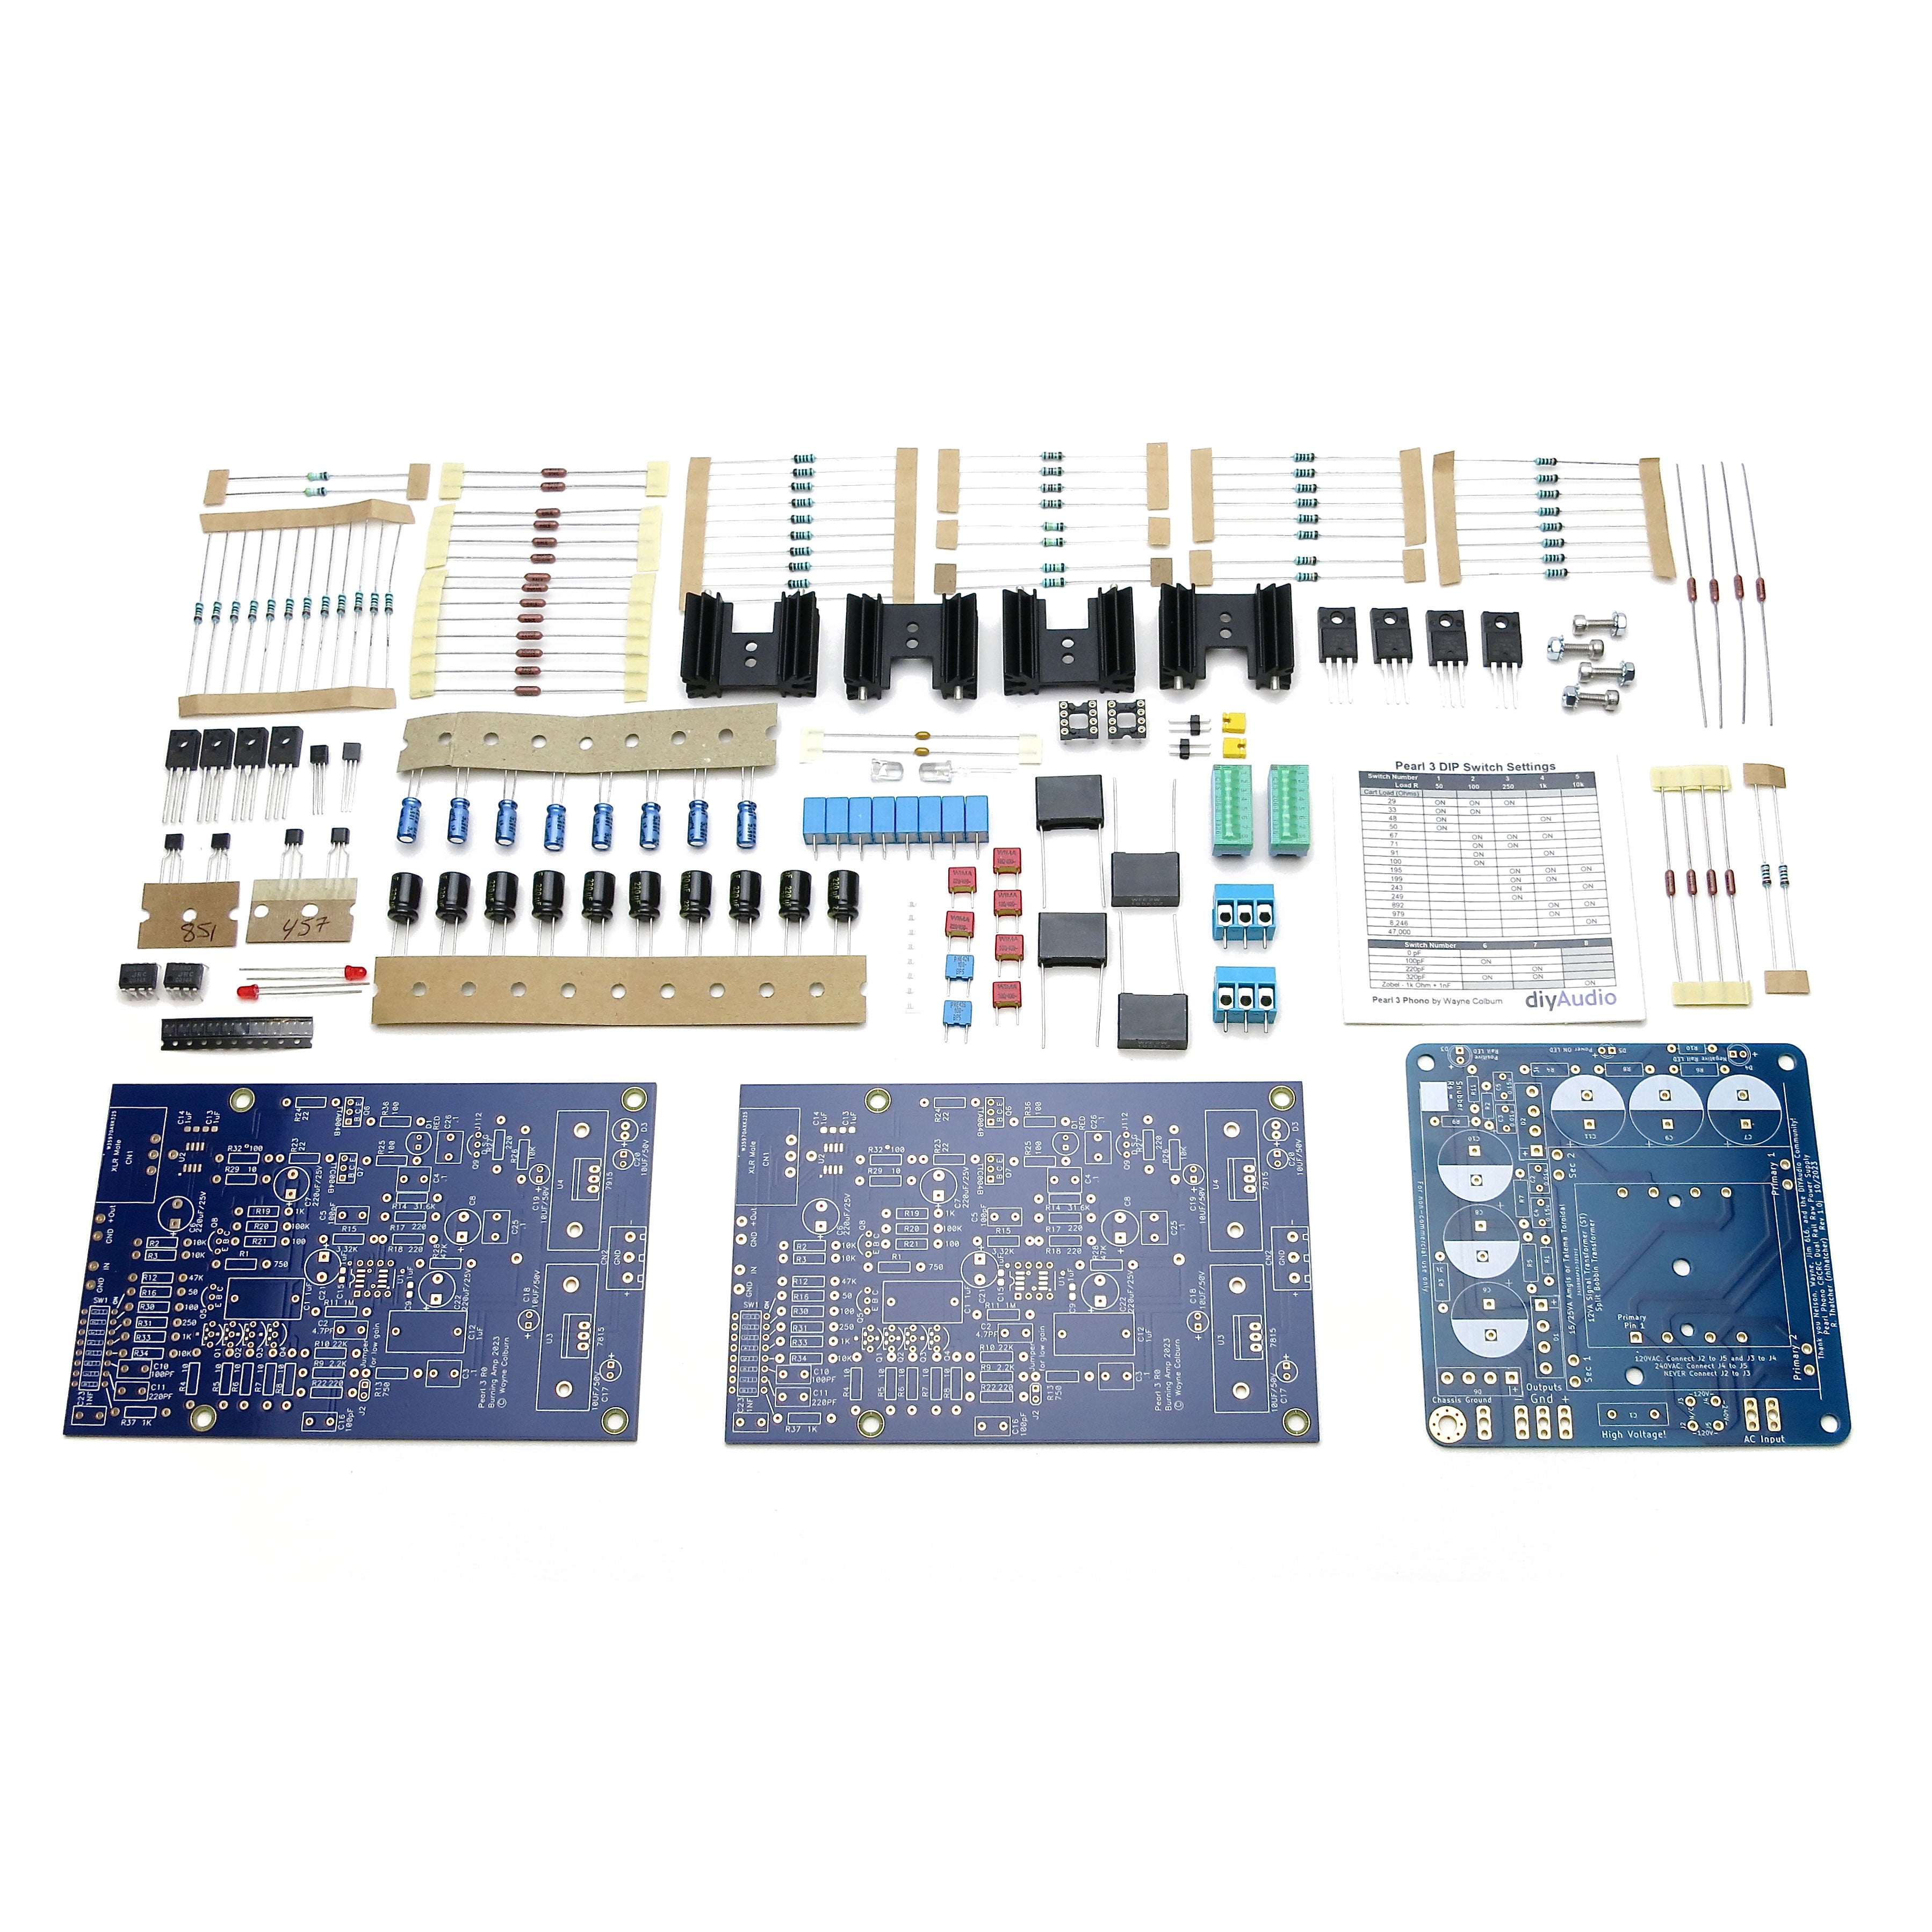
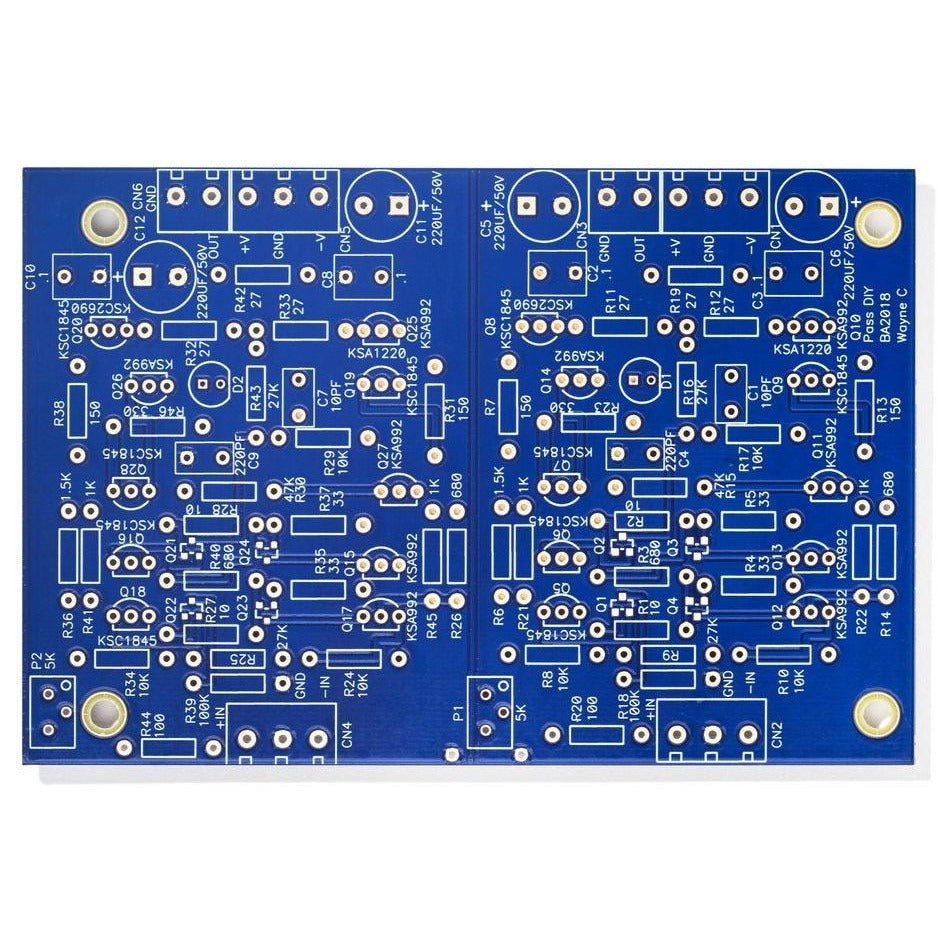
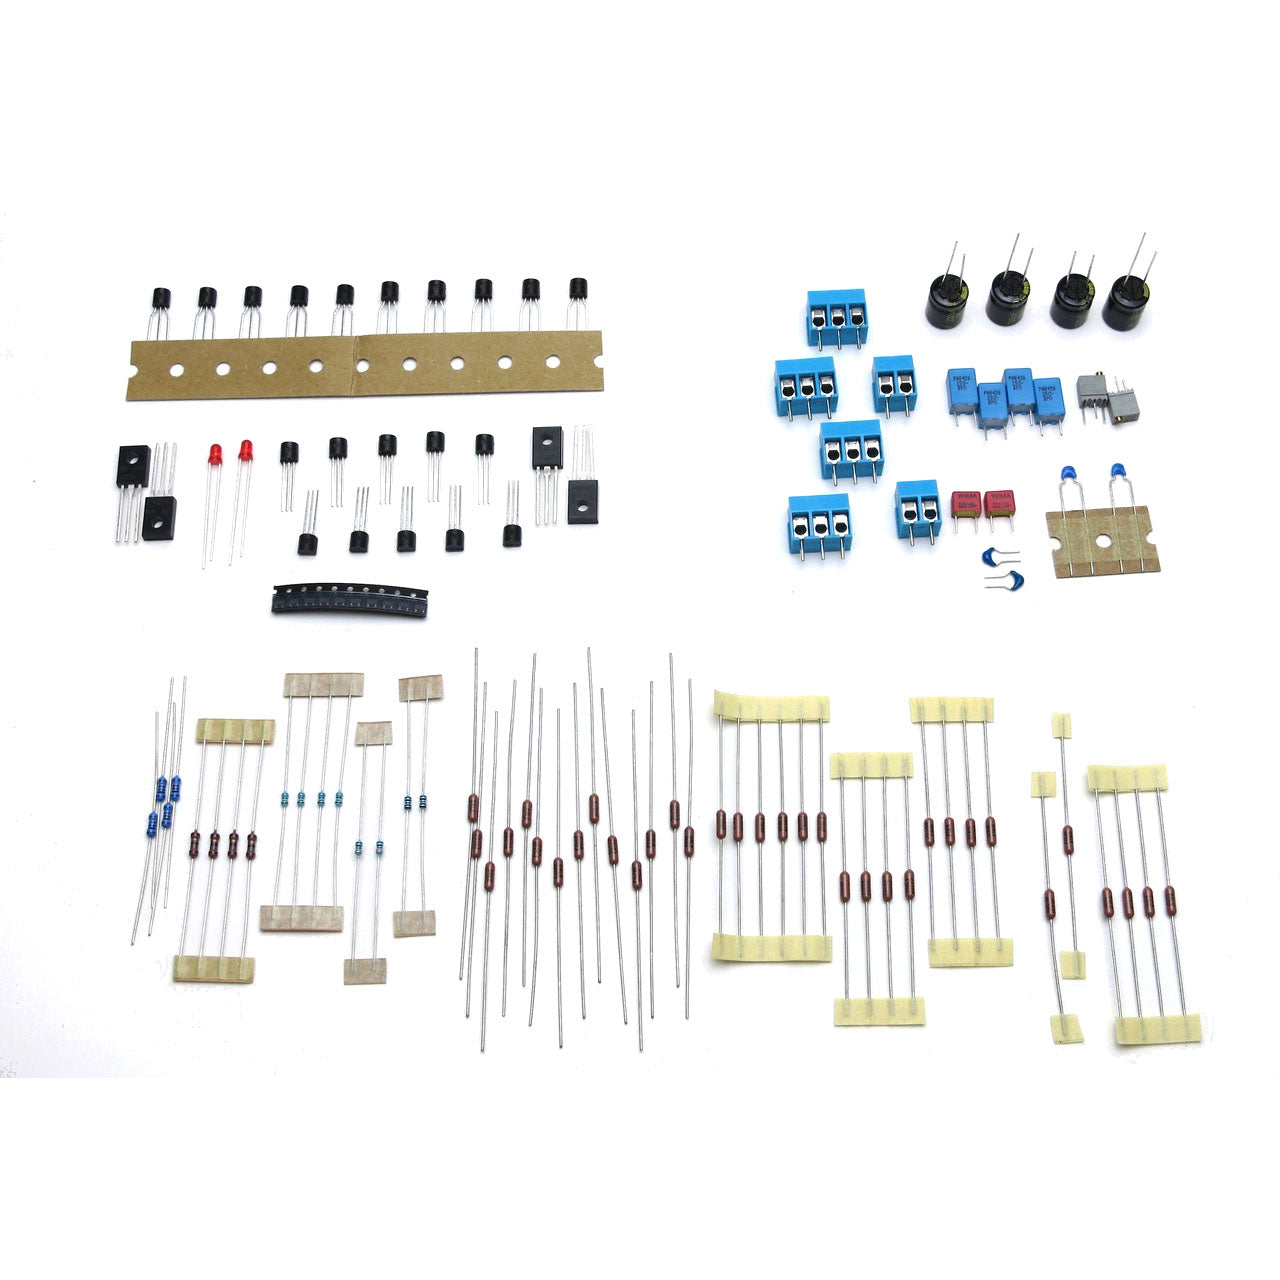
Project: BA2018 Linestage
Wayne's BA 2018 Linestage is the latest DIY pre-amplifier / linestage product from Wayne Colburn.
Read more about it in the Wayne's BA 2018 Linestage discussion thread on diyAudio.
Watch Wayne's talk about the linestage at Burning Amp 2018.
Note - Photos include parts available at the time of publishing. Individual components are subject to change based on availability.
View collection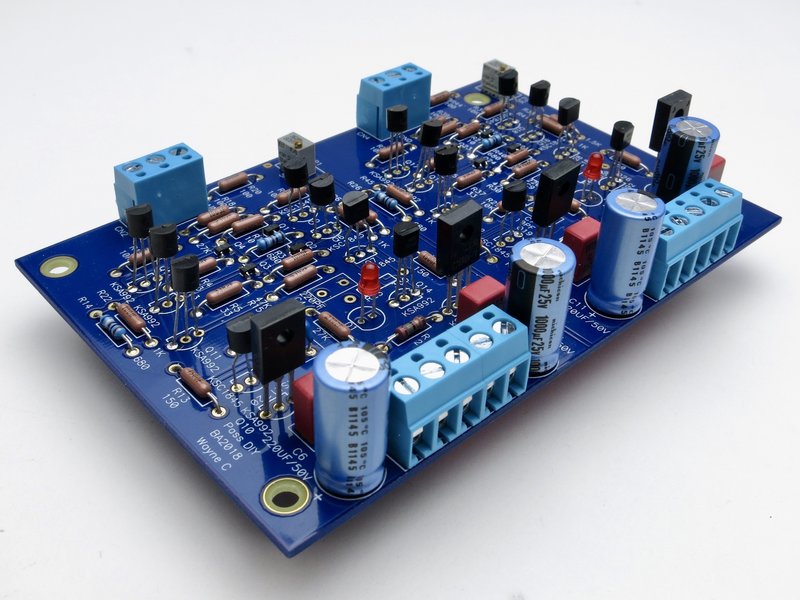
BA2018 Linestage
BA2018 Linestage
BA2018 Linestage
Project: BA3 Burning Preamplifier
View collection
BA3 Preamplifier
BA3 Preamplifier
Project: F5
The F5 is a Push-Pull, Class-A power amplifier. It is unique in that it has no capacitors in the amplifier circuit. The F5 is a voltage source amplifier, requiring nothing out of the ordinary from your preamp or speakers.
The F5 is probably the most popular amplifier being built on DIYaudio these days. It is simple to make, sounds fantastic, and has similar gain to many commercial amps.
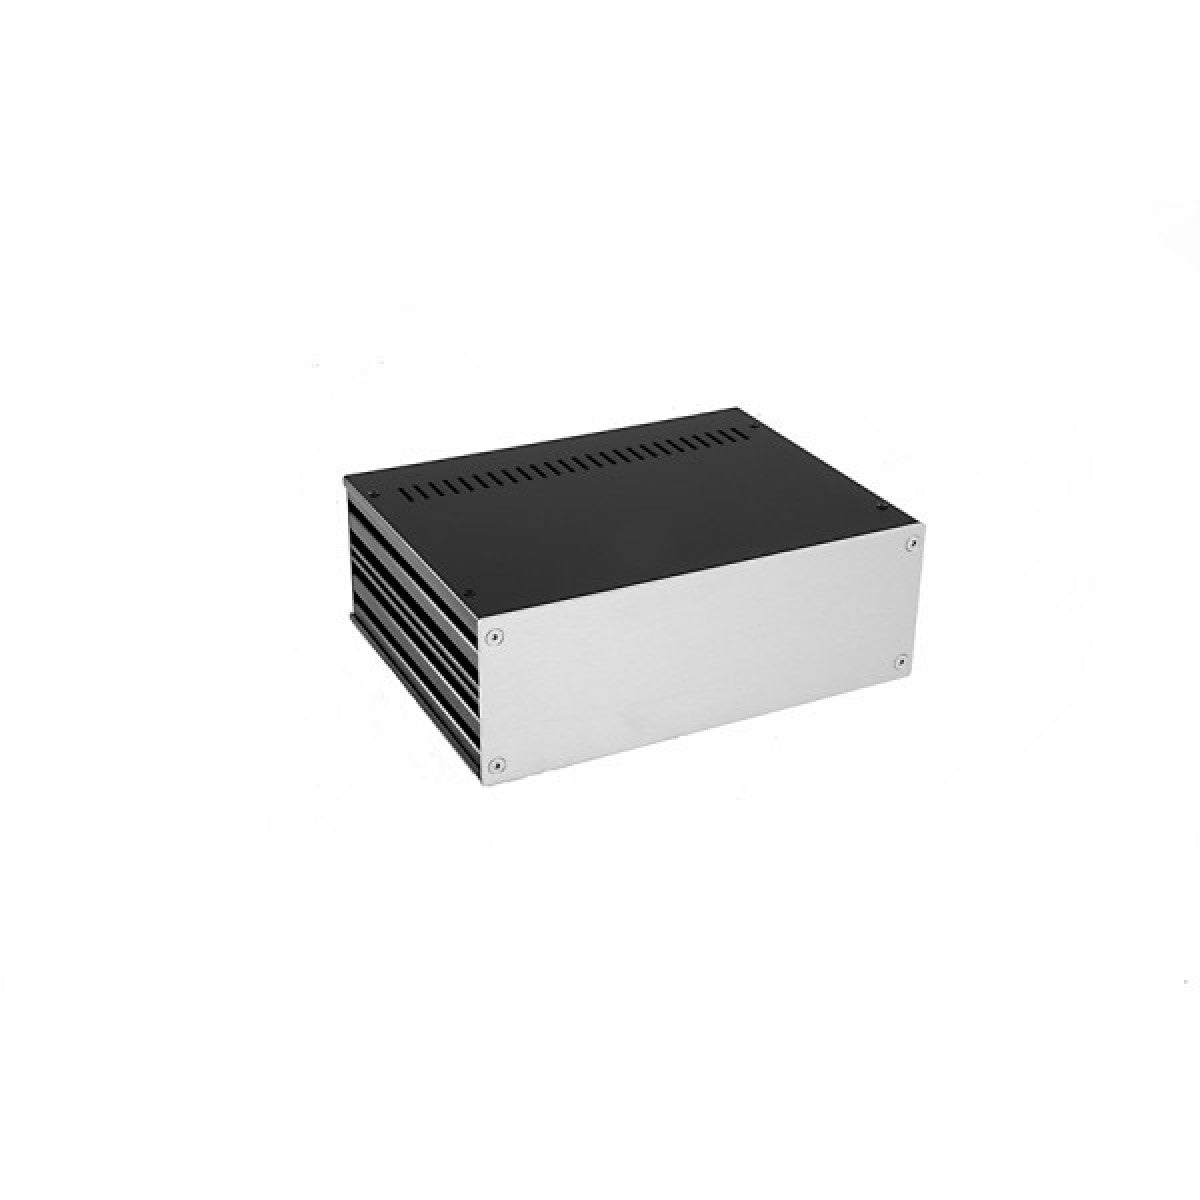
Populate these boards with your components, then add your own power supply, chassis and heat sinks to complete the amplifier. The mounting hole spacing is the same as all other diyAudio Version 2 UMS boards.
Output power
25WPC into 8ohm
Power supply requirements
A Bipolar power supply of (+/- 24V) is required. This will require an 18V+18V (or 36V Center Tapped) transformer from 300-500VA, and PSU capacitance of 30,000uF per rail or more. The PSU for the F4, F5, and Aleph J are all essentially identical. See the F5 build guide for details.
Chassis suggestions
The 4U Deluxe Amplifier Chassis makes a great home for this amplifier, and has pre-tapped holes that match the circuit board and transistor mounting positions. The diyAudio "Universal Mounting Specification" (UMS) is a common mounting pattern between the amplifier PCB and the heatsinks. If you utilize the UMS on your heatsinks or use one of the pre-drilled chassis from diyAudio, you will be able to quickly and easily mount different amplifier boards in the same chassis. For example, a 4U 'Jack of all Chassis' with a 400VA, 18V+18V transformer and PSU board, will give you a power supply and chassis where you could try the F4, F5, F5C, Aleph J, and other Pass/Firstwatt amps in the future merely by swapping the amp PCB. The investment in Chassis and PSU needs only be made once.
Please see the F5 thread in the store support forum for any questions you might have and a definitive list of relevant links and resources.
Change history
V1.0
- Initial release
V2.0
- Updated to suit UMS
V3.0
- Change to F5 schematics from F5 Turbo article
- Minor diagram change in NTC and limiter sections
- P3 added to adjust N/P variations to reduce distortion
- Relabelling of resistors to match schematics
Layout changes
- JFETs moved further away from current traces
- Hole for OUT moved to other edge of board to make it prettier and increase symmetry
- Middle mounting holes removed
Additional Information
V3 information (the current board is V3)
- The F5 V3 boards use the part numbering from the F-5 Turbo article, which is the latest official version of the F5.
- The P3 is optional and only used for advanced builders with advanced equipment - you can leave it out if you don't have this equipment.


F5

Project: F5M
The original F5 amplifier was a commercial product made by First Watt in 2008, and like other FW projects, in a limited quantity. Also like other FW amplifiers it was relatively low power Class A, emphasizing simplicity and sonic quality.
Features:
- Simpler design to the original F5, without compromising the qualities which made the original popular.
- Input impedance: 47k Ohm
- Damping factor: ~50
A special and limited edition 4U400 chassis is available for pre-order now that will be suitable for this and many other projects. A range of 3U, 4U and 5U deluxe-style chassis with UMS are in the works to suit this amplifier, and expected to be available in late June.
View collection
F5M


F5M

Project: F6
These F-6 Clone Boards use the same circuit as the Nelson Pass / diyAudio FirstWatt F6 described in the diyAudio FirstWatt F6 thread thread.
This set of circuit boards will make a MOSFET version of the F6 amplifier of Nelson Pass. This amplifier is a new and interesting development from his creative mind, where a small collection of parts comes together to make amazing, beautiful music. This creativity and solid engineering has kept Mr. Pass, and his companies, Pass Labs and FirstWatt, at the forefront of specialist audio engineering and construction, where new and wonderful creations are made.
The original amplifier utilized extremely rare power JFET from SemiSouth, which will never be made again, and are all gone. Be warned, any eBay sources claiming to have the SemiSouth devices are fakes. If you happen to already have the power JFET, they can be used with this PCB.
Populate these boards with your components, then add your own power supply, chassis and heat sinks to complete the amplifier.
Circuit description
The F6 is a Class-A MOSFET power amplifier, with a JFET driver stage. It utilizes a small-signal transformer for phase inversion, so both the output MOSFET are N-channel. This transformer greatly contributes to the overall sonic character of the amp which is very highly regarded and considered to be similar and having all the benefits and positive characteristics of a tube amp... making some observers speculate that much of the positive 'tube amp' sound is the transformers, not the tubes. The F6 is a regular kind of amp - a voltage source amplifier, requiring nothing out of the ordinary from the preamp or the speakers.
Output power
As with most of the FirstWatt amplifiers the power output is 25WPC into 8 ohm. More into 4 ohm.
PSU requirements
A Bipolar power supply of (+/- 24V) is required. This will require an 18V+18V (or 36V Center Tapped) transformer from 300-400VA, (shielded transformers are preferred) and PSU capacitance of at 60,000uF per rail or more. A PSU for the F4, F5, or similar will be appropriate. See the F6 build guide for details.
Chassis (heatsink) requirements
The 4U 'Jack of all Chassis' is ideal for this amplifier. If making your own chassis a good rule of thumb is at least 25sq inch (160sq cm) of finned heatsink per output transistor. (More is always better.) The diyAudio "Universal Mounting Spec" (UMS) is a common mounting pattern between the amplifier PCB and the heatsinks. If you utilize the UMS on your heatsinks or use one of the pre-drilled chassis from the diyAudio store, you will be able to quickly and easily mount different amplifier boards in the same chassis. For example, a 4U 'Jack of all Chassis' with a 400VA, 18V+18V transformer and PSU board, will give you a power supply and chassis where you could try the F4, F5, F5C, Aleph J, and other Pass/FirstWatt amps in the future merely by swapping the amp PCB. The investment in Chassis and PSU needs only be made once.
Build Guide
An Illustrated build guide showing all sorts of useful information on how to build the F6 can be found here -- F6 Build Guide
View collection

F6


F6
Project: Iron Pre
View collection
Iron Pre

Iron Pre
Iron Pre
Iron Pre
Iron Pre

Iron Pre
Iron Pre
Iron Pre
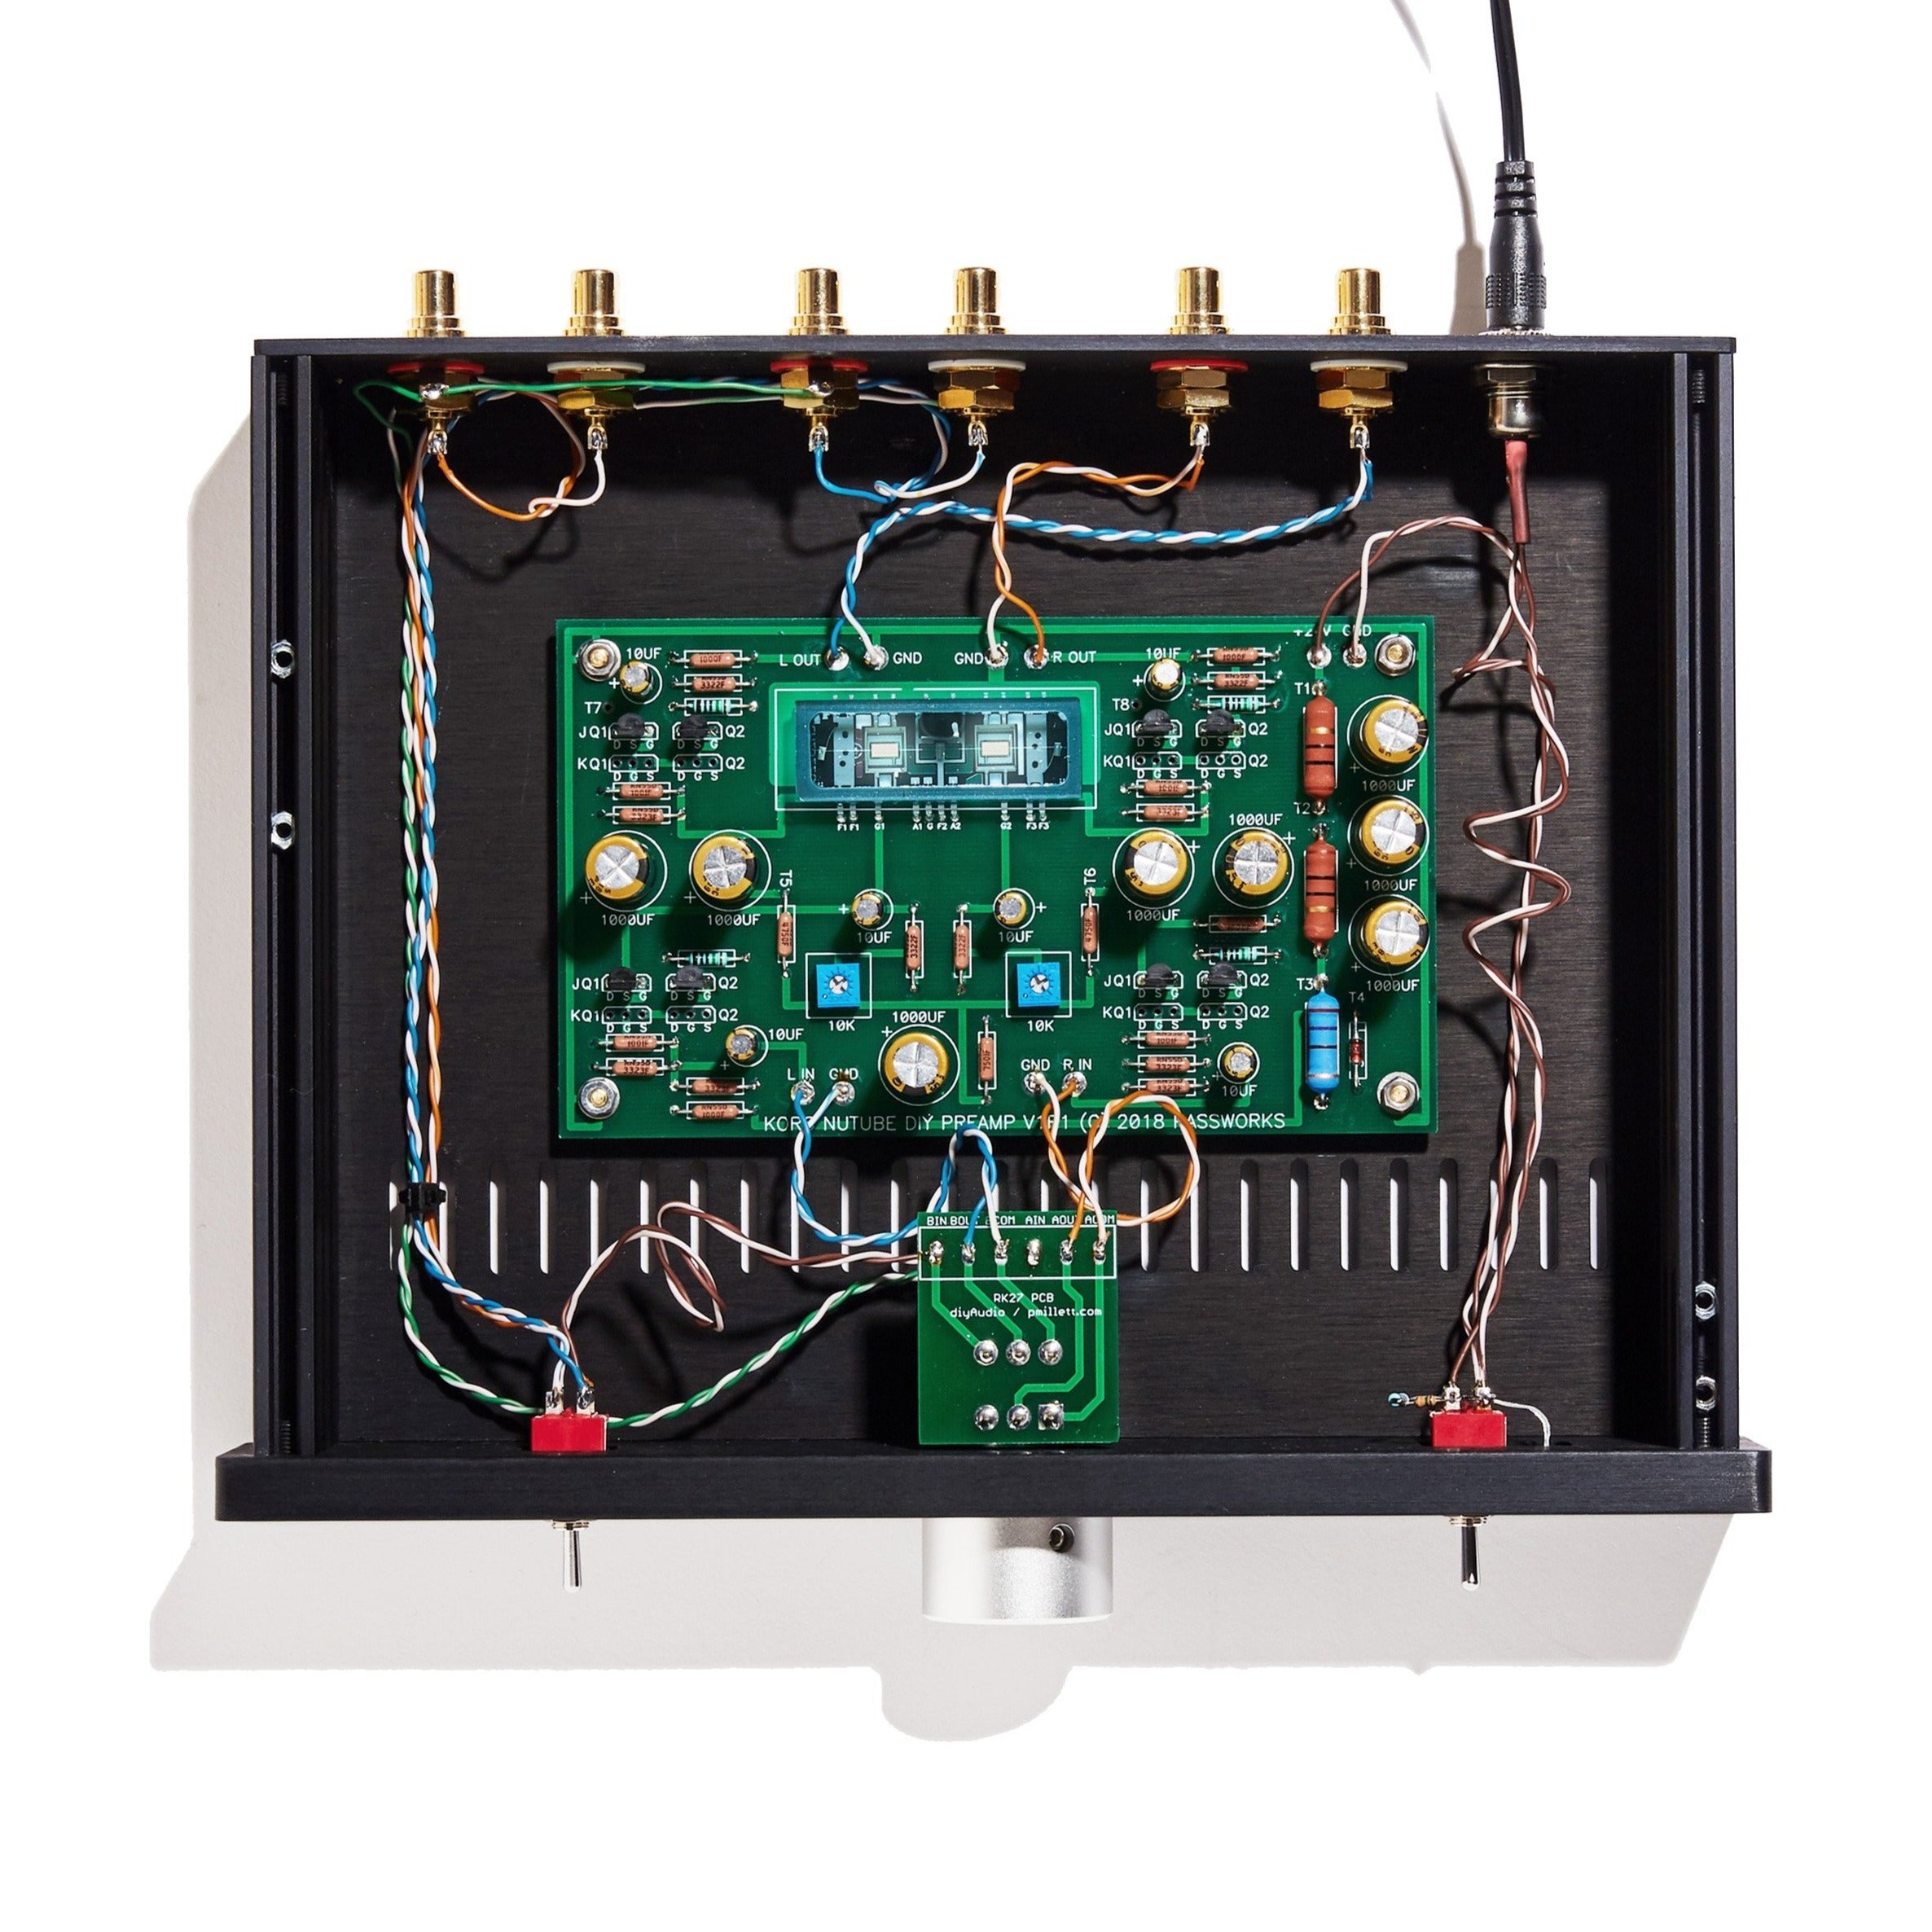
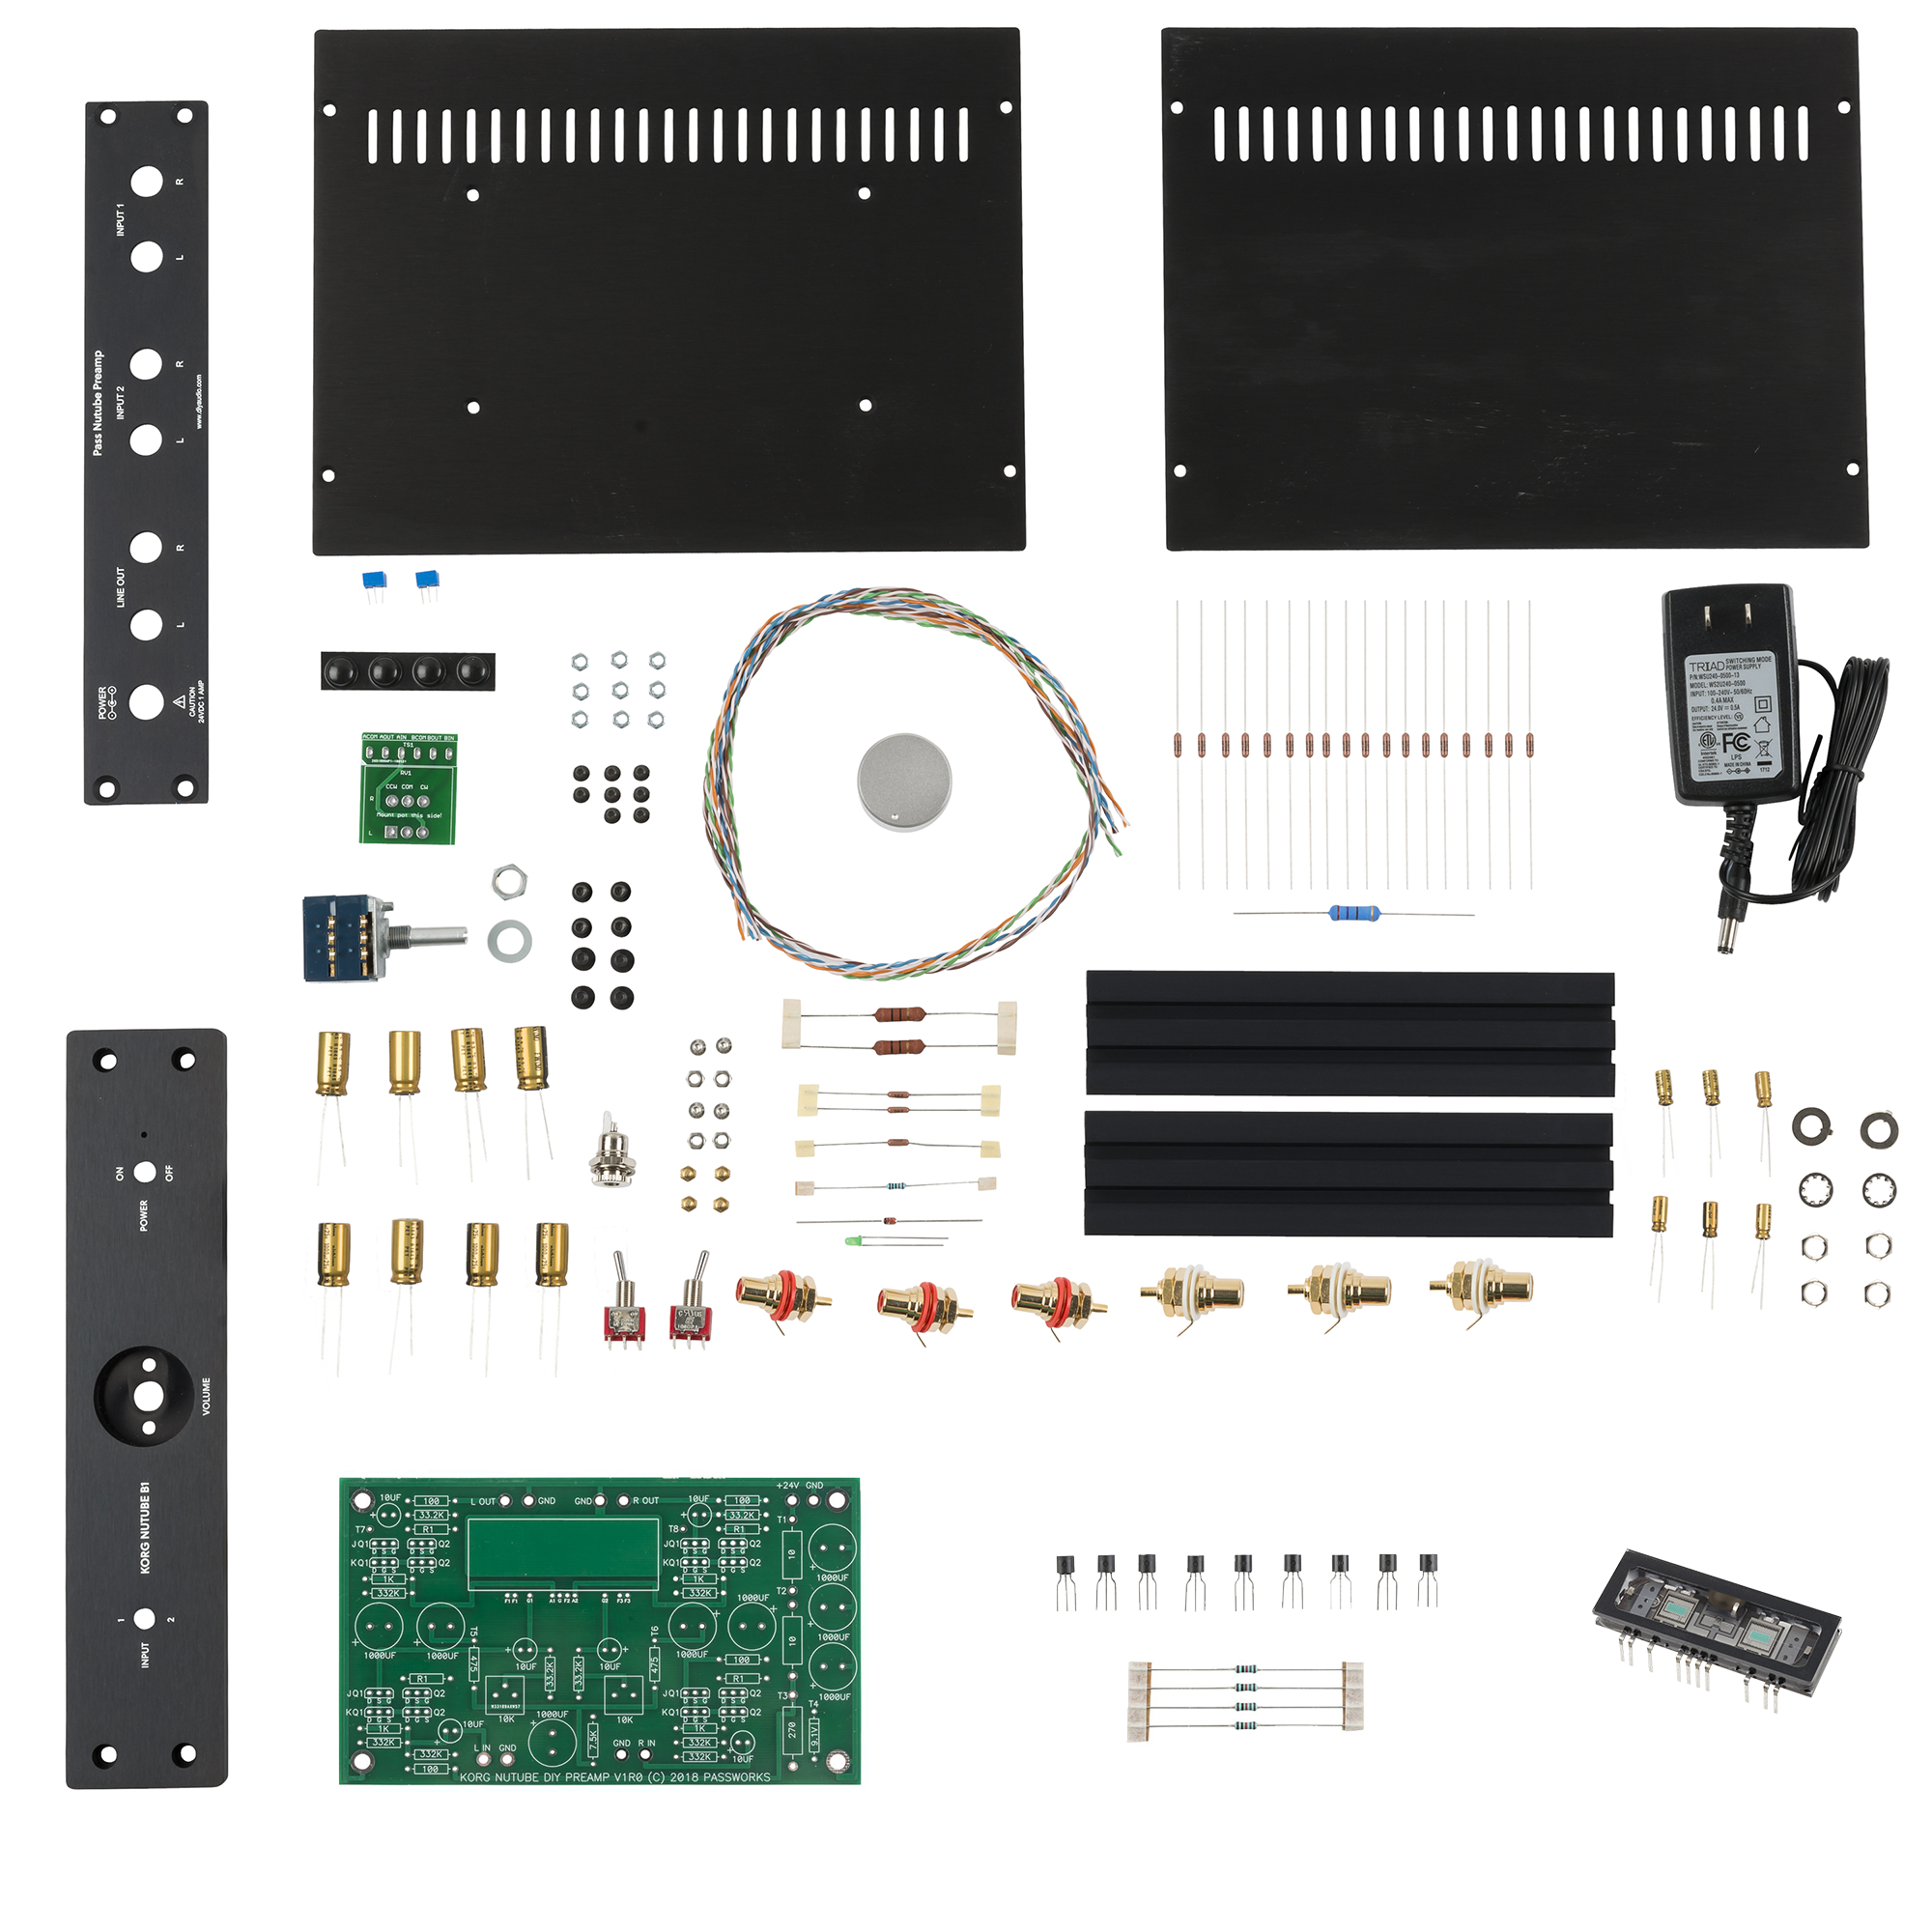
Project: Korg Nutube B1 Preamplifier
At the Burning Amp Festival in 2017 Nelson presented a pre-amp using the Korg Nutube dual triode. The latest revision of the circuit available is now available complete with Fairchild JFETs and all directly supplied by Nelson Pass.
Purchase just what you need based on what you have in your stash or get everything you need in a complete kit. The complete build guide helps DIYers just getting a start to complete an exceptional pre-amplifier in a few afternoons.
View collection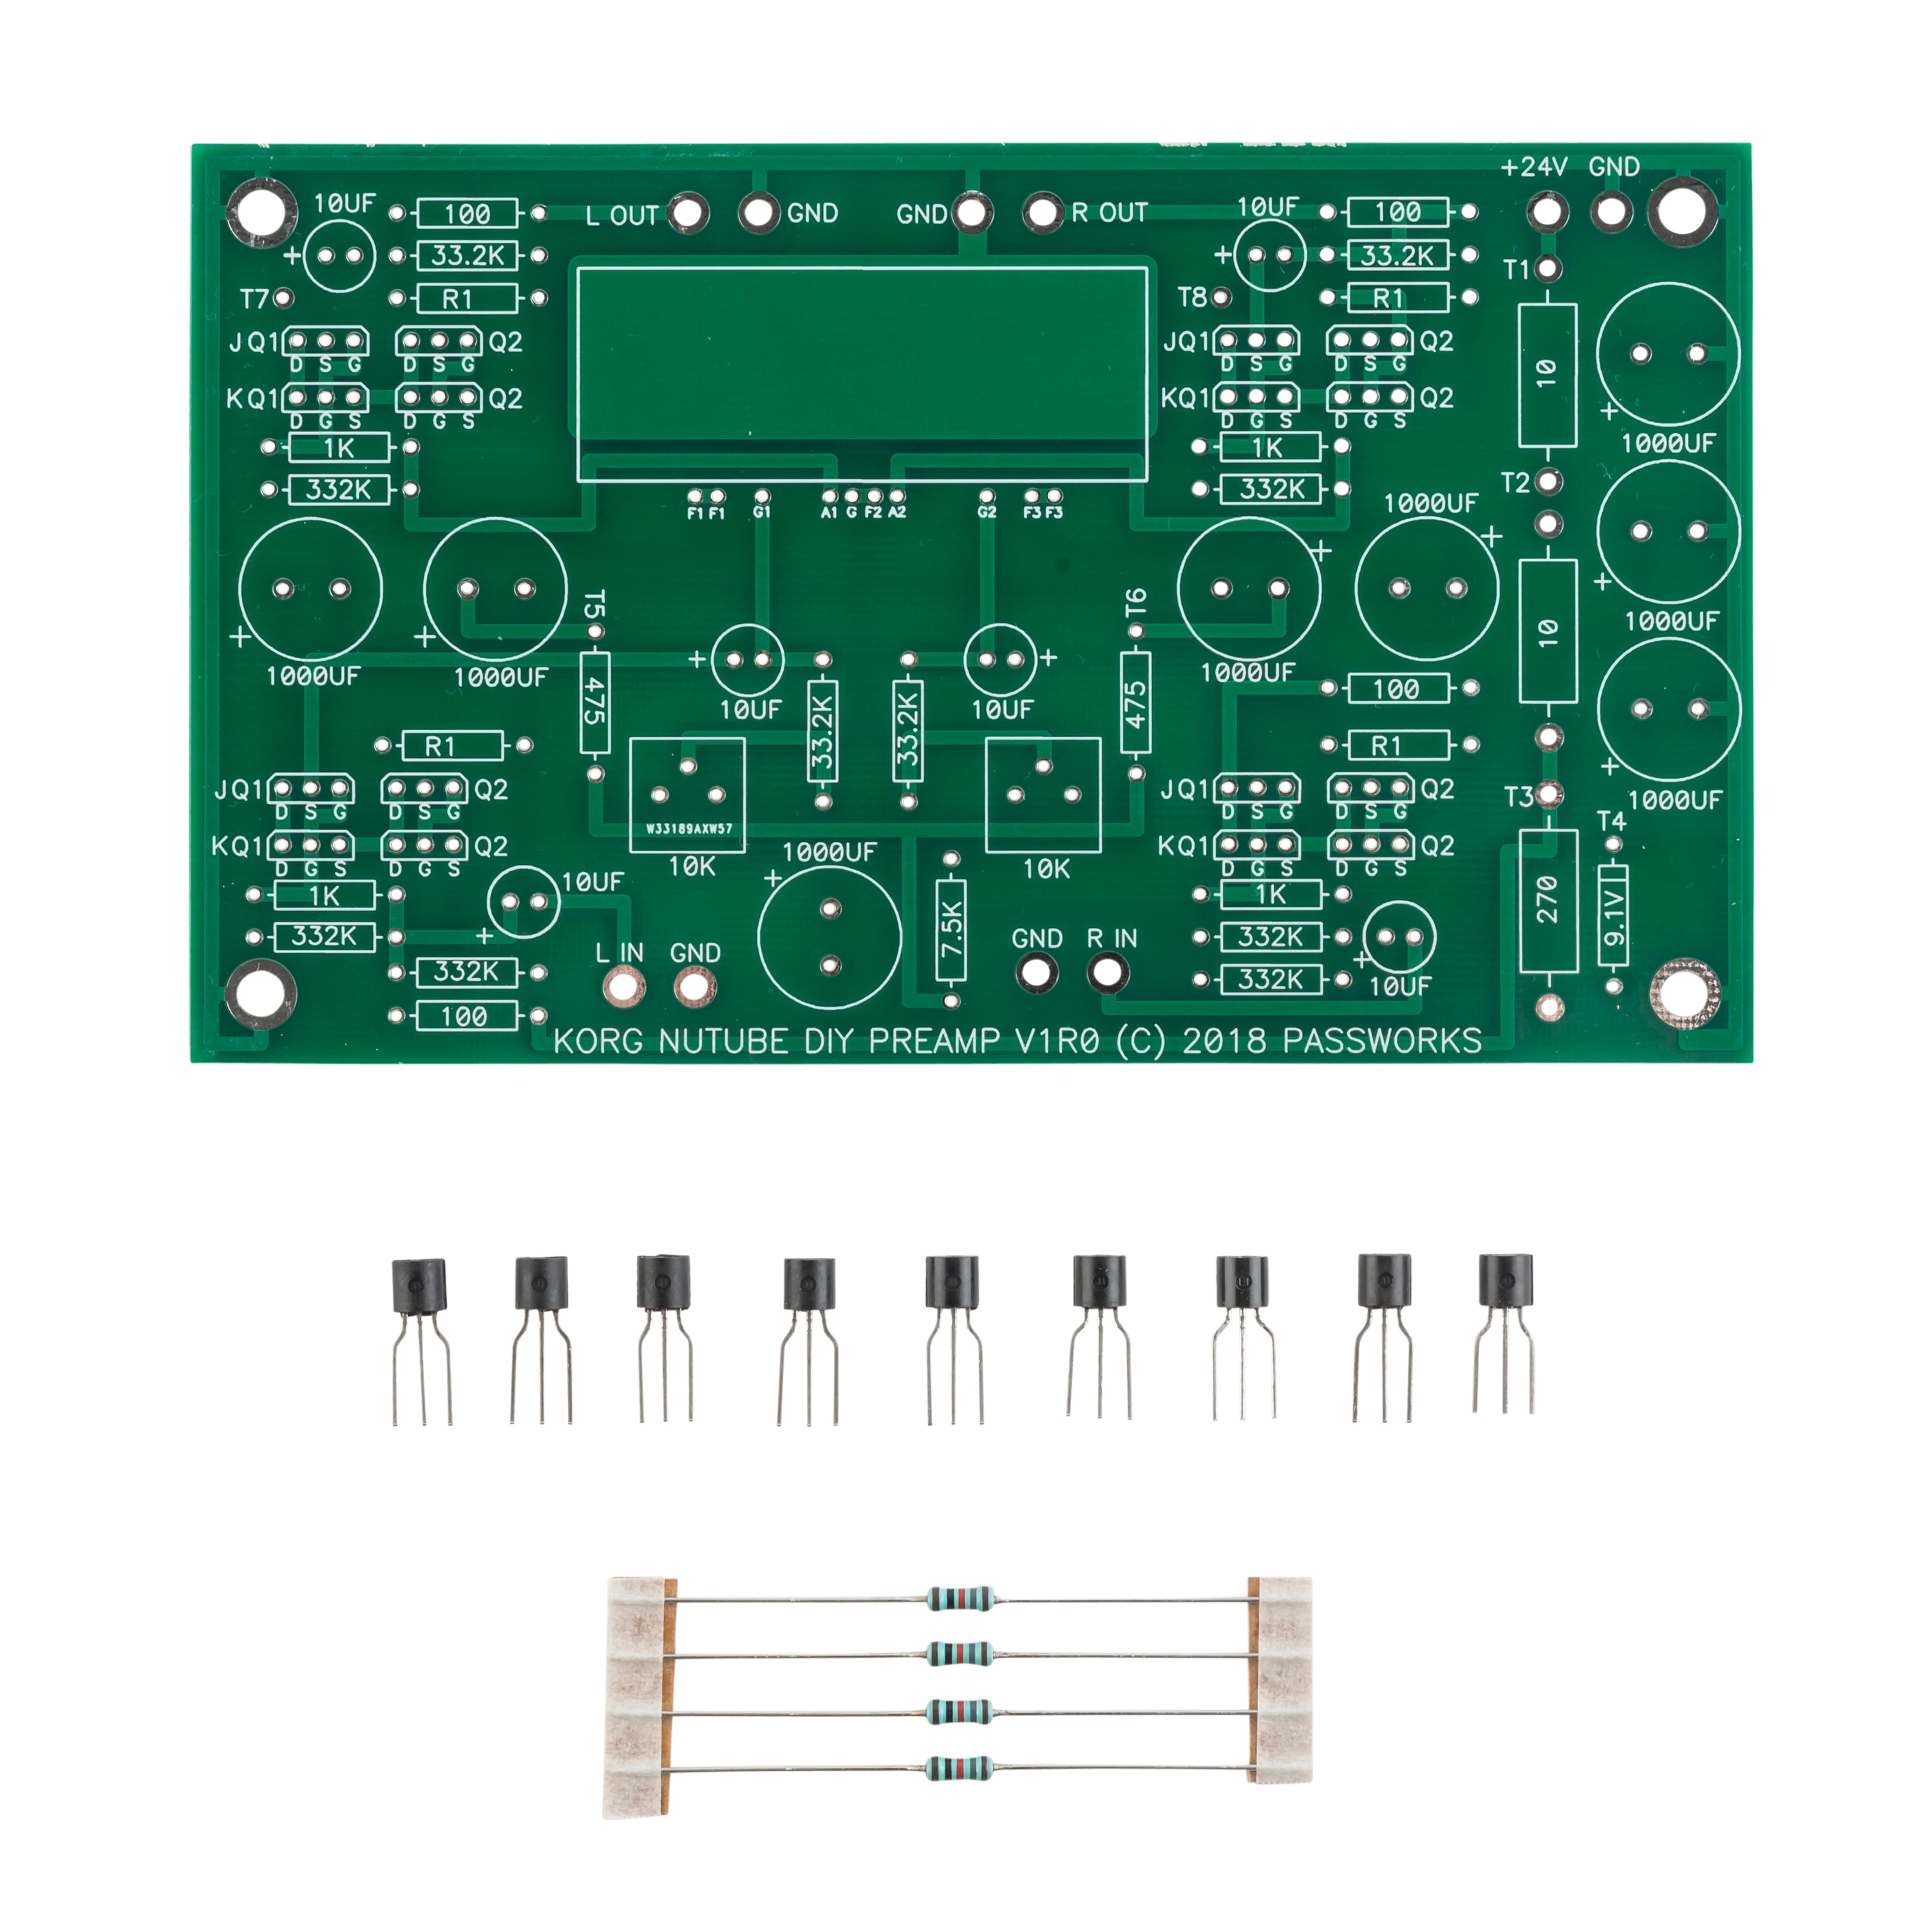
Project: Noir
Noir is a unique low cost headphone amplifier project, comprised of three circuit boards. The entire Noir BOM is purchasable from Mouser in a single click. Two of the PCBs form pre-made front and rear panels so you can easily form an enclosure. Very cool!
Noir exploits the well known advantages of class-A operation and a minimalist all-discrete circuit design. The amplifier consists of only two transistors (each operated in single ended class-A) giving a very short and linear signal path.
There is a 1/4" headphone jack on the front panel, and preamp outputs (RCA jacks) on the rear panel. Gain is +6 dB. The volume control is an audiophile-quality ALPS Blue Velvet potentiometer.
For more information, to see completed builds or to participate in the community discussion, please visit the Noir diyAudio Discussion Thread. A detailed 37 page Noir Build Guide is now also available to walk you through the construction process.
The amplifier PCB is designed for ease of assembly. All components are thru-hole mounted and are spaced apart generously, making it a breeze to stuff and solder the board. Component IDs and component values are printed on the board, as a further aid to construction. It is an excellent choice for first-time builders. PCB size is 182mm x 112mm, gold traces, and premium 2oz copper thickness.
The amplifier PCB can be installed in a wide variety of chassis. It fits especially well in the Galaxy 1U 230x170mm chassis sold here in the store. In fact, the Noir PCB set includes a front panel and a back panel made of black PCB material (epoxy fiberglass) which fits the 1U Galaxy perfectly. These panels are pre-drilled and pre-labeled, so builders don't need to spend any time in the metal working shop, preparing the front panel or back panel. These panel PCBs don't serve any electrical purpose other than providing ground for the switches.
However should you eventually want to do so and have metal front/back panels, you'll have the original easy-to-work aluminum panels from the original chassis at hand. Noir is a project you can grow into.
You can purchase the PCBs by themselves for $29, or a bundle of the PCBs plus a US-stock chassis (which ships from the US, not Italy) for just $69. As mentioned, the chassis does include the original blank black aluminum front/back panels.
FEATURES
- All-discrete, solid state. No ICs, No vacuum tubes.
- Single ended, Class A circuit operating at 150 mA bias current (exceptionally high for a headphone amp)
- No mains voltage inside the DIY chassis. Power supply is a commercial, safety rated, DC wall wart followed by a 2 stage supply filter on the PCB
- Non-inverting circuit design. this is important because Left and Right headphones, unlike loudspeakers, share their (-) terminal. When a headphone amp has an inverting circuit, you can't undo the inversion by swapping (+) and (-) on each driver.
HOW DOES IT SOUND?
As the saying goes "the proof of the pudding is in the tasting". Here's some feedback from people who have built it, several of whom determined it is their favorite HPA of all time. Others remarked that it is an excellent choice for a beginner's DIY HPA project.
|
"After two weeks and rotating thru several of my other HPAs I thought the newness would wear off like so many others, but it's still absolutely stunning... the clarity and openness of this Class A amp is just wonderful... its the best amp I have heard to date and I have heard a lot of them....(i have 10 in house at the moment)...
- Adyula " T2 is absolutely amazing. I believe it to be the best HPA I've ever heard"
- 6L6 |
"Dead quiet with no input and cranked to 11... unmolested, and detailed... balanced well, the treble is clear.. bass end is as good as my headphones will produce... a very nice, easy to build headphone amp that sounds great - perfect for someone starting out with DIY or as an enjoyable side project for the more experienced builder"
- AVTech23 " For a first time builder, I would recommend Mark's T2. Easier to build, less expensive, and more fun to listen to, as long as you don't need a ton of gain."
- AVDesignGuru |
BILL OF MATERIALS AND MOUSER SHOPPING CART
A spreadsheet Bill Of Materials is provided, and also a pre-loaded Shopping Cart at Mouser Electronics is presented. With a single click on the shopping cart, you can purchase all of the electronic components needed to build your Noir. You'll also need a 1U Galaxy chassis shipped from Italy or we have a few in the US at the moment which can be purchased as a bundle with the PCB from this page and will ship from the US.
NOTE: the ALPS potentiometer is frequently sold out at Mouser. Another source (cheaper too!) with lots of units in stock, is parts-express.com
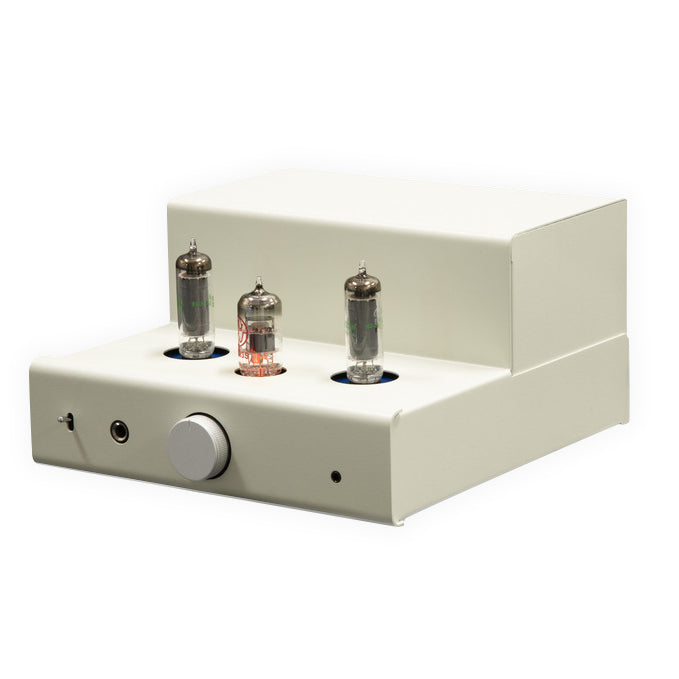
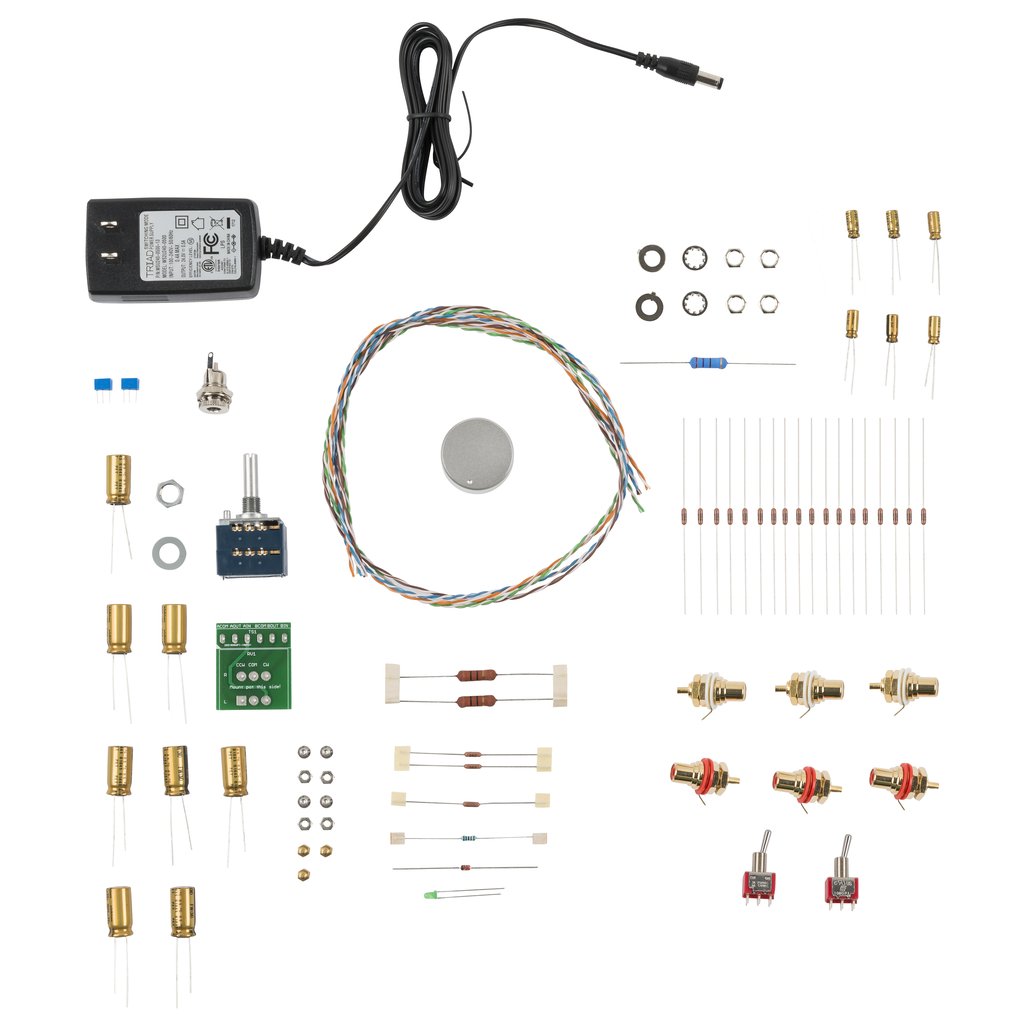
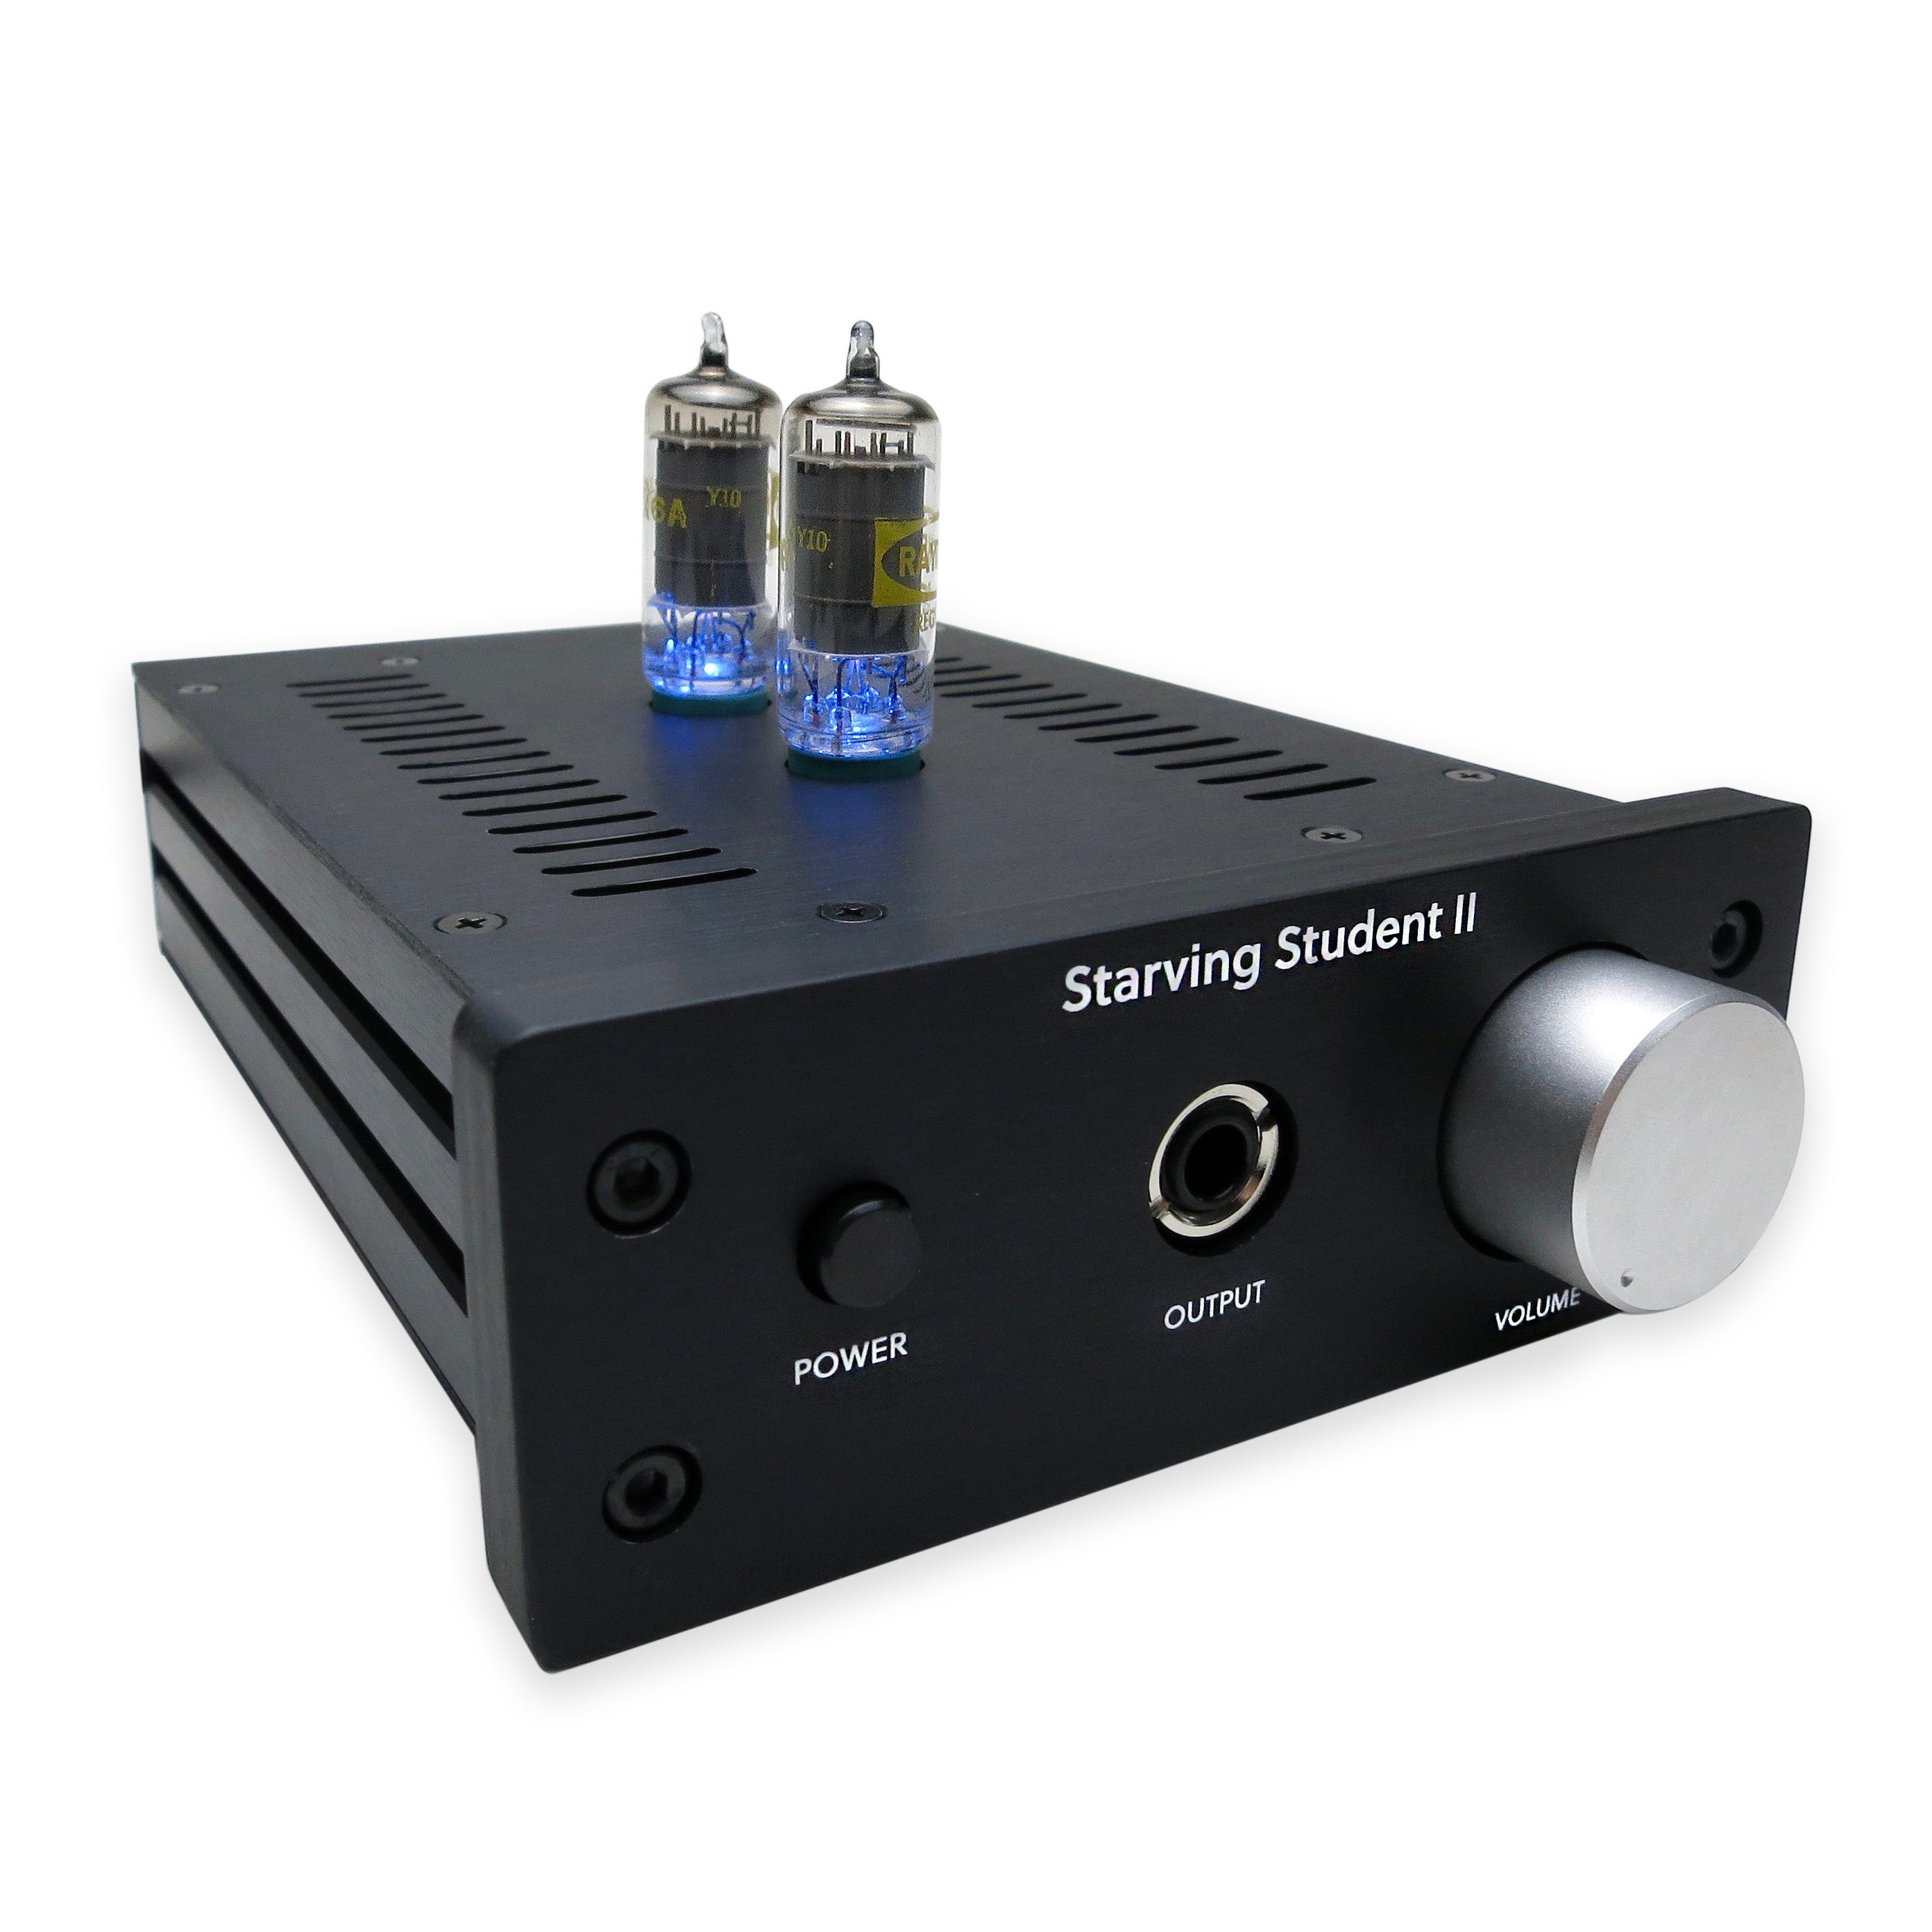
Project: Starving Student
We're happy to announce the immediate availability of this new collaboration between Pete Millett and diyAudio, an updated version of the classic Starving Student.
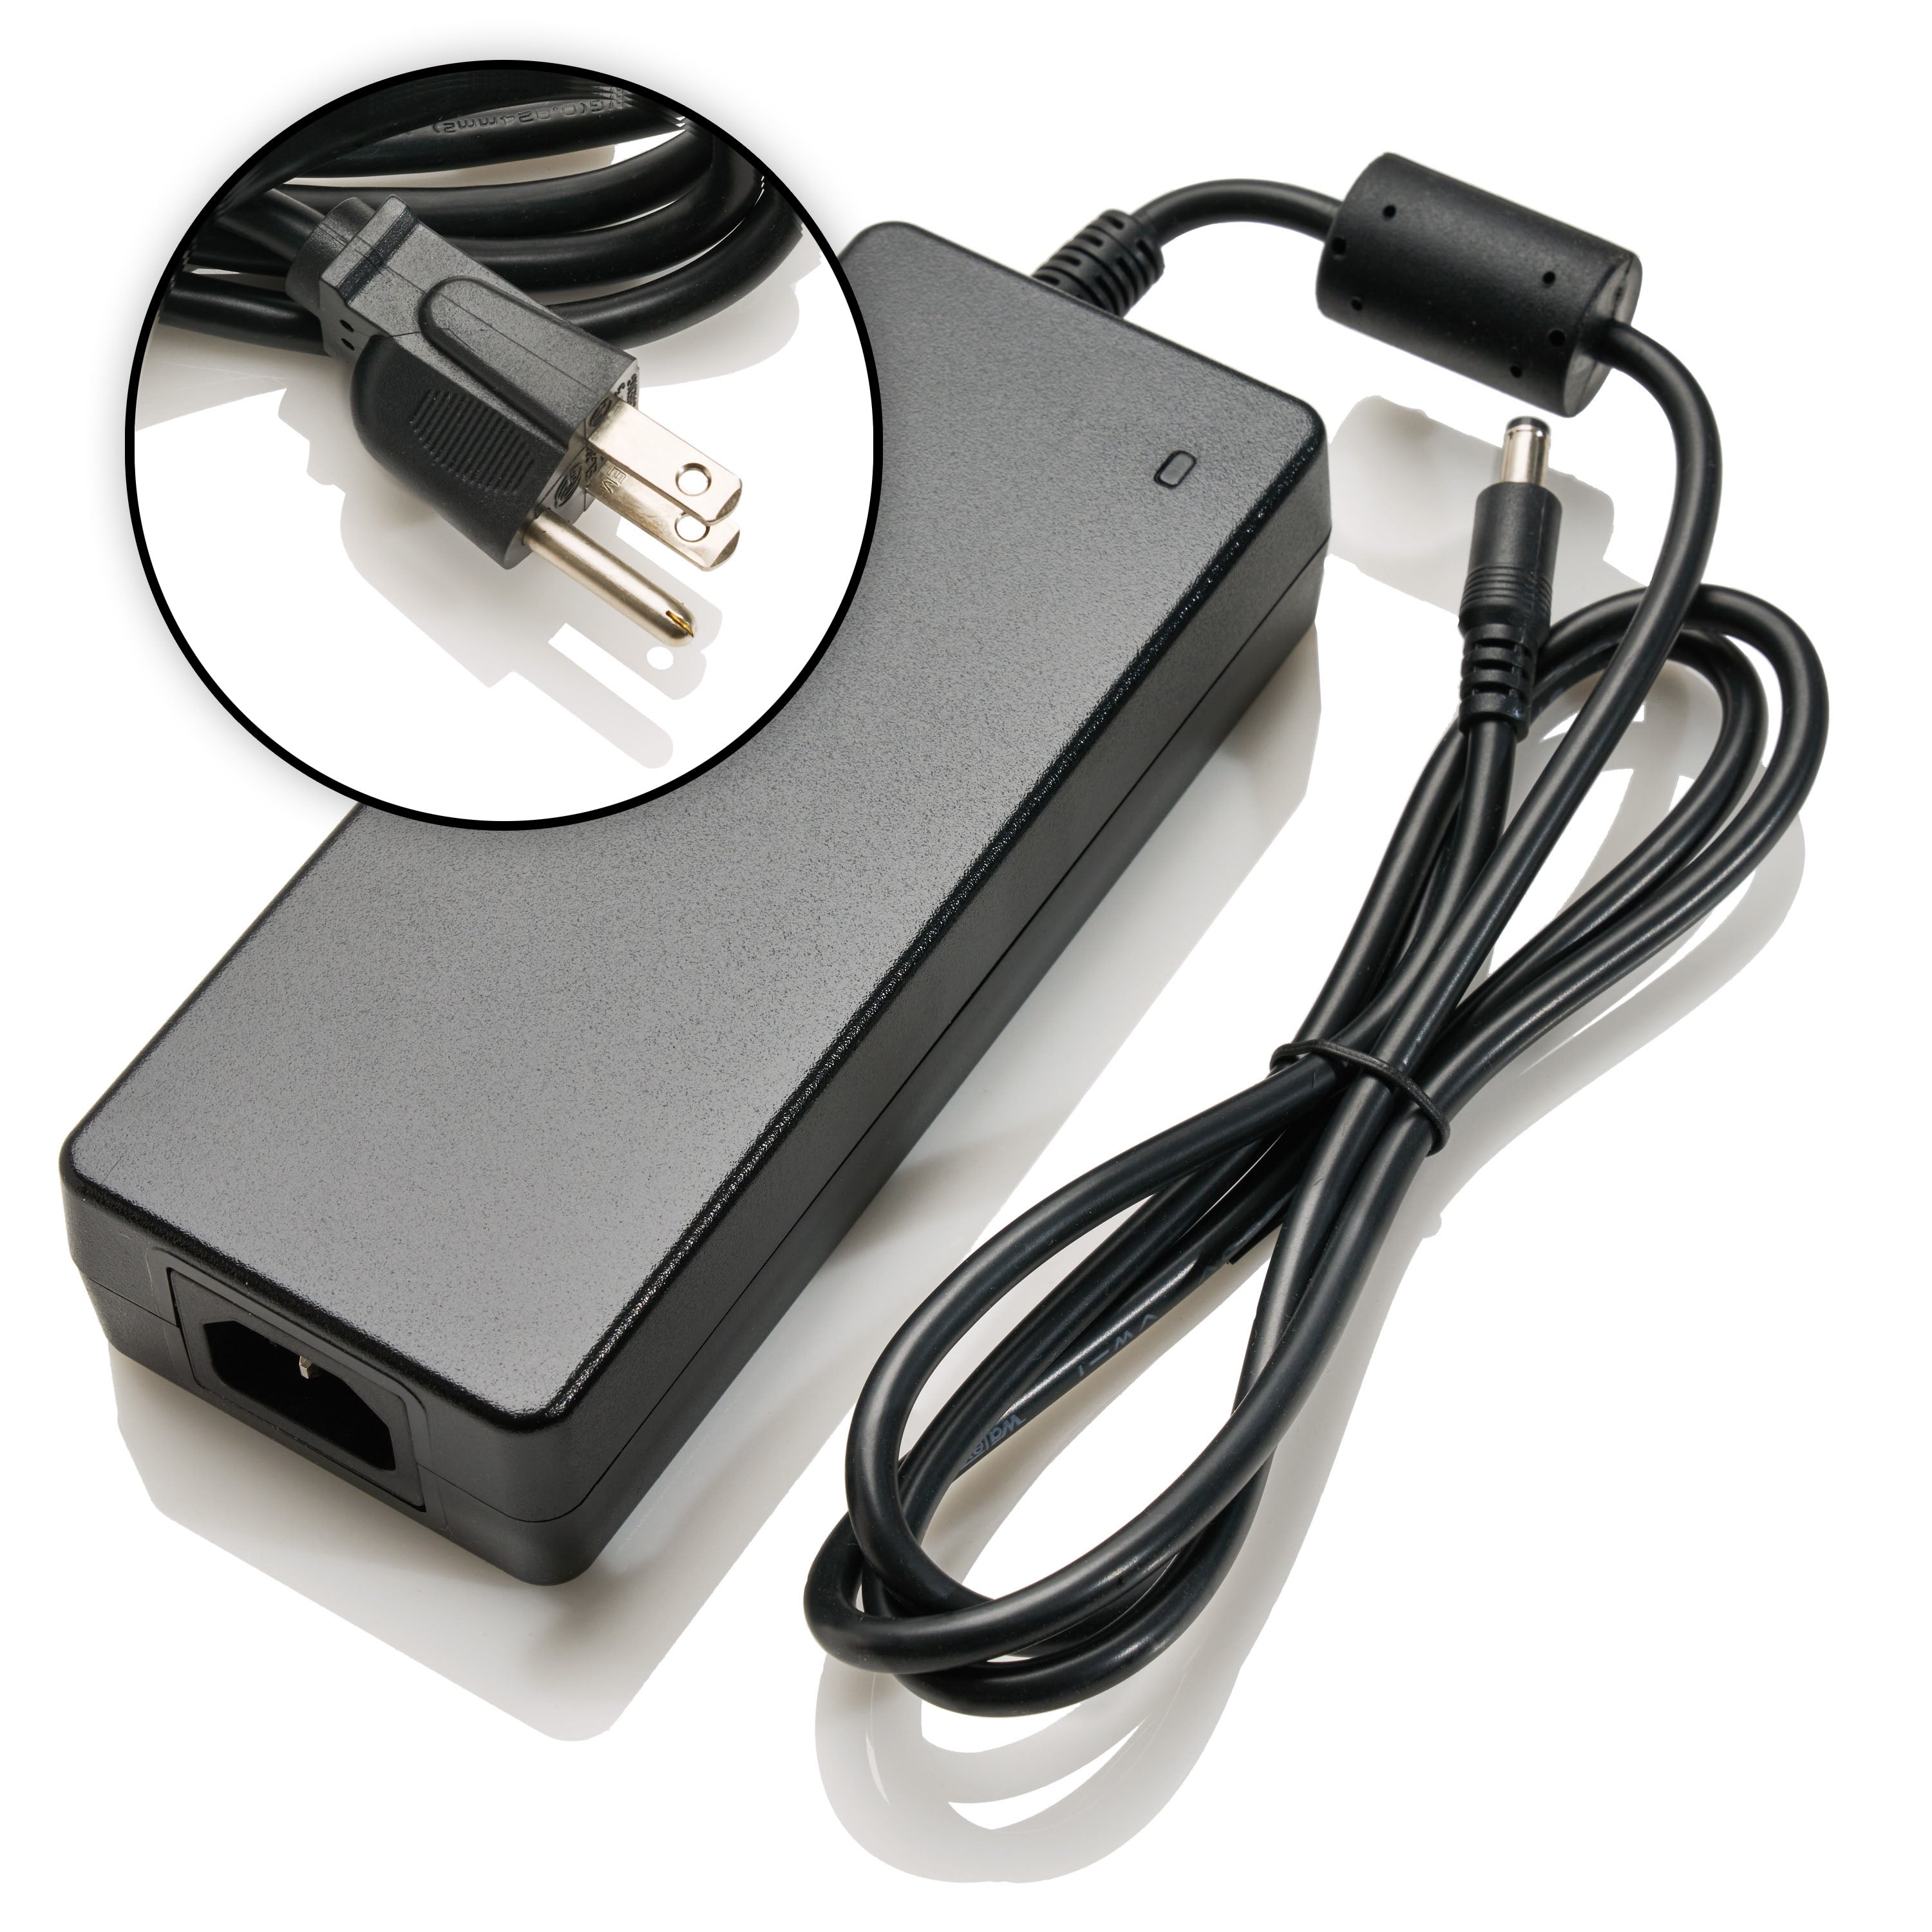
The Starving Student II is a hybrid tube/solid state headphone amplifier and pre-amplifier. 48VDC is fed via in from a high quality universal-voltage Meanwell power adapter. It has dual RCA inputs, with a 1/4” jack for headphones and another pair of RCA outputs for use as a pre-amplifier.
BOM and schematics are inside Pete's excellent SSII assembly instructions. 6L6 has prepared a beautiful SSII step-by-step build guide. The SSII information directory contains links to every SSII resource.
Both the parts kit and chassis will ship immediately from our US warehouse at the same time. You can ask questions and discuss your build in the SSII discussion thread on diyAudio.
Features
- New and improved redesign of the classic Starving Student by tube guru Pete Millett
- Detailed step-by-step SSII build guide from 6L6
- Can be used as a headphone amplifier or pre-amplifier
- Includes two 18FX6 vacuum tubes, functioning as triodes
- Choice of resistor or CCS plate loading for preferentially lower distortion or softer clipping, using a blue LED to bias CCS and light the tubes
- Time delay muting circuit to allow the tubes to warm up
- Sold as a complete kit with everything included
Specifications
| Spec | Plate load | 150 ohm load | 30 ohm load |
| Gain (at max volme setting) | CCS | 20 dB | 18 dB |
| Resistor | 17 dB | 16 dB | |
| Frequency response +/-3dB | CCS | 11Hz - 40kHz | 18Hz - 40kHz |
| Resistor | 12Hz - 50kHz | 20Hz - 50kHz | |
| Frequency response 20Hz-20kHz | CCS | +/- 0.8dB | +/- 1dB |
| Resistor | +/- 0.8dB | +/- 1dB | |
| THD+N 1V 1kHz | CCS | 0.47 % | 0.15 % |
| Resistor | 1.8 % | 1.3 % | |
| Maximum output @ 5% THD | CCS | 9.9 V RMS | 2.5 V RMS |
| Resistor | 3.1 V RMS | 2.4 V RMS |
We also have available a zip archive containing 12 different SSII graphs.
View collection
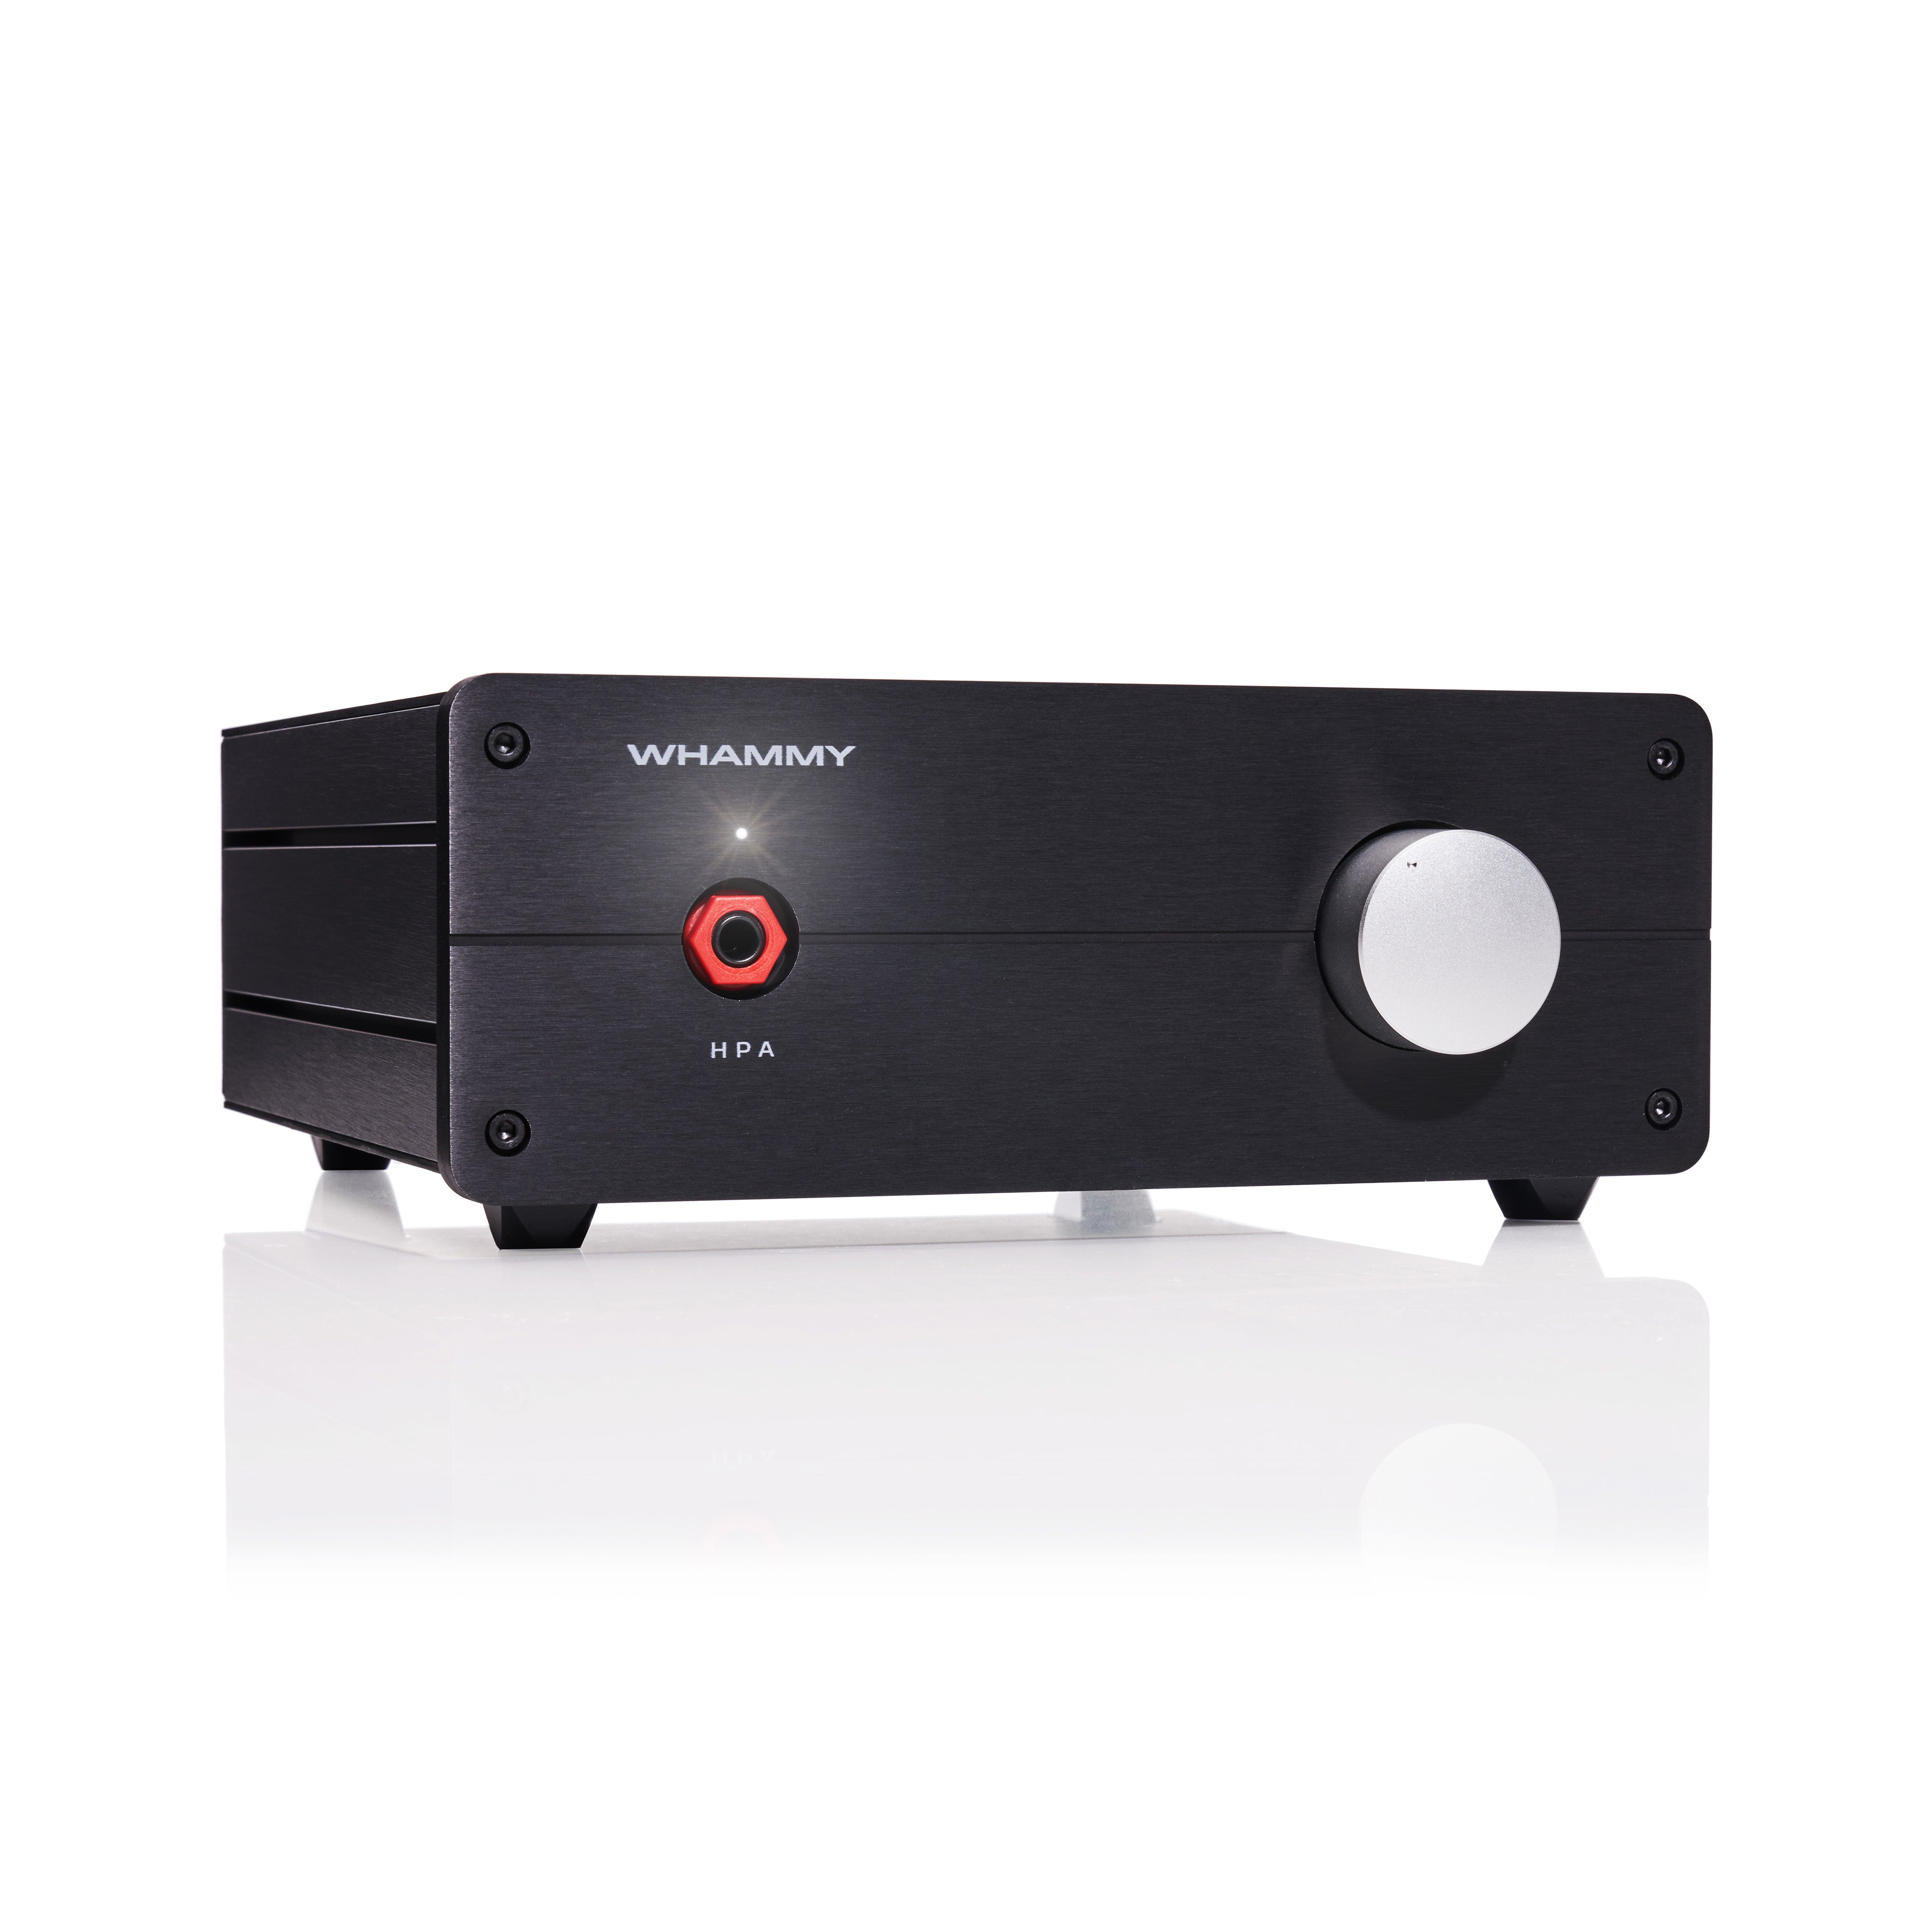
Project: WHAMMY
The WHAMMY Class-A headphone amplifier
Wayne Colburn, the genius at Pass Labs who for the last 25 years has designed essentially all the things that aren't speaker amplifiers, wanted to make a fun, high-performance, fantastic-sounding, Class-A, DIY headphone amp for this community. We call it:
Wayne's Headphone Amp Must Make Yourself
Yes, it's a silly name. But it's cute. And it explains a lot about it. So it stuck.
Given the explosion in the popularity of headphones, as well as the unbelievable amount of choice and variety in the market, it seemed that a simple and great-sounding headphone amp would be a great addition to the DIY community.
Because there are so many choices of headphones, from Planars to IEM's, high impedance or low, this amp will drive any headphone you want to throw at it (Well, not electrostatic headphones directly, no amp like this will, but it will happily drive a step-up transformer like Stax).
Wayne wanted a universal headphone amp for his desk. This is the fruit of that idea. It’s made to be made in an afternoon or an evening and it has no builder adjustments, so it’s going to have a high likelihood of success and completion for beginners and experienced DIYers. 
It's an all in one PCB, just wire the AC & fuse, input and output jacks. Add a selector switch if you like.
Class-A output stage with enough current to drive anything. It also makes a wonderful line stage with about 14db of gain.
You can purchase a full kit on this page, or a-la-carte to suit your budget or desire:
-
WHAMMY PCB
- WHAMMY Chassis
- WHAMMY Completion Kit
- WHAMMY Full Kit (this page)
The full kit includes everything you need to build the project (PCB, chassis and WHAMMY completion kit).
Note - Photos include parts available at the time of publishing. Individual components are subject to change based on availability.
Please note: We have not yet produced a build guide using the new completion kit parts and the new chassis. However you can follow the original WHAMMY build guide and with some help from the forum to answer any questions you might have, you should be able to complete the build without too much trouble.
Reviews
How to build it
Most of the info you need to complete this project can be found in the first 6 posts this thread, a well-illustrated guide showing how everything goes together.
- Step by step WHAMMY build guide on guides.diyaudio.com
- WHAMMY build guide and general discussion thread
- Rough Bill of Materials (this is not the BOM used for the kit)
Video
Here's a video of Wayne talking about the Whammy at Burning Amplifier Festival 2017 -- Wayne Colburn at BAF '17
View collection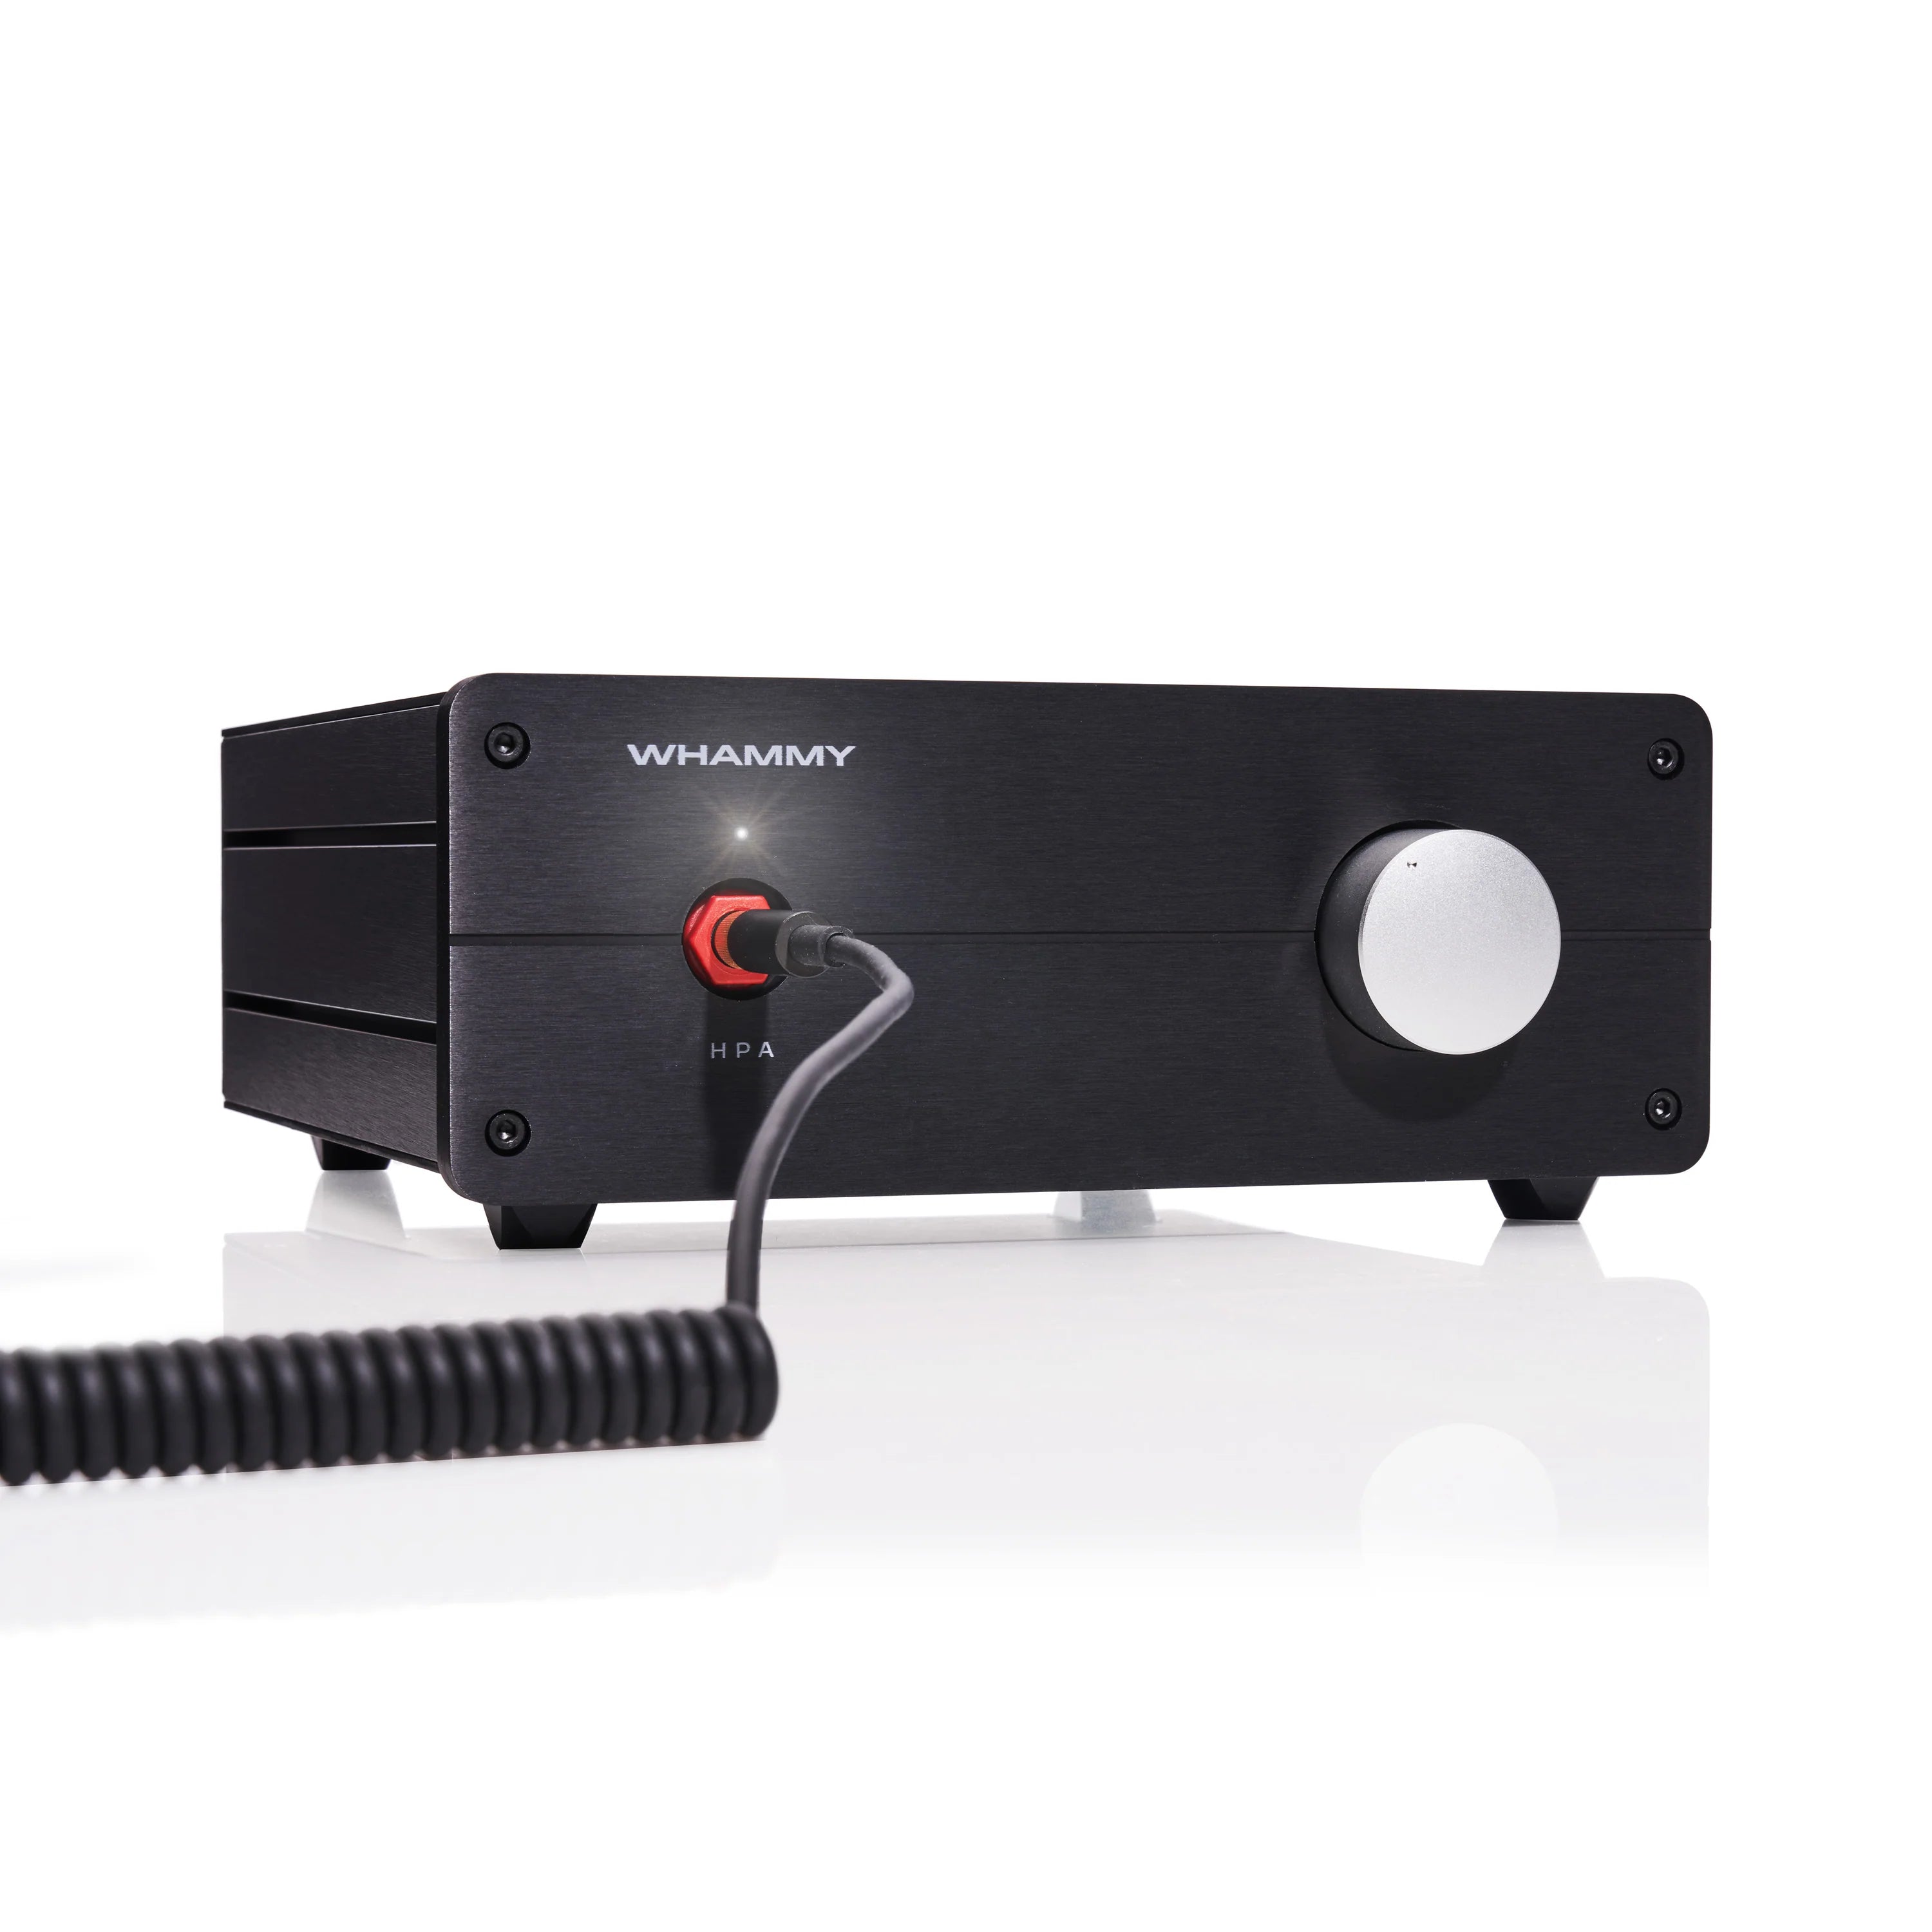

WHAMMY


WHAMMY

WHAMMY
WHAMMY